Tag: hobby homestead

  • 5 Essential Tips for Starting a Garden: A Beginner’s Guide to Growing Your Own Food

    5 Essential Tips for Starting a Garden: A Beginner’s Guide to Growing Your Own Food

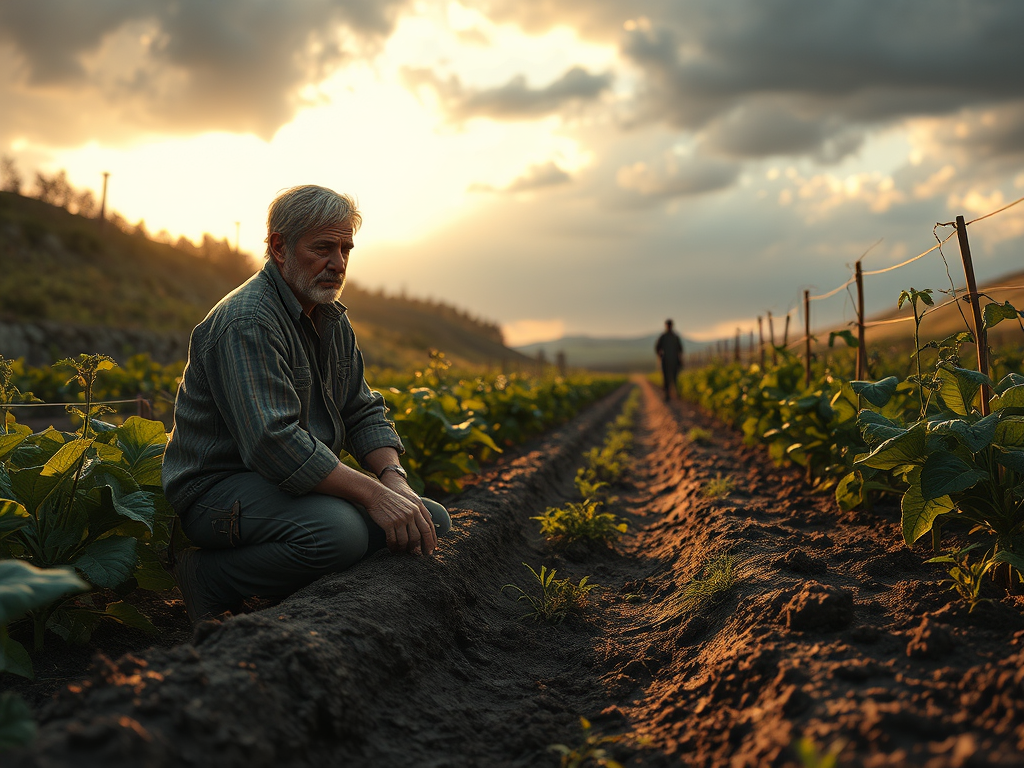
    Gardening for self-sufficiency is a rewarding and empowering way to take control of your food sources, reduce grocery bills, and reconnect with nature. Whether you’re aiming to grow a few vegetables on your balcony or transform your backyard into a mini farm, starting a garden for self-sufficiency is easier than you might think. I’ll guide you through the basics of starting out, from choosing the right crops to planning your garden layout, so you can get started with the confidence you need to succeed.

    Why Start Gardening for Self-Sufficiency?

    Before diving into the logistics of gardening, it’s important to understand the benefits that come with growing your own food:

    1. Save Money: Growing your own fruits, vegetables, and herbs can significantly reduce your grocery costs over time.

    2. Healthier Food: You’ll have direct access to fresh, organic produce free from harmful chemicals or pesticides.

    3. Environmental Impact: Growing your own food reduces the carbon footprint associated with transportation and packaging in grocery store products.

    4. Increased Food Security: By growing your own food, you are less dependent on commercial food systems, giving you more control over your nutrition.

    Do I have you convinced? Great, let’s get started.

    1. Start Small and Plan Your Garden

    If you’re just starting out with gardening, keep it simple at first! Kick things off with a few plants and get the hang of the basics – it’ll boost your confidence and give you the experience you need before going big. There’s nothing worse than feeling discouraged after your first year just because you took on too much. Planning ahead is also key to maximizing your space and picking the right plants for your area. No need to get bummed out over a plant that just wasn’t meant to grow where you are!

    Assess Your Space:

    – Backyard: If you have a yard, you may want to start with a raised bed or traditional garden plot. Raised beds are particularly helpful for beginners because they’re easier to manage, with fewer weeds and better drainage.

    – Balcony/Patio: If you don’t have much space, container gardening is an excellent choice. You can grow herbs, leafy greens, and small vegetables in pots, ensuring that you maximize your available space.

    – Indoor: Growing food indoors can be a great option for those in apartments or colder climates. Herbs, microgreens, and even dwarf varieties of tomatoes and peppers can thrive indoors with the right lighting.

    Plan What to Grow:

    Start by thinking about the foods you use most often. Focus on crops that are easy to grow, have a high yield, and can be stored for later use. Consider growing:

    Leafy Greens: Spinach, kale, and lettuce are quick to grow and ideal for beginners.

    Root Vegetables: Carrots, beets, and potatoes are hearty and thrive in many climates.

    Herbs: Basil, mint, parsley, and cilantro are great for adding flavor to meals and grow well in small spaces.

    Tomatoes and Peppers: These are common self-sufficiency staples, and with the right care, they can be incredibly productive.

    Legumes: Beans and peas enrich the soil while providing a valuable source of protein.

    Be sure to consider your climate and growing season. Research what plants are best suited to your area and when to plant them to ensure success.

    2. Prepare the Soil

    Healthy soil is the foundation of any successful garden. For self-sufficiency, you’ll need soil that is nutrient-rich, well-draining, and capable of supporting your crops throughout the growing season.

    Improve Your Soil:

    Composting: Start composting kitchen scraps, lawn clippings, and yard waste to create nutrient-dense soil. Composting helps to enrich the soil, improve its structure, and promote healthy plant growth.

    Soil Amendments: You may need to amend your soil with organic matter such as compost, manure, or garden soil. Test your soil to see if it needs any adjustments, like adding lime for acidity or sulfur to lower pH levels.

    Mulching: Mulch helps retain moisture, suppresses weeds, and keeps the soil temperature stable. Use organic mulch like straw, wood chips, or grass clippings.

    3. Start with the Right Tools

    Having the right tools can make gardening easier and more enjoyable. Some basic gardening tools you’ll need include:

    Garden Gloves: Protect your hands from thorns, dirt, and pests.

    Trowel or Hand Fork: Essential for digging and planting small seeds or plants.

    Watering Can or Hose: Make sure your plants stay hydrated, especially during dry spells.

    Pruning Shears: These are important for trimming plants and removing dead growth.

    Spade or Shovel: Useful for digging and turning over the soil in larger beds.

    Start with a small collection of basic tools, and as you gain more experience, you can gradually expand your toolkit.

    4. Plant and Care for Your Crops

    Once your garden space is prepared and your tools are ready, it’s time to plant. Follow the recommended planting instructions on seed packets or plant labels, and ensure your crops have the proper spacing for healthy growth.

    Watering:

    Proper watering is key to plant health. While the needs of each crop vary, aim to water early in the morning or late in the evening to reduce evaporation and prevent diseases. Check your plants regularly to ensure they’re not too dry or waterlogged.

    Fertilizing:

    To boost plant growth, use organic fertilizers like compost or aged manure. Fertilize at regular intervals as recommended by the plant type, but avoid over-fertilizing, which can harm plants.

    Pest Management:

    While pests are a part of gardening, there are natural ways to manage them. Try companion planting (e.g., planting marigolds with tomatoes to deter pests), introducing beneficial insects (like ladybugs), and using organic pest control methods such as neem oil or insecticidal soap.

    5. Harvest and Store Your Crops

    The fruits of your labor will eventually come to fruition. Harvest your crops when they’re ripe, but don’t wait too long, as overripe produce can attract pests.

    Storing Your Bounty:

    Self-sufficiency involves not just growing food but also preserving it for later use. Some options include:

    Canning: Preserve fruits, vegetables, and even meats by canning them in jars. Make jams, sauces, and soups for long-term storage.

    Freezing: Many vegetables can be frozen for later use. Flash-freezing helps preserve their texture and flavor.

    Drying: Herbs, fruits, and even some vegetables can be dried and stored for extended use.

    Root Cellar: Certain crops like potatoes, carrots, and winter squash can be stored in a cool, dark place for months.

    Final Thoughts

    Starting a garden for self-sufficiency is a rewarding journey that’s all about continuous learning. Every season offers new challenges and opportunities to experiment with different crops, techniques, and food preservation methods. By starting small with a well-planned garden, focusing on soil health, and mastering the basics, you’ll set yourself up for success. As you gain experience, you’ll see your yield grow, and so will your confidence in growing your own food. Gardening is a skill that improves with time, so stay patient, curious, and enjoy watching both your garden and your self-sufficiency flourish. Happy gardening!

  • Chicken Coop Building 101

    Chicken Coop Building 101

    Whether you’re a new homesteader or a seasoned pro, providing your chickens with a safe and comfortable home is crucial for their health and productivity. A well-designed chicken coop not only keeps your flock secure from predators but also offers them a comfortable environment to lay eggs and thrive. If you’re building or upgrading your chicken coop, there are several essentials to consider, from ventilation and nesting boxes to predator-proofing. Plus, with a little creativity, you can reuse and recycle materials to keep your budget in check.

    If you are new to owning chickens or they are in your forseeable future you should check out this Beginner article! I give you a run down of all the basics to give you a head start.

    Ventilation: A Must-Have for Healthy Chickens

    Good airflow is one of the most important aspects of a chicken coop. Chickens produce moisture, heat, and waste that can quickly make the air stuffy and unhealthy if not properly ventilated. Inadequate ventilation can lead to respiratory problems and poor egg production. 

    Tips for Proper Ventilation

    Windows and Vents: Install adjustable windows or vents at different heights around the coop. Higher vents allow warm air to escape, while lower vents let fresh air in.

    Cross-Ventilation: Make sure air can flow across the coop from one side to the other. This can be achieved by placing vents or windows on opposite walls.

    Natural Ventilation:Position the coop in a shaded area to help keep temperatures down during the summer months.

    If you’re working with a tight budget, consider using old window frames, mesh, or even plastic vent covers from a local salvage yard to create effective ventilation.

    Bedding: Creating a Clean Environment

    Choosing the right bedding for your chicken coop is essential for their health, comfort and cleanliness. Here are some of the best bedding types for your coop.

    Wood Shavings: Pine or cedar both work well. They’re highly absobent, helping to manage moisture and control odors in your coop.

    Straw/Hay: Provides a soft, cushioned bedding thats great for nesting boxes. Its cheap, easily replaced, biodegradable and helps provide extra warmth in the winter.

    Construction Sand: Easy to clean, drains well so it’s great for managing moisture and odors. It also provides a natural surface for chickens to take their dust baths in.

    Compost- AKA The Deep Litter Method: This method involves using straw, hay or other organice materials like leaves that naturally compost over time. Instead of changing out the bedding your just add to it. This promotes a natural decomposition, creating a self-cleaning system that requires less changing but keeps chickens in a warm and dry environment.

    Nesting Boxes: Comfort and Privacy for Egg-Laying

    Nesting boxes are a must-have for any chicken coop. They provide a private, secure space for hens to lay eggs and encourage them to lay in the right spot instead of on the floor. Proper nesting boxes can help prevent egg breakage and keep your eggs clean.

    Nesting Box Tips

    Size: Each box should be around 12 inches by 12 inches, and you can add a few extra boxes to accommodate your flock size. Typically, one box per 3-4 hens is sufficient.

    Height: Place the boxes about 18 inches off the ground, so hens feel safe but can easily access them.

    Bedding: Use straw, hay, or wood shavings for bedding inside the boxes. Not only does this provide comfort, but it also helps absorb moisture.

    For a budget-friendly option, repurpose wooden crates, old cabinets, or even milk cartons to make your nesting boxes. You can often find these items at thrift stores, yard sales, or even for free from neighbors.

    Predator-Proofing: Keeping Your Flock Safe

    One of the biggest threats to your chickens is predators. Raccoons, foxes, weasels, and even neighborhood dogs can cause serious harm to your flock if your coop isn’t secure. A well-built, predator-proof chicken coop will give you peace of mind and keep your chickens safe.

    Predator-Proofing Tips

    Strong Construction: Use sturdy materials for the coop frame, such as treated lumber or recycled pallets. Make sure all doors and windows close securely.

    Wire Mesh: Use 1-inch hardware cloth for windows and doors. Avoid chicken wire, as predators can easily tear through it. If you want to secure the floor of the coop, bury the wire 6 inches into the ground to prevent digging predators.

    Secure Latches: Install heavy-duty locks or latches on doors and nesting boxes to prevent raccoons from opening them.

    Roof Protection: A solid roof, either metal or sturdy plywood, is essential. Ensure it is secure to prevent predators from sneaking in from above.

    If you’re on a budget, you can recycle old fencing, wire, or scrap lumber from construction projects. This is a great way to save money and still keep your flock safe.

    Also please keep in mind that many people choose to free range their flock and that is perfectly fine. Depending on where you live that may be a feasible option for you. I have personally done both and choose to have mine cooped up most of the year. After garden season is over, I like to let them out but I do notice a higher rate of death when I let mine free range. Whether its due to illness or predators.

    Insulation and Comfort: Keeping Your Flock Happy Year-Round

    Chickens need protection from both the cold and heat, so it’s important to think about insulation in your coop. This will help maintain a comfortable temperature for your chickens in every season.

    Comfort Tips

    Winter Insulation: If you live in a cold climate, you’ll need to insulate your coop to keep your chickens warm in the winter. Use recycled foam panels, cardboard, or even old insulation materials to line the walls.

    Summer Cooling: In hot weather, ensure your coop has plenty of shade and airflow. You can make a simple shade structure from recycled tarps or old roofing materials to create a cooler environment.

    Depending on your climate and the breed of chickens you keep, winter insulation may not be necessary. Chickens can tolerate cold temperatures, and it’s best to keep them as natural as possible. I don’t insulate my coop during the winter months but I do use the deep litter method to help maintain a warmer temperature in their coop. I also have chickens who still prefer to roost outside even with snow on the ground. However, if you live in a climate where the temperature drops below zero, insulation for your coop may be needed to keep your flock healthy.

    Herbs: Lavender, Mint, Oregano, Thyme, Rosemary, Dandelion and even Chamomile can be beneficial additions to your chicken coop. I like to just sprinkle some around the coop on top of whatever bedding you prefer to reap the benefits.

    Lavender: Is widely known for it’s calming properties, so yes it can help keep your chickens in a relaxed state. It also repels flies and mosquitos.

    Mint: Also has a strong distinct sent that will deter rodents and insects.

    Oregano: Natural micorbial properties that can help prevent bacterial infections. It can also boost their immune systems! (Can also be added to their feed.)

    Thyme: Also has microbial benefits and can help with respiratory issues. (Can also be added to their feed.)

    Rosemary: Has antifunal and antibacterial propertties and can help reduce the presence of bacteria in your coop. Also helps digestion if comsumed.

    Chamomile and Dandelion can also help support digestion.

    Reuse, Recycle, and Save Money: Building a Budget-Friendly Chicken Coop

    You don’t have to spend a fortune to create a comfortable, functional chicken coop. With a little creativity and a focus on reusing and recycling materials, you can build or upgrade your coop on a budget.

    Budget-Friendly Ideas

    Pallets: Wooden pallets are a fantastic building material. They can be disassembled and repurposed for walls, floors, and even roosting bars. Many businesses give away pallets for free or at a low cost.

    Old Furniture: Repurpose old wooden furniture, such as cabinets or dressers, for nesting boxes, roosting bars, or even coop walls.

    Scrap Metal or Wood: Check with local construction sites or salvage yards for leftover materials. Many contractors are happy to give away scrap materials that are perfect for building or upgrading your coop.

    By repurposing materials, you not only save money but also reduce waste, contributing to a more sustainable lifestyle.

    Final Thoughts

    A chicken coop is more than just a shelter; it’s the heart of your flock’s well-being. By focusing on ventilation, bedding, nesting boxes, predator-proofing, and insulation, you can ensure your chickens live in a safe and comfortable environment. And remember, building a budget-friendly coop doesn’t mean sacrificing quality. With a bit of creativity and a focus on reusing and recycling materials, you can create a chicken coop that works for you and your flock without breaking the bank. Happy homesteading!

    Here is a low budget coop my husband and I put together with repurposed materials if you want to check it out below.

  • Homesteading Challenges and How To Stay Resilient

    Homesteading Challenges and How To Stay Resilient

    Homesteading is a lifestyle many dream of—living off the land, becoming self-sufficient, and escaping the chaos of this thing we call life. But what’s often left out of the picture is the reality that homesteading is tough. It’s a never ending journey filled with highs and lows, and sometimes the lows can feel overwhelming. Whether it’s dealing with injured animals, crop failures, losing animals, or facing unexpected costs, the struggles of homesteading can take a significant emotional toll. However, the key to surviving—and thriving—through these challenging times is resilience. In this article I’ll explore how to handle the heartbreak, misfortune, and setbacks that come with homesteading, and offer practical tips that have helped me to boost morale and to keep you pushing forward.

    The Harsh Reality of Homesteading

    While homesteading is undoubtedly rewarding, it’s not without its challenges. Many aspiring homesteaders are drawn to the idea of living off the land and taking control of their food sources, but they may not fully anticipate the difficulties that come with such a lifestyle.

    Common struggles include:

    • Financial Strain: Homesteading requires a significant investment in land, equipment, and supplies. Repair costs, unanticipated expenses, and the unpredictable nature of farming can put a strain on even the most well-prepared budgets.
    • Weather and Crop Failures: The whims of nature are not always on your side. Droughts, floods, or unexpected frosts can wipe out crops, leaving you with empty fields after months of hard work.
    • Losses and Setbacks: Losing animals to disease, predators, or even old age can be heartbreaking. Even after investing time, money, and love into raising them, it’s tough when things go wrong.
    • Physical and Emotional Toll: The demanding nature of homesteading can quickly lead to burnout. The physical work required is often grueling, and the emotional weight of facing repeated failures can feel like too much.
    Giving my duck a bath inside during the winter, trying to help her heal with a hurt foot

    Building Resilience in the Face of Adversity

    One of the most essential qualities for homesteaders is resilience—the ability to bounce back from setbacks and keep moving forward. Resilience isn’t just about toughing it out; it’s about finding strength in the face of hardship, learning from mistakes, and maintaining hope even when things don’t go as planned.

    Here’s some ideas to practice next time you feel defeated:

    • Reframe Challenges as Opportunities: Instead of viewing setbacks as failures, try to see them as opportunities to learn. When crops fail or something breaks, ask yourself what you can do differently next time. Take it as an education opportunity. Viewing your problems or setbacks as stepping stones reminds you that you’re still on your way to mastery and that sometimes we trip but we still trip forward.
    • Don’t Be Afraid to Ask for Help: Resilience doesn’t mean doing everything on your own. Sometimes the most resilient thing you can do is lean on others. Join homesteading communities online or locally, ask for advice, and share your struggles with others who understand. Having a support system can be a game-changer.
    • Stay Patient and Practice Persistence: Homesteading is a long game, and results often take time. Trust the process and don’t expect overnight success. Patience, persistence, and a steady pace will help you weather the storm and remember when you hit a rough patch. That it is just that, a patch in the long scheme of your plans.
    Rainy season brings a whole lot of mud and a lot of mess. The pigs don’t mind though.

    Practical Tips to Boost Morale and Stay Motivated

    When the going gets tough, it’s easy to lose motivation. But staying motivated and maintaining a positive outlook is crucial for getting through the rough patches. Here are some things you can do to help keep your head up:

    • Take Breaks: Homesteading can be overwhelming, and sometimes the best way to handle things when everything seems to be falling apart is to step away for a little while. Take a day off to relax, recharge, and reset your mind. Whether it’s a walk in nature, a quiet afternoon with a book, or a short trip to visit friends, allowing yourself time to decompress will make you feel more energized when you return to your work.
    • Celebrate Small Wins: It’s easy to focus on what’s going wrong, but taking time to celebrate the small victories can provide a much-needed boost. Whether it’s a successful harvest, the birth of a new animal, or simply getting a fence repaired, take a moment to appreciate what you’ve accomplished. These small wins add up over time and help you maintain perspective.
    • Practice Gratitude: Shifting your focus from what’s going wrong to what’s going right can have a huge impact on your mindset. Start a gratitude journal or make it a daily habit to list three things you’re thankful for. It could be the sunshine after a rainy spell, a hearty meal from your garden, or simply the peace of the land around you. Focusing on the positives can help alleviate feelings of burnout.
    Appreciating the peace, quiet and lights from my little town in the distance during early morning chores.
    • Mindfulness and Self-Care: Meditation, yoga, or even just mindful breathing can help calm your mind when you’re feeling stressed. Make self-care a priority, whether it’s taking a warm bath, getting enough sleep, or setting aside time for your mental well-being. When you’re physically and emotionally rested, you’ll approach your homesteading challenges with a clearer and more positive outlook.

    The Importance of Persistence and Long-Term Thinking

    While short-term setbacks can be tough, it’s important to keep the bigger picture in mind. Homesteading is not about instant success or perfection—it’s about building a life over time, learning from experiences, and growing through challenges. Every hardship is an opportunity for growth, and every step forward, no matter how small, is still a step forward.

    Remember, homesteading is a long-term journey. Take pride in the fact that you’re investing in a lifestyle that will pay off in the long run. Whether it’s the independence of raising your own food, the satisfaction of fixing something with your own hands, or the joy of watching your farm grow, every struggle is part of the process.

    Conclusion

    Homesteading is as rewarding as it is challenging. The struggles are real, and there will undoubtedly be moments when things go wrong, when the heartache feels too much, and when the weight of it all seems unbearable. But through resilience, persistence, and a mindset of learning and growth, you can push through the tough times. By taking breaks, celebrating small wins, and practicing self-care, you can boost your morale and maintain the strength needed to continue. Remember, every challenge you face is shaping you into a stronger, more capable homesteader—and that’s something to be proud of. Keep going, and trust that the rewards will come.

    One of my favorite quotes when times get tough is by John C. Maxwell: “Dreams don’t work unless you do.” Aside from taking breaks, practicing gratitude and self care. This quote serves as a powerful reminder and helps redirect me when negative thoughts creep in. It reminds me that I must keep pushing forward to achieve my dreams and to get back to work.

  • Raising Chickens for Beginners: Everything You Need to Know

    Raising Chickens for Beginners: Everything You Need to Know

    Raising chickens is one of the most rewarding steps toward self-sufficiency and sustainable living. You may have heard that they are the gate-way animal to homesteading. 😂 Not only do they provide fresh eggs and meat, but they also make delightful companions and help control pests in your yard. If you’re new to chicken keeping, don’t worry—it’s easier than you think! Here’s everything you need to know to get started. 

    Why Raise Chickens?

    First off, why should you raise chickens? Chickens are incredibly versatile animals, making them a perfect addition to any homestead, backyard or beginner. Here are some benefits:  

    Fresh Eggs: Home-raised eggs are tastier and more nutritious than store-bought.  

    Natural Pest Control: Chickens love eating insects like ticks, beetles, and flies.  

    Composting Helpers: Their droppings are a rich source of nitrogen for compost.  

    Low-Maintenance Pets: Chickens are easy to care for and can provide endless entertainment.  

    Choosing the Right Breeds 

    Selecting the right breed depends on your goals. Some chickens are better for egg production, while others are ideal for meat or dual-purpose. I always recommend doing your own research to find whats right for your life and your homestead but here are a few popular options:  

    Egg-Layers: Leghorns, Rhode Island Reds, and Australorps are amazing layers.  

    Meat Birds: Cornish Cross and Freedom Rangers are great for meat production but these are birds you would stricly buy from a hatchery. They are bred to be larger and aren’t recommended for re-breeding as the genetics just wont turn out the same. So therfore you would be buying them from a hatchery every year. Orpingtons and Bresse’s are a good option if you want to breed yourself.

    Dual-Purpose: Breeds like Orpingtons, Wyandottes, or Rhode Island Reds are good options for both eggs and meat.  

    Cold-Hardy Breeds: Brahmas, Black Australorp and Barred Rocks tolerate colder climates well.  

    Heat-Tolerant Breeds: Leghorns and Andalusians do better in warm climates.  

    Setting Up Your Chicken Coop 

    A well-designed chicken coop is essential for keeping your flock safe, healthy, and productive. Here’s what to consider:  

    Space Requirements: Provide at least 4 square feet per bird inside the coop and 10 square feet per bird in the outdoor run.  

    Ventilation: Proper airflow prevents moisture buildup and reduces the risk of respiratory issues.  

    Nesting Boxes: Provide one nesting box for every 3–4 hens for egg-laying.  

    Roosting Bars: Chickens need roosts to sleep on at night, about 8–12 inches per bird.  

    Predator Protection: Use sturdy materials, and ensure doors and windows are secure. Install hardware cloth instead of chicken wire for better protection against predators.

    Remember, there are many options for building or purchasing a suitable coop for your birds. It can still be purposeful without being pretty. We utilized an old shed that was on our property, cut the chicken door, built roosts, and bought some laying boxes. I’ve seen people turn old campers, large dog kennels, and even make simple hoop coops to house their chickens. The possibilities are endless. So please don’t think you need $1,000 to build a coop; you just don’t.

    Feeding Your Chickens

    A balanced diet is crucial for healthy chickens and quality eggs. Here is a quick run down or you can check out my article here:

    Feeding Your Chickens for a Healthy Flock: A Guide to Quality Eggs and Meat

    Chicken Feed: Start with a commercial feed formulated for the age and purpose of your chickens (starter feed for chicks, layer feed for hens, or grower feed for meat birds).  

    Scratch Grains: A treat for chickens, but not a primary food source.  

    Kitchen Scraps: Chickens love vegetable scraps, fruits, and grains, but avoid feeding them raw potatoes, avocado, chocolate, or anything moldy.  

    Grit and Oyster Shells: Grit aids in digestion, and oyster shells provide extra calcium for strong eggshells.  

    Fresh Water: Chickens need constant access to clean water.  

    Managing Health and Hygiene  

    Healthy chickens are happy chickens. Here’s how to maintain their well-being:  

    Clean the Coop: Regularly remove droppings and old bedding to prevent ammonia buildup.  

    Check for Parasites: Inspect your chickens for mites, lice, and worms. Treat as needed with appropriate solutions.  

    Quarantine New Birds: Keep new chickens separate for a few weeks to ensure they’re not carrying diseases.  

    Watch for Signs of Illness: Be alert for lethargy, loss of appetite, or abnormal behavior, which could indicate health issues.  

    Raising Baby Chicks 

    Starting with baby chicks can be a fun and rewarding experience. Here’s what they’ll need:  

    Brooder Box: A safe, enclosed space with proper ventilation.  

    Heat Source: Use a heat lamp to maintain a temperature of 95°F in the first week, decreasing by 5°F each week until they’re fully feathered.  

    Chick Feed: Provide starter feed with the nutrients they need for healthy growth. 

    Fresh Water: Use a shallow dish to prevent chicks from drowning. Yes, this happens.  

    Bedding: Use pine shavings or straw, but avoid newspaper, which can cause leg problems. This would be like using no bedding as the newspaper just slips and slides everywhere, putting your babies at risk for splayed leg syndrome.

    Egg Collection and Storage  

    Hens typically start laying eggs around 4–6 months of age depending of the breed. To ensure clean and fresh eggs:  

    Daily Collection: When left unattended in the nest, eggs can become dirty, cracked or even eaten(either by the chicken herself orother invaders). In some cases, hens might also conceal them. Interestingly, chickens have a unique ability to carry their eggs tucked under their wings, transporting them to a more secure location(for hatching).  

    Store Properly: Farm fresh eggs have what we call a ‘bloom’ on them that protects them for weeks at room temperature. However if you wash this bloom off, then the eggs must refrigerated.  The eggs still last up to 3 months if stored in the fridge. I personally leave all my eggs at room temperature and rotate them into my kitchen about once a week. I will then wash if they are dirty and store them in the fridge or give away to family as I see fit.

    Common Challenges 

    Even experienced chicken keepers face challenges. Here are a few and how to handle them:  

    Predators: Raccoons, hawks, and foxes are common threats. Always secure your coop and run.  

    Broody Hens: A broody hen essentially acts like a mother anticipating the arrival of chicks. She will lay a certain number of eggs and then stop, choosing to settle on her nest in hopes of hatching them. Interestingly, even without a rooster, meaning the eggs are not fertilized, or if you routinely gather the eggs she lays, she may still insist on sitting on her empty nest. This behavior can lead her to attempt hatching eggs that won’t ever develop or remain fixed on an empty space. To curb this broodiness, it’s important to remove her from the nest, sometimes repeatedly over several days. While she won’t be pleased and will likely express her discontent LOUDLY, this intervention is crucial. Left to her own devices, she might starve herself in her relentless pursuit to incubate those eggs.

    Molting: Chickens shed old feathers and temporarily stop laying eggs during molting season. Usually this happens in fall. It’s normal and doesn’t require intervention, however you may come out one day thinking a murder happened with all the excess feathers you find.

    Building a Routine

    Chickens thrive on consistency. Establish a daily routine that includes:  

    – Feeding and watering in the morning.  

    – Collecting eggs daily.  

    – Letting them out to free-range (if possible).  

    – Many chicken tenders choose to put their chickens to bed and close their coop doors at night to keep them safe from predators. I don’t lock mine up in their coop, but I do ensure they are safe in their run, especially during the summer when daylight hours are long and they are most likely up past my bedtime.

    Enjoy the Process  

    Raising chickens is about more than just eggs and meat—it’s about building a connection to your food and enjoying the simple pleasures of life. Chickens have unique personalities and are fun to watch as they scratch, peck, and interact. Take the time to enjoy the process and celebrate the small victories.  

    Final Thoughts

    Raising chickens is a rewarding journey that offers both practical benefits and joyful moments. By starting with the right preparation and knowledge, you’ll set yourself up for success. Whether you’re looking to gather fresh eggs every morning or simply enjoy the companionship of these feathery friends, chickens are a wonderful addition to any homestead or backyard.  

    What questions do you have about raising chickens? Share your thoughts in the comments below!

  • Building a Budget-Friendly Turkey Coop for Less Than $50 Using Repurposed Materials

    Building a Budget-Friendly Turkey Coop for Less Than $50 Using Repurposed Materials

    Raising turkeys can be an exciting and rewarding endeavor, but constructing a proper turkey coop can often feel like an expensive investment. However, with a bit of creativity and a commitment to using repurposed materials, it’s entirely possible to build a functional and sturdy turkey coop for under $50! Here’s how I did it, and you can too.

    Start with a Plan

    Before you start collecting materials, sketching a design for your turkey coop is essential. It’s crucial to visualize the placement of the coop and assess what resources you already have at your disposal. This preparation can help you determine if any groundwork needs to be done, such as leveling the area or salvaging nails from reclaimed wood, ensuring everything is ready when you begin construction. Turkeys require ample space, so your coop must be sufficiently large to house your growing flock comfortably. A general guideline is to provide about 10 square feet per turkey within the coop. Currently, I’ve got three turkeys, but I plan to increase my flock, which is why I chose a 10 x 20-foot dimension to give them plenty of room to thrive as well as space for future additions. For this project, I constructed a straightforward rectangular frame using free pallets sourced from Facebook Marketplace. Over this frame, I intended to create a “hoop coop effect” but instead of utilizing either a cattle panel or plumbing pipe. I opted for a couple of simple roof peaks and netting to keep my turkeys securely contained. It was cheaper and gave me the opportunity to use the netting. Additionally, I wanted to incorporate nesting areas for egg collection and designated roosting spots for their comfort.

    Scavenge for Materials

    To keep the costs down, I scoured my property, local construction sites, and online marketplaces like Craigslist and Facebook Marketplace for repurposed materials. The key is to be resourceful, so don’t shy away from used or broken items that can be easily transformed into something useful.

    Here’s a list of what I found and used:

    Old wooden pallets – These are perfect for building the frame and walls of the coop. I was lucky enough to score a few for free from a local business. You can often find these behind stores or warehouses.

    Bird Netting – I repurposed old bird netting I had saved from years prior but any ol chicken wire or fencing you have lying around will work. This will act as the coop’s outer barrier, keeping predators out and turkeys in.

    Scrap plywood or boards – These were used for the coop’s floor and roof. I also used them to secure the pallets that formed the periemter. You can often find leftover plywood sheets at construction sites or salvage yards.

    Clearance Buys – I used an old gazebo that I had bought on clearance a few years back. Everything was still in the box, we hadn’t even opened it. You could also use a tarp or a large piece of plastic sheeting as a waterproof cover for the roof, ensuring the coop stays dry during rain.

    Building The Walls

    I found some free pallets on Facebook Marketplace with this project in mind my husband and I decided to pick up a trailer full to take home. After laying out the perimeter for the turkey run I was building, I brought all the pallets in. Working solo on this section, I arranged the pallets on the ground and began assembling them. Using any scrap wood I could find, I secured the pallets together. Once I had enough pallets assembled for a wall, I stood them upright and drove T-posts into the ground alongside them. To ensure stability, I attached the pallets to the T-posts with plumber’s tape and repeated the process to construct the second wall.

    Adding the Doors and Peaks

    Once the walls were constructed and finished, my husband assisted me in determining the placement for the door while also crafting the roof peaks for the netted run. We needed to buy a couple of 2 x 4s since we didn’t have any suitable materials available. For the door, we repurposed a piece of cattle panel, it was already clipped to size (we had used it for another coop previously) and secured it to a T-post using tie wire.

    Building the Structure

    To create the necessary structures, both an interior and an exterior were designed. I envisioned a cozy coop for the turkeys to nest in, but I decided against adding roosts. My reasoning was that they would likely prefer roosting on top of the coop, as they do currently. To finalize the roof, we utilized a gazebo, which I had purchased for just $50 during a sale a few years back. Surprisingly, I had never opened it since I mistakenly believed it was a pop-up gazebo. Now seemed like the perfect opportunity to finally put it to use! With my vertically challenged stature, my husband stepped in to help assemble it, so I wouldn’t require a ladder to do so. Once the gazebo was up, he turned his attention to the coop. Using leftover plywood, he skillfully pieced together a functional structure for me.

    Securing the Coop and Roof

    Leftover bird netting from a previous chicken run presented both a challenge and an opportunity. Though it was tangled and messy, I was determined to make use of what we had rather than purchasing new materials. After untangling the netting, I draped it carefully over the top and over the pallet walls, securing it to the gazebo for added stability. To ensure it stayed in place, I fastened it with staples to the wooden frame.

    The Total Cost

    When it comes to the total cost of this project, I managed to keep it under $50. Here’s a breakdown:

    – Wooden pallets: Free

    – Bird Netting: Free (from scraps)

    – Gazebo: Free (clearance buy from years back)

    – Scrap plywood: Free (leftovers)

    – 2 x 4 Boards: $30

    – Nails, screws, and hardware: $15

    – Straw bedding: Free (from my garden)

    Conclusion

    Through a mix of creativity and recycling materials, I constructed a sturdy turkey coop for less than $50. This project not only resulted in substantial savings, but it also contributed to waste reduction by utilizing resources I already had on hand. It demonstrates that with a bit of time, effort, and ingenuity, one can create something both practical and resilient without breaking the bank. While it may not be glamorous, it effectively keeps my turkey secure and protected. For those interested, I’ll share a link to our brief YouTube video below.

    If you’re considering raising turkeys or any other poultry, I highly recommend looking at repurposed materials for your next coop build. Not only will you save money, but you’ll also be doing your part to keep reusable items out of the landfill. Happy building!

  • Feeding Your Chickens for a Healthy Flock: A Guide to Quality Eggs and Meat

    Feeding Your Chickens for a Healthy Flock: A Guide to Quality Eggs and Meat

    Raising chickens is not just about providing a safe environment and clean shelter; their diet plays a significant role in their overall health, productivity, and the quality of eggs and meat they produce. Whether you’re raising chickens for eggs, meat, or both, understanding what to feed your flock is essential for ensuring they thrive. In this guide, we’ll explore the importance of a balanced diet, provide tips on feeding your chickens for optimal health, and highlight some nutritious herbs that can benefit your flock.

    The Basics of a Balanced Chicken Diet

    A healthy, balanced diet is the foundation of a thriving chicken flock. The right nutrition will ensure that your chickens are healthy, produce high-quality eggs, and grow into strong, healthy meat birds

    Key Components of a Chicken’s Diet

    Layer Feed (For Egg-Laying Hens): The primary food for egg-laying hens is a specially formulated layer feed. This feed is designed to provide the right balance of protein, calcium, and other essential nutrients. A typical layer feed contains around 16-18% protein, which supports healthy growth and egg production. The added calcium in layer feed is vital for strong eggshells.

    Starter Feed (For Chicks): Chicks require a higher protein content to support their rapid growth. Starter feed is formulated with 18-20% protein and includes all the nutrients necessary for healthy development. Once chicks are a few weeks old, you can switch to a grower feed.

    Grower Feed (For Meat Birds): If you’re raising chickens for meat, grower feed is the best choice. This feed is typically lower in calcium but provides higher levels of protein (around 18-20%) to support muscle development. It’s formulated to ensure healthy growth and optimal meat production.

    Grain and Scratch: Grains such as corn, wheat, oats, and barley can be offered to chickens in moderation. While they are not complete feeds, they provide energy and variety. Scratch is usually offered as a treat but should be limited to prevent imbalanced nutrition.

    Greens and Vegetables: Fresh greens, such as lettuce, kale, spinach, and herbs, are excellent additions to your chickens’ diet. These provide vitamins, minerals, and fiber. Chickens love pecking at fresh vegetables, and offering a variety can help keep them engaged.

    Clean Water: Water is just as important as food in a chicken’s diet. Ensure your flock has constant access to clean, fresh water, as dehydration can lead to poor health, reduced egg production, and weight loss.

    Incorporating Healthy Herbs Into Your Chicken’s Diet

    Herbs can not only spice up your chickens’ diet but also provide numerous health benefits. Many herbs are rich in vitamins, minerals, and antioxidants, supporting your chickens’ immune systems and overall well-being. Here are a few herbs to consider:


    Parsley: High in vitamin K, vitamin C, and folic acid, parsley is excellent for supporting bone health and overall immune function. It can also help with digestion.

    Oregano: Known for its antibacterial properties, oregano is a great herb for supporting respiratory health. It can help fight off infections and boost the immune system.

    Thyme: Thyme is another herb with powerful antimicrobial and antioxidant properties. It can promote respiratory health and aid in digestion.

    Mint: Fresh mint is known for its digestive benefits, helping with bloating and upset stomachs. It also has a refreshing scent that can help deter pests in the coop.

    Dandelion: Dandelion is full of vitamins A, C, and K and has anti-inflammatory properties. It can aid digestion and promote overall vitality.

    Basil: Basil contains essential oils that have anti-inflammatory and antioxidant properties. It’s great for promoting healthy digestion and boosting the immune system.

    Garlic: While not technically an herb, garlic is a natural antibiotic and can help fight off infections. It also helps boost immunity and can deter internal parasites. However, garlic should be used in moderation.

    How to Feed Herbs to Your Chickens

    You can offer fresh or dried herbs to your chickens. Simply hang bundles of herbs in the coop or scatter them in their outdoor run. Chickens will naturally peck at the herbs, gaining the benefits as they eat. You can also mix chopped herbs into their regular feed or sprinkle them on top of greens or vegetables.

    Providing Treats and Supplementing Their Diet

    While a balanced base feed should make up the majority of your chickens’ diet, occasional treats can offer enrichment and variety. However, treats should never exceed more than 10% of their total diet to avoid nutritional imbalances.

    Healthy Chicken Treats

    Fruits and Berries: Chickens enjoy fruits like berries, apples, and bananas. These are rich in vitamins and antioxidants. However, make sure to remove any seeds or pits, as they may be harmful.

    Vegetables: Chickens love leafy greens, carrots, cucumbers, and squash. These vegetables provide fiber and essential nutrients.

    Mealworms and Grubs: These high-protein treats are ideal for chickens that need extra protein, especially during molting season.

    Sunflower Seeds: A healthy snack that is high in fats and protein, sunflower seeds can be offered in moderation.

    Supplements

    To ensure your chickens are getting all the nutrients they need, you may need to supplement their diet occasionally

     Calcium Supplements: For laying hens, you can provide crushed oyster shell or limestone to ensure they get the necessary calcium for strong eggshells.

    Grit: Chickens need grit to help them digest food properly. Grit aids in grinding down food in their gizzards, especially if they eat grains and seeds. You can offer commercial grit or even small stones from your yard.

    Signs of an Imbalanced Diet

    While chickens generally have hearty appetites, you should be aware of the signs of an unbalanced diet, which can affect their health and productivity.

    Decreased Egg Production: If your hens suddenly stop laying or produce soft-shelled eggs, it may indicate a lack of calcium or an imbalance in their diet.

    Pale Comb and Wattles: If a chicken’s comb or wattles appear pale, it could signal nutritional deficiencies, anemia, or illness.

    Lethargy or Weight Loss: If chickens become weak, lethargic, or lose weight despite eating regularly, they may be lacking essential nutrients.

    Feather Loss or Poor Plumage: Feather loss, or the development of dull, brittle feathers, can indicate inadequate protein or vitamins.

    Conclusion: The Key to Healthy Chickens and Quality Eggs and Meat

    Feeding your chickens the right diet is crucial for their health, egg production, and meat quality. By providing a balanced diet that includes layer or grower feed, plenty of fresh water, and healthy herbs, you can ensure that your flock thrives. Including a variety of fruits, vegetables, and occasional treats can also support their overall well-being and keep them happy and engaged. Keep an eye on your chickens’ condition, and always look for signs of dietary imbalance. A well-fed flock will reward you with vibrant health, high-quality eggs, and delicious meat.

    Happy chicken keeping!

  • Spring Into Action: Prepping Your Garden Beds For This Growing Season

    Spring Into Action: Prepping Your Garden Beds For This Growing Season

    If you are anything like me, your anxious to get back outside. After being stuck inside trying to stay warm. I’m sure we are all ready for the sun to grace us with her warm smile.

    Well I have good news. Raise your trowels in the air and we’ll burst into battle…..the battle that is preparing our spring garden beds. With all jokes aside we really can start prepping our garden beds. As winter begins to wind down, it’s the perfect time to prepare your garden for a great growing season. Getting a head start on cleaning up and organizing your space now will set yourself up for a smoother, more successful spring planting season. Let’s get into it!

    Rake It Till You Make It

    First things first, let’s start by cleaning up any leftover debris from the fall and winter months. Any fallen leaves, dead plants, and branches all need to go. They create hiding spots for pests and harbor diseases. That would definitely put a damper come spring time when all you want to do is plant your tomato babies. So rake up leaves and remove any dead plant material from garden beds and pathways. Compost what you can and discard the rest. Not all plants are meant to be composted. You also don’t want any diseased or pest-infested material to infect healthy plants later.

    Pot-ential Cleanliness Awaits

    Time to clean out your pots and containers from last season. Scrub them with warm, soapy water (yes, pots get dirty, too) and disinfect them with a bleach solution to prevent any lingering pests or diseases. Plus, it’s always nice to start the season with a fresh slate—no one likes a plant holding on to last year’s bad vibes.

    Let’s Cut To The Chase

    If you have trees, shrubs or perennials. Now is a great time to prune them back. Prune away any dead, diseased, or damaged branches before new growth starts in the spring. Make sure to clean your tools if you are working with diseased plants. You don’t transfer anything to your healthy plants.

    Woman cleaning her garden tools

    Ready, Set, Sharpen!

    Just like most of our waistlines, your garden tools have also been neglected and forgotten about over the winter. Take the time to clean, sharpen, and oil them. Getting this done before the busy planting season means you won’t have to stop to do this later, allowing you to focus on your task at hand. Shovels, hoes, pruners, and gardening forks all need sharp edges to complete your tasks in a timely manner. Don’t forget to clean the rust spots, and when you’re done cleaning them, store them in a dry area so they stay ready until you need them.

    Bracing For A Stronger Garden

    Now is a good time to inspect, repair or add any garden structures. Check your raised beds, fences, or trellises and make sure they haven’t been damaged over the winter months. Make sure raised beds are level and intact, so they’ll be ready for planting.

    Soil Your Hands Not Your Plans

    You might notice weeds starting to emerge as late winter transitions into early spring. Now is a perfect time to tackle those unwanted weeds. Making your gardening efforts much easier before they have a chance to spread. consider lightly tilling or turning the soil within your garden beds. This practice can enhance aeration and facilitate improved drainage. However, if the ground remains too frozen or saturated, it’s best to patiently wait until the soil becomes workable.

    Since you’re already digging your hands into the earth, this is also an opportune moment to amend your soil. Quality soil is essential for a thriving garden, so now is an excellent time to analyze its characteristics. Assess the pH level and nutrient content. Based on your findings, you can enhance the soil by adding compost, organic materials, or soil conditioners. Getting ahead start stage allows sufficient time to decompose and blend into the soil. Ensuring it’s fully prepared for planting season.

    Digging Into Your Garden Blueprint

    It’s still be cold out, there might even be snow on the ground where you live. That doesn’t mean you can’t plan out this years successful harvest. Reflect on what worked for you last year and take that into consideration. Make notes of new plants or varieties you want to try and make sure you have all your seeds purchased. Planning ahead helps prevent overcrowding but also ensures you make the most of the space available. I like to draw out my plans and also use the “Planter” app. Doing both help me achieve a great layout and also space everything out accordingly.

    Sowing the Seeds of Success

    Your local climate plays a crucial role in determining when you can begin planting. Depending on what zone your in, you might find yourself able to plant cold-hardy crops quite early in the season. For instance, last year, I had great success growing broccoli and lettuce ahead of schedule by utilizing crop covers to protect them from chilly temperatures. Also, if you have the space available, starting seeds indoors can be an excellent way to get a jump on your gardening endeavors. Embracing these early planting strategies can lead to a fruitful harvest before traditional planting times arrive.

    A Final Sprout

    With these helpful suggestions, you can set yourself up for a fruitful and satisfying growing season. It’s an ideal opportunity to get a jump start on your spring garden. So when the time is right, you can get straight to planting! Slip on those gardening gloves, embrace the earth, and get ready to witness your garden thrive along with your gardening skills. Enjoy the joys of gardening!

    Remember, gardening isn’t a race. It’s not about achieving perfection; it’s about having fun, watching things grow, nourishing your body and learning along the way. Enjoy the sunshine, take a moment to breathe in the fresh air and maybe even stop for a cup of tea while you work. Your garden will thank you for it—especially once it’s all spruced up and ready to burst into life

  • Homesteading: My Top Ten Tips

    Homesteading is a dream for many—living closer to nature, growing your own food, raising animals, and embracing self-sufficiency. It’s a lifestyle filled with rewards, but it’s also packed with challenges and surprises that most beginners don’t anticipate. Looking back on my journey, there are several things I wish I had known before diving into homesteading. If you’re just starting out, these lessons might save you time, money, and frustration.

    1. You Don’t Have to Do Everything at Once

    When I first started homesteading, I was eager to try it all—gardening, raising chickens, keeping bees, and preserving food—all at once. I figured if instead of just dipping a toe in, I would jump in both feet first. This was a recipe for burnout. I quickly learned that starting small and focusing on one or two projects at a time is the best approach. Homesteading is a marathon, not a sprint. There’s always time to add more as you gain experience and confidence. If you want to read about how I got started I’ll link it below.

    2. It’s Harder Than It Looks Online

    Scrolling through social media, it’s easy to romanticize homesteading. Beautiful gardens, happy animals, and rustic homes make it seem effortless. In reality, homesteading is a lot of hard work. Plants don’t always thrive, animals get sick, and fences break, a lot. Be prepared for challenges and bad days. Homesteading is about learning as you go, and remembering its okay to make mistakes.

    3. The Cost Can Add Up Quickly

    I assumed that homesteading would save me money right away, but I quickly realized that the upfront costs can be significant. Tools, seeds, fencing, animal feed, and infrastructure like coops and raised garden beds all require investment. While homesteading can save money in the long term, it’s important to budget wisely and prioritize essential projects first.  I also suggest prioritizing DIY projects and recycled materials before buying new. It’s more important for it to be purposeful than pretty.

    4. Research Is Your Best Friend

    One of the biggest lessons I learned is that knowledge is power. I made several mistakes early on because I didn’t research enough. For example, I didn’t now how to amend my soil or know what companion planting was. Let’s not start about how I misjudged the height of fencing I needed for my goat enclosure. Take the time to study your land, climate, and the requirements of the animals or plants you want to raise.  

    5. Time Management Is Key

    Homesteading is incredibly time-consuming. Between caring for animals, maintaining a garden, and tackling DIY projects, it’s easy to feel overwhelmed. I wish I had created a daily and seasonal schedule earlier to stay on top of tasks. Planning ahead, especially for busy times like planting and harvesting seasons, makes everything more manageable. 

    6. Pests and Predators Are Relentless

    One of the biggest shocks for me was how relentless pests and predators can be. From insects destroying crops to foxes breaking into the chicken coop, I learned that prevention is crucial. Invest in secure fencing, use natural pest control methods, and always be prepared to adapt your strategies.

    7. It’s Okay to Outsource Some Things

    As much as I wanted to do everything myself. I quickly realized that it’s okay to ask for help or outsource certain tasks. Whether it’s hiring someone to repair a fence or buying seedlings instead of starting from seed. Outsourcing can save you time and energy when you’re feeling overwhelmed. When I outsource I prefer to buy local or from other homesteaders to help support my community.

    8. Patience Is Essential

    Homesteading is a lifestyle that requires patience. Gardens don’t grow overnight, and animals take time to mature and produce. There will be setbacks and slow progress, but trust the process. Celebrate small victories and remember why you started.  

    9. Self-Care Matters

    In the early days of homesteading, I often worked from dawn to dusk, neglecting my own well-being. Over time, I learned that self-care is just as important as caring for your land and animals. Take breaks, rest when you need to, and make time for hobbies or relaxation to avoid burnout.  

    10. Homesteading Is a Journey, Not a Destination

    Finally, I wish I had embraced the mindset that homesteading is an ever-evolving journey. There’s always something new to learn, and your goals change over time. Instead of striving for perfection, focus on progress and enjoy the process of building a lifestyle that works for you.  

    Final Thoughts

    Homesteading is a fulfilling and transformative lifestyle, but it’s not without its challenges. By learning from my experiences, you can avoid some common pitfalls and set yourself up for success. Remember to start small, do your research, and give yourself grace as you learn and grow.  

    Whether you’re just starting out or thinking about taking the plunge, homesteading is a journey worth pursuing. What lessons have you learned or are you excited to explore? Share your thoughts in the comments below!

  • Duck Eggs vs Chicken Eggs: Key Differences Explained

    Duck Eggs vs Chicken Eggs: Key Differences Explained

    Duck egg and Chicken egg side by side

    When it comes to choosing between duck and chicken eggs, both options might catch your eye during your next trip to the local market or while tending to your poultry on the homestead. These eggs may appear quite similar at first glance, but they offer distinct nutritional benefits, flavors, and culinary uses that set them apart. Duck eggs, for instance, are often richer and creamier than chicken eggs, making them a favorite among bakers and gourmet cooks alike. As you weigh the pros and cons of each type, it’s important to consider how these differences might align with your cooking needs and taste preferences. Understanding the unique qualities of duck eggs can help you make the best choice for your kitchen and lifestyle.

    Nutritional Content

    Higher Protein Content: Duck eggs contain more protein than chicken eggs, making them an excellent choice for those looking to increase their protein intake.  

    More Omega-3s: Duck eggs are rich in omega-3 fatty acids, which support brain health and reduce inflammation.  

    Higher Vitamin and Mineral Levels: Duck eggs have more vitamins (A, D, B12) and minerals like iron and selenium compared to chicken eggs.  

    Calories and Fat: Duck eggs are larger and have a higher fat content, which provides more energy but might not be suitable for those on low-fat diets.  

    Flavor and Taste

    Duck eggs have a richer, creamier flavor compared to chicken eggs.  

    – The yolks are larger and have a more vibrant orange color, often described as “buttery.”  

    – Many bakers prefer duck eggs for their richer taste and ability to enhance baked goods’ texture and flavor. 

    Baking Benefits

    Duck eggs are a favorite among bakers and chefs.  

    Better Structure: The higher protein content helps create fluffier cakes, stronger meringues, and denser, more moist baked goods.  

    Richer Texture: Duck eggs contribute to a creamier texture in custards, quiches, and other recipes. 

    A dozen duck eggs

    Longer Shelf Life

    Duck eggs have thicker shells than chicken eggs, which:  

    – Makes them more durable and less likely to crack.  

    – Helps them stay fresher for longer, especially when stored properly

    Allergen Alternative

    Some people with chicken egg allergies find that they can tolerate duck eggs. While they’re not suitable for everyone, this can be a great alternative for those who miss eating eggs.

    More Sustainable for Small Homesteads

    Ducks are hardy, low-maintenance animals that:  

    – Lay eggs consistently, even in colder weather.  

    – Thrive in a variety of environments, including wetlands or small homesteads.  

    – Are great pest controllers, eating slugs, snails, and insects.  

    Their eggs can provide a reliable source of nutrition year-round.  

    Richer in Healthy Fats

    Duck eggs contain more healthy fats, including monounsaturated and polyunsaturated fats. These fats are important for heart health and maintaining healthy skin and hair. 

    Larger Size

    Duck eggs are larger than chicken eggs, which means:  

    – You get more egg per shell.  

    – Fewer eggs are needed for recipes or meals, making them more efficient in the kitchen.  

    Downsides to Consider

    While duck eggs offer many benefits, they may not be for everyone:  

    Cost: Duck eggs tend to be more expensive than chicken eggs due to lower supply.  

    Taste: The richer flavor might not appeal to everyone, especially if you prefer the lighter taste of chicken eggs.  

    Fat and Cholesterol: The higher fat and cholesterol levels may not suit individuals with specific dietary restrictions.

    Smell: The aroma of duck eggs can resemble that of cooked fish, depending on the cooking method. This scent is attributed to their rich omega-3 fatty acid content, which is similar to that found in fish.

    Which Should You Choose?

    Choosing between duck eggs and chicken eggs is a matter of personal taste, nutritional needs, and usage. For those in search of superior flavor, richer nutrition, or exceptional baking outcomes, duck eggs are an excellent option. Conversely, if a gentler flavor profile or specific dietary considerations are your priorities, chicken eggs remain a wonderful selection. For homesteaders, the decision to raise both ducks and chickens can yield a multifaceted experience—offering delicious eggs, natural pest control, and an array of dietary choices!


    Both duck and chicken eggs present an abundance of nutritional benefits and culinary versatility. Including a mix of these eggs in your dishes can bring an exciting variety of flavors and textures into your kitchen and home. Embracing the distinct characteristics of each type enriches your meals and broadens your cooking skills, enhancing the joy and diversity at your dining table. Whether you savor the robust taste of duck eggs or the subtler flavor of chicken eggs, having both available unlocks endless culinary adventures. Personally, I find duck eggs to be delightful! Have you had a chance to try duck eggs? I’d love to hear your thoughts in the comments!

  • How to Start a Homestead on a Budget: Affordable Tips for Beginners

    How to Start a Homestead on a Budget: Affordable Tips for Beginners

    Starting a homestead is a dream for many—a chance to live more sustainably, grow your own food, and reconnect with nature. However, the idea of homesteading can feel overwhelming, especially when faced with the perceived costs of land, equipment, and supplies. The good news? You don’t need a fortune to start your homestead. With careful planning, creativity, and a willingness to start small, you can create a thriving homestead without breaking the bank. Here’s how. 

    small homestead

    Start Small and Grow Over Time

    Homesteading doesn’t have to mean owning a sprawling piece of land with a barn, livestock, and a massive garden. Begin with what you have, whether it’s a backyard, balcony, or even a windowsill.  

    Here’s what I mean by starting small:

    – Start with container gardening or a few raised beds to grow your own vegetables

    – Raise chickens for eggs or rabbits for meat on a small plot of land

    – Experiment with DIY projects like composting or rainwater collection before investing in larger systems  

    -Buy bulk fruit and vegetables when in season and learn to preserve them

    -Learn to make your own cleaning products

    By starting small, you can learn the basics of homesteading without taking on too much expense or responsibility upfront.  

    Find Affordable Land (or Make the Most of What You Have)

    If you dream of owning land for your homestead, finding an affordable piece of property is key. However, you don’t necessarily need acres of land to start.  

    Tips for Affordable Land:

    – Look for smaller plots of land in rural areas, which are often more affordable than larger parcels.  

    – Consider off-grid properties, which are typically cheaper but may require some investment in infrastructure.  

    – Rent or lease land from a farmer or neighbor to get started.  

    If you already own property, maximize its use. Even a small backyard can be transformed into a productive homestead.  

    Re-purposing a bucket to grow tomatoes

    Use What You Already Have

    Before buying new tools, equipment, or supplies, take stock of what you already own. Many items can be repurposed for homesteading.  

    Ideas for Repurposing:

    – Use old buckets or tubs as planters for container gardening.  

    – Turn scrap wood into raised garden beds, chicken coops, or fences.  

    – Transform old jars into food storage or fermentation containers.  

     Re-purposing materials not only cuts costs but also minimizes waste, perfectly aligning with the sustainable values of homesteading. A pile of scrap wood often accumulates on our property specifically for this purpose, allowing us to give new life to old materials. Additionally, many local Facebook groups offer opportunities to acquire unwanted items at little to no cost, providing even more resources for creative projects.

    Focus on Low-Cost Livestock

    Livestock can be one of the most expensive parts of homesteading, but you don’t need a barn full of animals to get started. Begin with small, low-maintenance livestock that provide multiple benefits.  

    Budget-Friendly Livestock Options: 

    – Chickens: They’re inexpensive to buy and raise, and they provide eggs, meat, and natural pest control.  

    – Rabbits: These animals are easy to care for, reproduce quickly, and provide a great source of meat.  

    – Ducks: Like chickens, ducks are low-maintenance and excellent foragers.  

    Keep it simple, you can provide excellent housing that protects them from the weather without it being fancy like some you may see online. Start with a few animals and expand your herd or flock as you gain experience and resources. 

    Grow Your Own Food

    Growing your own food is one of the cornerstones of homesteading, and it’s also a way to save money on groceries.  

    Tips for Budget Gardening:

    – Start with easy-to-grow crops like tomatoes, zucchini, beans, and lettuce.  

    – Save seeds from your harvest to reduce costs for the next growing season.  

    – Compost kitchen scraps and yard waste to create free, nutrient-rich soil.  

    If you’re new to gardening, consider starting with a small plot or containers to minimize upfront costs.  

    Opened faced hands holding vegetable seeds

    Learn Basic DIY Skills

    Homesteading often involves building, repairing, and maintaining structures and systems. Learning basic DIY skills can save you thousands of dollars over time.  

    Key Skills to Learn:

    – Carpentry: Build your own chicken coops, raised beds, and fences.  

    – Plumbing: Install rainwater harvesting systems or repair leaks.  

    – Food Preservation: Learn to can, ferment, or dehydrate your harvest to reduce food waste.  

    YouTube, library books, and local workshops are excellent resources for learning homesteading skills on a budget.  

    Buy Used or Barter

    Buying new equipment and supplies can quickly add up, but you can often find what you need secondhand or through bartering.  

    Where to Find Deals:

    – Check local classified ads, thrift stores, and yard sales for tools, supplies, and equipment.  

    – Join homesteading or farming groups on social media to find items for sale or trade.  

    – Barter your skills or surplus produce with neighbors for items you need.  

    For example, you could trade eggs or homemade bread for gardening tools or livestock feed. Never traded or bartered before? I teach you how in this article:

    Focus on Sustainability

    One of the best ways to keep costs low is to focus on sustainable practices that reduce waste and reliance on store-bought goods.  

    Sustainable Practices:  

    – Use rainwater collection systems to water your garden and livestock.  

    – Compost all organic waste to create free fertilizer for your plants.  

    – Raise dual-purpose livestock, such as chickens that provide both eggs and meat.  

    The more self-sufficient your homestead becomes, the less you’ll need to spend on external resources.  

    Farmer standing in front of his crop

    Build a Community

    Homesteading doesn’t have to be a solo endeavor. Building relationships with other homesteaders, farmers, and neighbors can help you access shared resources and support.  

    Ways to Build Community:

    – Join local gardening clubs or homesteading groups.  

    – Attend farmers’ markets or agricultural fairs to network with others.  

    – Exchange knowledge, seeds, or equipment with fellow homesteaders.  

    A strong community can help you learn new skills, share resources, and find encouragement when challenges arise.  

    Be Patient and Set Realistic Goals

    Homesteading is a journey, not a race. Starting on a budget means you may need to prioritize certain projects and grow your homestead over time.  

    Tips for Success:  

    – Set realistic goals for your first year, such as starting a garden or raising a few chickens.  

    – Celebrate small wins, like your first harvest or a successful DIY project.  

    – Avoid comparing yourself to others—every homestead is unique.  

    By focusing on progress rather than perfection, you’ll create a sustainable and rewarding homesteading lifestyle without financial stress.  

    Final Thoughts

    Starting a homestead on a budget is entirely possible with a bit of creativity, resourcefulness, and determination. By starting small, re-purposing what you have, and focusing on sustainability, you can build a homestead that meets your needs without breaking the bank.  

    What budget-friendly homesteading tips have worked for you? Share your thoughts and experiences in the comments below!