Tag: hobby homestead

  • 1 Week Old Chicks: What’s Normal vs Warning Signs (Beginner Guide)

    1 Week Old Chicks: What’s Normal vs Warning Signs (Beginner Guide)

    If you’ve ever stood over your brooder thinking:

    “Are they okay… or am I overthinking this?”

    You are NOT alone.

    The first week with chicks is one of the most nerve-wracking stages because everything is new, they’re tiny, and honestly… sometimes caring for them can be a little confusing.

    They sleep a lot.
    They move weird sometimes.
    They randomly pile up.

    And it’s really hard to tell:

    What’s normal… and what’s actually a problem?

    Let’s break it down in a simple, real life way so you can feel confident and not constantly worried.

    What Healthy 1 Week Old Chicks Actually Look Like

    Healthy chicks are more active than people expect—but they’re also not running around nonstop.

    Here’s what’s normal:

    • Sleeping often (this is a big one)
    • Bursts of energy followed by rest(just like a toddler)
    • Eating and drinking regularly
    • Soft peeping (not constant distress sounds)
    • Moving around the brooder comfortably

    They should look alert when awake, not weak or struggling to stay awake while standing.

    Tired vs Sick Chicks (This Confuses Everyone)

    This is where most beginners panic.

    A tired chick will:

    • Sit down and rest
    • Close its eyes
    • Wake up and act normal again

    A sick chick will:

    • Stay lethargic even when others are active
    • Not respond much when touched
    • Separate from the group
    • Look weak or unbalanced
    • Look “sad” or sleeping while standing up

    If they don’t “bounce back” after resting, that’s when you need to pay attention.

    Normal Chick Behavior (That Looks Weird But Isn’t)

    Let’s normalize a few things that freak beginners out:

    Sleeping A LOT

    Totally normal. They grow fast and need the rest just like all babies.

    Piling Together

    Can be normal—but also watch temperature (we’ll cover that below).

    Random Zoomies

    Short bursts of energy are a GOOD sign.

    Quiet Moments

    Not every chick is noisy 24/7.

    Warning Signs of Illness in Baby Chicks

    Now let’s talk about what actually matters.

    These are the signs you don’t ignore:

    • Constant lethargy
    • Weakness or wobbling
    • Not eating or drinking
    • Loud, distressed peeping
    • Sitting puffed up for long periods
    • Isolates or looks like its sleeping standing up
    • Dirty or blocked vent

    If you see multiple signs together—take action.

    How to Check for Pasty Butt (And Why It Matters)

    This is a common issue in young chicks where their droppings stick to their backside and block their vent. When the vent is blocked, they can’t pass waste, which can quickly become serious and even fatal if not addressed. It’s one of the most common problems beginners run into when raising chicks.

    What to look for:

    • Dried poop stuck to their backside
    • Swollen or blocked vent area

    What to do:

    • Gently clean with warm water
    • Dry them completely before putting them back

    Why Clean Water and Dry Bedding Matter More Than You Think

    This is HUGE—and often overlooked.

    Dirty conditions = fast problems.

    Make sure:

    • Water is clean (not full of shavings or poop)
    • Bedding stays dry
    • You’re doing regular refreshes

    A lot of chick health issues start here.

    Temperature Cues: Your Chicks Will Tell You Everything

    Forget guessing—your chicks will show you what they need.

    Too Cold:

    • Huddled tightly together
    • Loud peeping

    Too Hot:

    • Spread out far from heat source
    • Panting

    Just Right:

    • Moving around evenly
    • Calm and comfortable

    Their behavior is more accurate than your thermometer.

    Subtle Warning Signs Beginners Miss

    These are the ones that sneak up on people:

    • One chick consistently off by itself
    • Slight drop in activity compared to others
    • Eating less than the group
    • Just “not quite right” behavior

    Trust your gut here. If something feels off—it probably is.

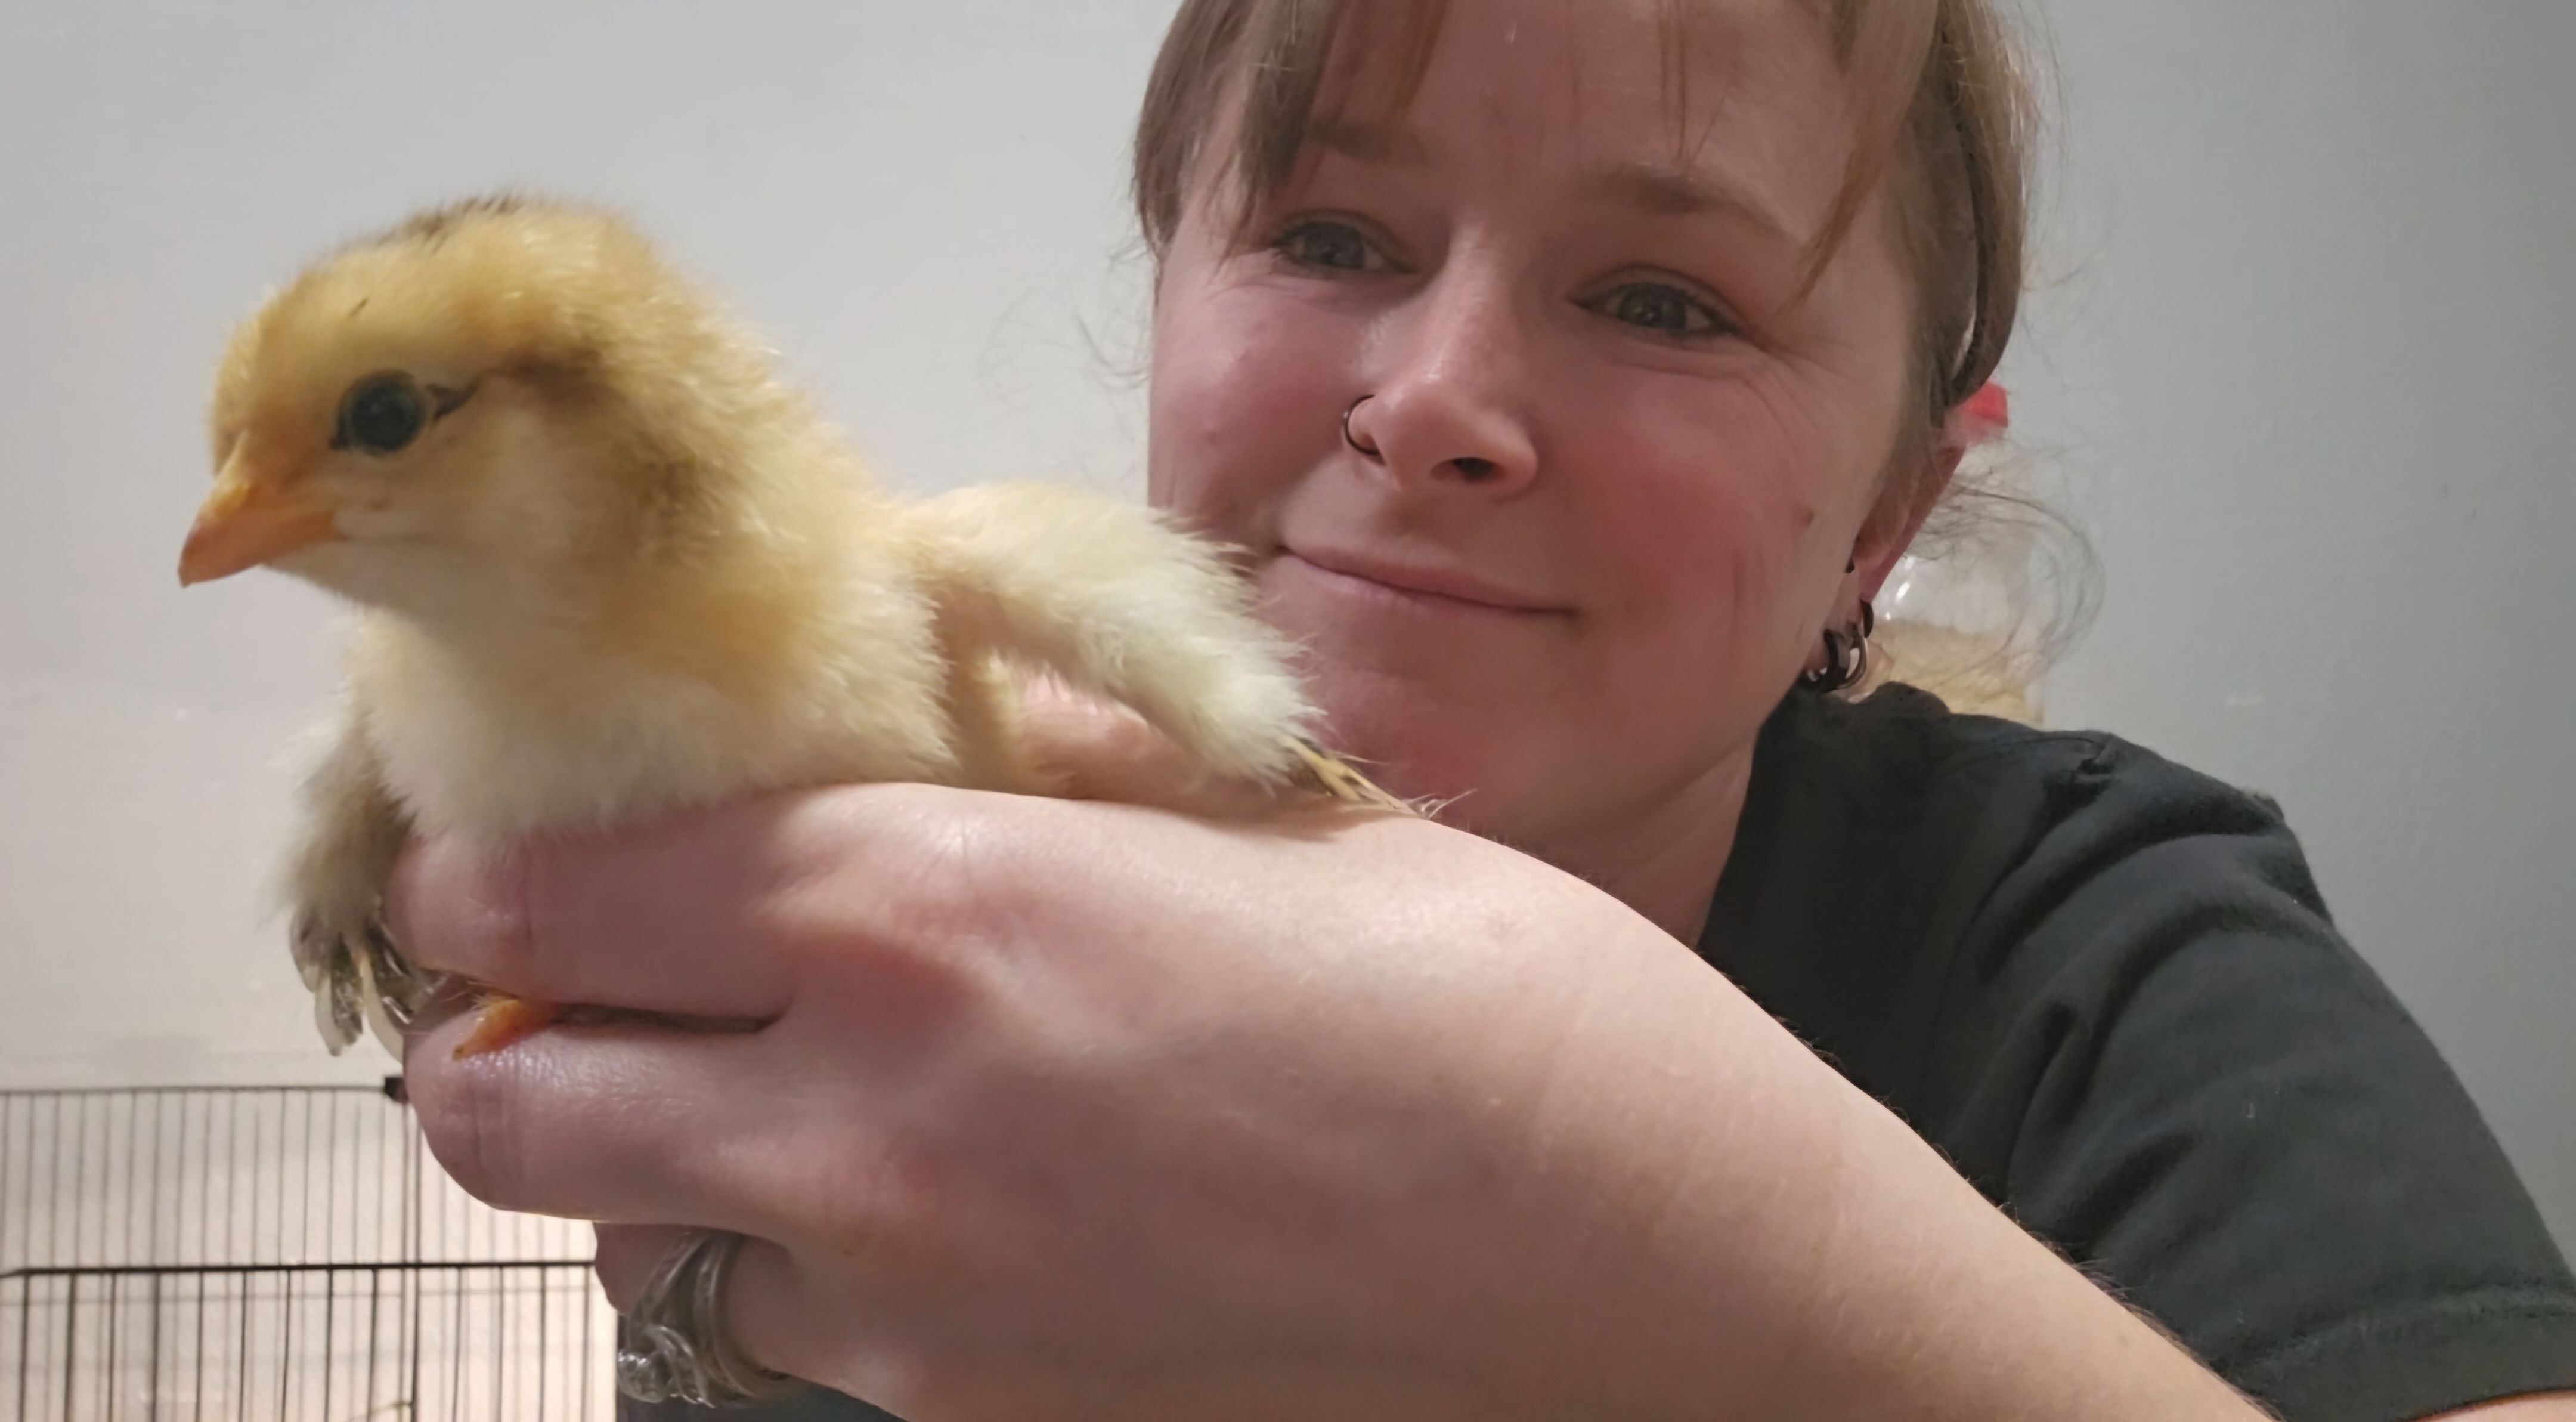
    Watch This: Real Examples of Healthy vs Sick Chicks

    If you want to actually see what this looks like in real life…

    Watch my full video here 👇

    I’m showing my own one-week-old chicks so you can:

    • See normal behavior
    • Spot warning signs
    • And feel more confident in what you’re looking at

    Free Guide: Raising Chickens With Confidence

    If you’re new and want something simple to follow…

    I put together a free beginner-friendly guide inside my freebie hub.

    👉 Freebie Hub

    It includes:

    • Chick care basics
    • Simple checklists
    • Easy-to-follow guidance

    Take what helps and leave the rest.

    Want to Stay Organized? (Chicken Binder)

    If you’re someone who likes having everything written down and organized…

    My Chicken Binder helps you track:

    • Chick growth
    • Feeding
    • Health checks
    • Coop planning

    It’s perfect if you’re raising chickens seriously or just want less mental chaos.

    Chicken Planner For Backyard Flocks

    Final Thoughts: You’re Probably Doing Better Than You Think

    If you’re standing over your brooder wondering if everything is okay…

    That means you care. And that already puts you ahead.

    Most chick issues don’t come from people not knowing enough—
    they come from not paying attention.

    Watch your chicks, learn their behavior and adjust as you go.

    That’s how confidence is built.

    Not overnight…
    but one day at a time.

    And before you know it,
    you won’t be second-guessing everything anymore.

    And if you want to keep learning as you go…

    Come hang out with me over on Facebook.

    I share simple homesteading education, real-life tips, and I do giveaways over there too.

    It’s a really good place to learn, ask questions, and be around people doing the same thing you are.

    I’d love to have you there.

  • Why Most People Burn Out Gardening (And How to Avoid It)

    Why Most People Burn Out Gardening (And How to Avoid It)

    Starting a garden is exciting.

    Spring arrives, the weather warms up, you have packets upon packets of seeds ready to go and suddenly it feels like anything is possible. You imagine rows of tomatoes, baskets of vegetables, and a garden full of fresh food.

    That excitement is a great thing.

    But it’s also one of the biggest reasons many beginner gardeners experience gardening burnout.

    Because when we first start gardening, it’s so easy to plant way more than we’re ready to manage.

    Today I want to talk about how easy it is to plant way too much, way too fast… why that’s exactly where most beginners burn out… and how to build a garden that actually stays fun instead of overwhelming.

    If you’ve ever felt overwhelmed trying to do everything at once, I go deeper into that in this video:


    The Excitement Trap

    When people decide to start gardening, there’s a lot of excitement involved. (As there should be).

    Buying seed varieties, choosing colorful plants, planning your bed layout — all of that gives you a little rush of motivation. It feels productive and inspiring at the same time.

    And at that stage, gardening still feels easy. (And fun).

    The plants are tiny, it’s easy to take care of them.

    You water them, check on them, maybe admire them a little bit, and everything feels manageable.

    But what a lot of beginners don’t think about yet is what happens when those little plants start getting bigger. Yes, we all know it’s inevitable. We know plants don’t stay small but what we don’t think about is the labor that goes along with it.

    Because when plants grow, the work grows too.


    When Plants Get Bigger

    As plants mature, their needs change.

    They require more water, more space, and more attention.

    Weeds will start appearing in the beds.

    Pests can show up.

    And suddenly the garden that once felt relaxing starts demanding more time than you expected.

    Now watering isn’t something you can do when you feel like it.

    It’s something you have to do when the plants need it.

    Sometimes that’s when you’re tired.

    Sometimes that’s after a long day at work.

    Sometimes that’s when you don’t really feel like going back outside.

    That’s when the excitement fades and frustration starts to creep in… and before you know it, that frustration turns into regret, negativity, and sometimes giving up altogether.


    My First Real Garden

    I remember the first year I really started to garden seriously.

    Before that I had grown a few things here and there, but this was the first year I thought I was going to grow a lot of food.

    And honestly, I kind of just winged it.

    My thinking was, “How hard can this be?” Plants grow naturally, right? Humans have been doing this forever. So I figured I’d just throw some seeds down and let nature take over… and let’s just say, she did—just not in the way I expected.

    I quickly learned that gardening involves a lot more than just “throwing some seeds down”.

    The biggest thing I didn’t account for was the weeds. There were thousands of them. At first everything looked the same to me. Tiny green sprouts everywhere and I couldn’t tell the difference between my plants and the weeds. So I didn’t know what I could pull and what I should leave. So I just didn’t do anything and by the time I finally figured out what my plants looked like and what the weeds were, the weeds had already taken over.

    There were so many that I didn’t even want to start pulling them… so I didn’t. Honestly, I completely gave up that year. But that season taught me a lot—about myself, about nature, and about what happens when you just wing it.

    And that’s the exact point where a lot of beginner gardeners start to feel defeated. (I know I sure did). Because it stops feeling fun… and starts feeling like a chore you’re already behind on.


    What I Wish I Knew Before I Started

    Looking back, one thing I would have done differently is just a little bit of research before jumping in.

    Now don’t get me wrong—there is absolutely a time to just try things and learn as you go.

    But having a basic idea of what you’re getting into makes a huge difference.

    For example, I live in a windy area.

    What I didn’t understand at the time is that wind spreads seeds—a lot of them.

    Weed seeds, grass seeds, even tree seeds… they all travel.

    So when I tossed my garden together without any kind of plan, I basically set myself up for a weed problem before I even started.

    If I had known that, I could have taken a few simple steps:

    • putting down a barrier
    • mulching early
    • planning out weed control from the beginning

    Nothing complicated—just small, preventative things.

    And that’s really the balance.

    You don’t need to know everything before you start.

    But knowing a little can save you from a lot of frustration later.


    Excitement vs What You Can Actually Manage

    One of the biggest lessons I’ve learned is this:

    Your garden needs to match what you can actually manage—not just what you’re excited about.

    Excitement is what gets you started.

    But what can you manage day-to-day?
    That’s what keeps things growing.

    Your garden should fit:

    • your real schedule
    • your energy levels
    • your current experience

    A small, well-maintained garden will always outperform a big one that burns you out.

    Because when it feels doable, you stick with it.


    The Harvest Problem

    Another thing beginners don’t always think about is the harvest.

    Because when plants grow well… they really grow.

    And if you planted a big garden without a plan for what you’re actually going to do with that food, it can get overwhelming fast.

    Suddenly you’ve got baskets of vegetables sitting on your counter… and you’re not quite sure what to do with all of it.

    Maybe you don’t know how to preserve it yet.
    Maybe you don’t have time to deal with it.
    Or maybe—if we’re being honest—your family doesn’t even eat that vegetable.

    And this is something I see all the time…

    When everything feels exciting, you want to grow everything.

    And I’m all for experimenting and trying new things.

    But if you’re growing squash just because someone told you to… and no one in your house actually eats squash… what are you going to do with it?

    That’s why one of the best things you can do as a beginner is start with foods your family already eats.

    Because when your harvest fits naturally into your meals, it doesn’t feel overwhelming—it feels useful.

    And that’s what keeps gardening rewarding.


    Systems Prevent Burnout

    Over time, what helped me avoid gardening burnout wasn’t working harder.

    It was building better systems.

    Things like:

    • having clear garden pathways
    • smaller, more manageable beds
    • a compost system
    • daily observation habits

    These systems reduce friction and make daily garden tasks easier.

    When your garden is designed to work with your routine instead of against it, everything becomes more manageable.

    Gardening stops feeling overwhelming and starts feeling sustainable.


    If you’re just getting started and want a few simple tools to help you plan and organize your garden, you can check out my freebie hub, where I have tons of free printable ready for you to snag up!


    A Garden Should Fit Your Life

    At the end of the day, gardening should add something positive to your life.

    It should feel productive, peaceful, and rewarding.

    Not overwhelming.

    Always start smaller than you think you should. Learn to grow a few things and learn how your space works. Then expand your garden as your experience grows.


    If you’d like a deeper look at building a garden that’s practical and manageable, I talk about these ideas in my book Garden Smarter Not Harder, which focuses on creating simple systems and habits that make gardening easier over time.


    Gardens don’t have to be perfect to feed your family and remember that your confidence and skills will grow right along side your plants.

  • Small Gardening Habits That Make Your Garden Easier to Manage

    Small Gardening Habits That Make Your Garden Easier to Manage

    When people picture gardening, they often imagine long weekends outside.

    Hours spent planting.
    Entire afternoons pulling weeds.
    Big seasonal projects that take up half the day.

    And while those days absolutely happen sometimes, the truth is that most successful gardens aren’t built in one long weekend.

    They’re built in small habits.

    Tiny actions repeated over time.

    A few minutes here.
    A quick check there.
    A short routine that becomes part of your day.

    Those small habits add up faster than people think.


    Gardening Success Isn’t About Motivation

    One of the biggest misconceptions about gardening is that you need to feel motivated to do it.

    You don’t.

    What you need are systems and habits that make caring for your garden part of your normal routine.

    This is where something called habit stacking becomes incredibly useful.

    Habit stacking simply means attaching a new habit to something you already do every day.

    Instead of trying to create brand-new routines, you piggyback off existing ones.


    What Habit Stacking Looks Like in the Garden

    Think about the things you already do every morning.

    You wake up.
    You pour a cup of coffee.
    You step outside.
    You check the weather.

    These are perfect anchor points for small gardening habits.

    For example:

    When you pour your morning coffee, take five minutes to water your plants.

    When you step outside in the morning, walk past the garden and do a quick observation check.

    If you have a greenhouse, make it part of your morning routine to open it and check moisture levels.

    You’re not adding a brand new task to your day.

    You’re simply attaching gardening to something that already exists.


    Start With Five Minutes

    A lot of people quit gardening because they feel overwhelmed before they even start.

    They imagine hours of work and giant gardens that require constant attention.

    But the reality is that a garden can be maintained in very small increments of time.

    Five minutes matters.

    Five minutes can be used to:

    • water seedlings
    • pull a few weeds
    • check for pests
    • harvest a handful of vegetables
    • adjust plant supports
    • observe how plants are growing

    Those small actions prevent problems before they become big ones.

    And over time, five minutes often turns into ten.

    Then fifteen.

    Not because you forced it — but because you start enjoying the routine.


    Build Systems That Support Your Habits

    Habits are easier to keep when your environment supports them.

    This means organizing your garden and tools so tasks feel simple and accessible.

    For example:

    Keep a small watering can near your seed trays.

    Store hand tools where you can grab them quickly.

    Place garden beds somewhere you naturally walk past each day.

    The easier something is to start, the more likely you are to actually do it.

    If watering your plants requires finding tools, dragging hoses, or walking across the property, you’re less likely to do it consistently.

    But if everything is within reach, the habit sticks.


    Examples of Small Gardening Habits

    Here are a few ways YOU can build small routines to integrate gardening into your life.

    Morning routine:

    Wake up ten minutes earlier.
    Pour your coffee.
    Step outside and check your plants.

    Midday routine:

    If you work from home or take lunch breaks at home, spend five minutes in the garden doing a quick walk-through.

    Evening routine:

    Before heading inside for the night, harvest anything that’s ready and pull a couple weeds.

    These moments don’t feel like chores.

    They feel like check-ins.


    Observation Is One of the Most Powerful Habits

    One of the most valuable gardening habits you can develop is simply paying attention.

    Observation helps you catch small problems early.

    You’ll notice:

    • pests before they spread
    • plants needing water
    • early signs of disease
    • vegetables ready to harvest

    When you interact with your garden daily, even briefly, your awareness increases.

    And awareness prevents overwhelm.


    Gardening Grows With You

    The beautiful thing about small habits is that they grow naturally over time.

    You might start with one tray of seedlings.

    Then a couple containers.

    Then a small raised bed.

    Not because you rushed into it — but because your confidence grew alongside your habits.

    And that’s how sustainable gardens are built.

    Not in bursts of motivation.

    But in steady routines.


    Start Small and Let It Grow

    If you want your garden to succeed long term, start smaller than you think you need to.

    Build simple habits.

    Create systems that support those habits.

    And give yourself permission to grow slowly.

    Five minutes today might not seem like much.

    But over an entire season, those five minutes add up to something powerful.

    A garden that fits your life.

    A routine that feels natural.

    And food that grows because you showed up consistently.

    Small habits.
    Steady progress.
    Real food on your table.

    Need More Help Getting Started?

    If you’re starting this season and want something simple to guide you, I created a free printable to help.

    Seed Starting Made Simple is an 11-page beginner-friendly guide that helps you find your frost date, plan your seed timeline, avoid common mistakes, and track your plants as they grow.

    You can download it here:
    👉 https://homesteadingwithbeckyj.com/freebie-hub

    And if you’d like a deeper look at building a garden that actually fits your life, my ebook Garden Smarter, Not Harder (Book 2 in The Grounded Homesteader Series) is available now.

    It focuses on simple systems, growing what makes sense for your household, and creating a garden that’s sustainable — not overwhelming.

    Grab it here:
    👉 https://homesteadingwithbeckyj.blog/product/the-grounded-homestead-series-book-2-garden-smarter-not-harder/

    Small steps. Steady growth. Real food.

  • Homesteading Hacks: 15 Life-Changing Tips to Make Your Farm Work (and Your Life Easier)

    Homesteading Hacks: 15 Life-Changing Tips to Make Your Farm Work (and Your Life Easier)

    Homesteading—it’s a lifestyle that’s all about getting your hands dirty, coming up with creative solutions, and living a simpler, self-sustaining life. But let’s be honest, sometimes that “simpler” part gets lost when you find yourself knee-deep in chores, tangled in garden hoses, or trying to herd a stubborn goat back into its pen (again).

    Luckily, there are a few homesteading hacks that will save you time, energy, and perhaps a little bit of your sanity. From clever ways to organize your tools to brilliant tricks for managing your animals, here are 15 life-changing homesteading hacks to make your farm work—and your life easier.


    1. Use an Old Ladder as a Tool Organizer

    That old wooden ladder you’ve been meaning to fix? Turn it into a tool rack! Just hang it horizontally wherever you want some rustic charm. The rungs can hold hoes, shovels, and even your gardening gloves. It’s a quirky yet functional solution to your tool clutter, and hey, it gives your barn a bit of farmhouse charm.


    2. DIY Bug Repellent with Essential Oils

    You love the great outdoors, but bugs…. Not so much? Instead of buying expensive chemical bug sprays, make your own using essential oils. A simple recipe: mix 10-20 drops of lavender, peppermint, or citronella oil with some water in a spray bottle, and boom—you’ve got a natural bug repellent that works wonders and smells much better than the store-bought stuff. Plus, your goats will appreciate the lavender scent.


    3. Repurpose Empty Egg Cartons for Seed Starting

    No need to spend a fortune on seed-starting trays. Those empty egg cartons you have piling up in the kitchen? They’re perfect for starting seeds! Simply fill each compartment with soil, drop in your seeds, and watch them grow. Plus, once the seedlings are ready, you can plant the whole carton in the ground—no need to remove them. The cardboard will biodegrade over time, making it an eco-friendly alternative.


    4. Make a Homemade Chicken Feeder with PVC Pipe

    Tired of constantly refilling your chicken’s feeder? A simple PVC pipe can solve your problem. Just grab a piece of PVC pipe, a few elbows, and T-joints from your local hardware store, and voilà! You’ve got an automatic feeder that prevents waste and gives your chickens access to food throughout the day. Bonus points if it’s elevated off the ground to keep things cleaner.


    5. Use Milk Jugs to Protect New Plants

    If you’ve ever had a young plant fall victim to the chilly early spring nights, you’ll love this hack: use empty milk jugs to protect your tender plants! Cut the bottom off a plastic milk jug, and place it over your new plant as a mini greenhouse. It’ll keep the frost off, and the sun will still get through the clear plastic. Plus, it’s free and recycling at its finest!


    6. Label Your Seeds with Popsicle Sticks

    In the whirlwind of spring planting, it’s easy to forget what you planted where. So, grab a pack of popsicle sticks, and use them as plant labels. Simply write the name of the plant with a permanent marker, and stick them in the soil. Not only is this an easy and affordable way to keep track of your garden, but it also makes you feel like an arts and crafts pro.


    7. Repurpose Old T-Shirts as Shop or Garden Rags

    Those old, holey t-shirts you’ve been hanging onto make excellent shop or garden rags. Cut them up and use them to wipe hands, clean tools, handle muddy pots, or protect your skin during quick garden jobs. They’re washable, reusable, and perfect for the homestead — even if they’re no longer wearable. It’s an easy way to reduce waste and get a little more use out of something you already have.


    8. The One-Bucket Homestead Hack

    Keep one sturdy bucket by the door and let it do multiple jobs. It can collect kitchen scraps for chickens or compost, haul garden tools, carry weeds, hold feed scoops, or catch random homestead messes that pop up throughout the day. It’s simple, flexible, and saves you from walking back and forth ten times. Sometimes the best homestead systems aren’t fancy — they’re just convenient.


    9. Reuse Containers for Simple Homestead Storage

    You don’t need to buy special organizers for your homestead. Old containers you already have — coffee cans, jars, tins, yogurt tubs, plastic bins — can be repurposed for all kinds of storage. They work great for seeds, bolts and screws, garden labels, small tools, animal supplements, and odds and ends that tend to get lost. Label them, stack them, and keep them where you actually use them. It’s not fancy, but it’s practical, saves money, and keeps clutter from taking over. Homesteading isn’t about having matching storage — it’s about making what you have work.


    10. Store Bedding Where You Actually Use It

    Instead of hauling bedding back and forth every time the coop needs freshening, keep a small bin or bag stored right inside or near the coop. Being able to quickly toss in a fresh layer makes maintenance faster and keeps small messes from turning into big cleanups. Simple access beats perfect storage every time.


    11. Keep Hoses Where They’re Needed

    If you have multiple garden or animal areas, it’s often easier to keep one hose permanently assigned to each spot instead of moving one hose everywhere. Less dragging, less wear and tear, and way less frustration.


    12. Collect Rainwater Where It Makes Sense

    Rainwater can be a great supplemental water source for gardens, especially during dry stretches. If it’s legal where you live, collecting rainwater in a simple barrel or container can help reduce water use and stretch your resources. Even a small setup can be useful for watering plants, filling watering cans, or spot-watering beds. Just remember — rainwater systems don’t have to be fancy to be helpful, and they work best as part of a bigger plan, not a cure-all. Always check local regulations, and start small to see what actually works for your space and climate.


    13. Use Scented Plants as a Gentle Pest Deterrent

    Instead of relying on one product to fix pest problems, adding strongly scented plants around your garden and home can help deter some insects naturally. Mint and lavender are two popular options — just make sure to plant mint in containers, not directly in the ground, unless you want it taking over everything. These plants won’t eliminate pests entirely, but they can help reduce pressure when used alongside other good garden practices. Think of them as part of a layered approach, not a cure-all.


    14. Use Free Pallets Instead of Buying New Materials

    Old pallets are often free and easy to find, which makes them a practical shortcut for homestead projects. Instead of buying new lumber, pallets can be repurposed for quick fixes like garden borders, compost bin walls, temporary fencing, or simple storage solutions. They’re not meant to be permanent or perfect, but they allow you to solve problems fast and cheaply using what’s available. When you’re learning as you go, pallets give you flexibility without a big investment — which is exactly what a good homestead hack should do.


    15. Air-Dry Herbs Using a Clothesline or Simple Hanging Space

    Drying herbs doesn’t require special equipment or a dehydrator. A clothesline, drying rack, or even a simple string indoors works just fine. Tie herbs in small bundles and hang them in a dry, well-ventilated space out of direct sunlight. This low-effort method saves energy, preserves flavor, and lets you work with what you already have. It’s a simple, old-fashioned solution that still holds up — especially for small batches.


    Final Thoughts: Homesteading Doesn’t Have to Be Hard—Just Clever

    Homesteading doesn’t have to be complicated or expensive to be rewarding. Most of the time, the best “hacks” are simply finding easier ways to do the things you’re already doing — using what you have, building systems that make sense for your space, and letting go of the idea that everything needs to be perfect. Try one or two of these ideas, skip the ones that don’t fit your homestead, and adjust as you go. That’s how real homestead routines are built. And if you’re looking for more simple, practical tools to help you stay organized and confident, be sure to check out my Freebie Hub for free printables all about homesteading. I’ll link it below so you can grab what fits your life right now. 🙂

  • The Easiest Vegetables to Grow for Beginner Homesteaders

    The Easiest Vegetables to Grow for Beginner Homesteaders

    One of the biggest mistakes new gardeners make is assuming that if a vegetable grows well for someone else, it will grow well for them too. Social media makes it easy to believe that success looks the same everywhere — but gardening is deeply personal to your location, climate, AND timing.

    Before we even talk about what’s “easy” to grow, we need to talk about zones.

    Gardening Zones & Why They Matter

    Your growing zone helps determine what plants can survive your seasons, but it doesn’t tell the full story. Two gardeners in the same zone can have completely different results depending on heat, humidity, wind, soil type, and how quickly temperatures change.

    Don’t know what zone you’re in? Check out the link below.

    https://planthardiness.ars.usda.gov/

    So if your favorite garden influencer is growing beautiful broccoli and you can’t keep it alive to save your life — it doesn’t mean you’re bad at gardening. It usually just means that plant isn’t well suited to your climate or growing season.

    The key to beginner success is choosing crops that are forgiving, adaptable, and productive, even when conditions aren’t perfect.


    Root Crops: The Best Place to Start

    If you’re brand new to gardening, root crops are some of the easiest and most reliable vegetables to grow.

    Think:

    • Carrots
    • Radishes
    • Beets
    • Turnips
    • Potatoes

    These crops grow underground, which protects them from a lot of environmental stress. They don’t require constant pruning, trellising, or special care. As long as your soil isn’t rock-hard and you keep them watered, they mostly take care of themselves.

    Radishes are especially great for beginners because they grow fast, helping you build confidence early in the season.


    Leafy Greens: Easy, Fast, and Productive

    Leafy greens are another beginner favorite — with one important tip: they prefer cooler weather.

    Great beginner greens include:

    • Lettuce
    • Spinach
    • Kale
    • Arugula

    These crops grow quickly and can often be harvested multiple times. They do best in spring and fall, and many varieties will tolerate light frosts.

    If you live somewhere that warms up quickly, look for heat-tolerant varieties, but keep expectations realistic. Even heat-tolerant greens can bolt (go to seed) once summer heat sets in. That’s not failure — it’s just how these plants respond to temperature changes.

    Planting greens early, providing shade, and harvesting often will help extend the season.


    Tomatoes: Easier Than People Think (With a Few Rules)

    Tomatoes get labeled as “hard,” but in my opinion, they’re actually pretty easy once you understand a few basics.

    Here’s what matters most:

    • Plant them deep. Tomatoes grow roots along buried stems, which leads to stronger plants.
    • Use compost or add nutrients. Tomatoes are heavy feeders and need ongoing nutrition as they grow.
    • Give them support early. Cages, stakes, or trellises prevent breakage and disease.
    • Water consistently. Irregular watering causes more problems than almost anything else.

    If you get these basics right, tomatoes are incredibly productive and forgiving. Cherry and paste varieties tend to be especially beginner-friendly.


    Herbs: Low Effort, High Reward

    Herbs are one of the most overlooked beginner crops — and one of the most rewarding.

    Easy herbs include:

    • Basil
    • Parsley
    • Cilantro
    • Thyme
    • Oregano
    • Chives

    Many herbs tolerate poor soil, don’t require much space, and can be grown in beds, containers, or even tucked into other garden areas. Perennial herbs like thyme and oregano come back year after year, making them especially low maintenance.

    Plus, harvesting herbs regularly encourages more growth — which is exactly what beginners want.


    What to Know Before You Plant (And Why That’s Okay)

    Even though the vegetables on this list are considered “easy” for beginners, they all come with their own little stipulations. Gardening isn’t about mastering everything at once — there are a lot of small details to learn, and the best way to learn them is one step at a time. You can read five books and watch endless videos, but until you actually get your hands in the soil, not everything will stick. Each of these plants thrives under slightly different conditions, and it’s worth taking a little time to research. Yes, you can go to the store, buy some seeds, toss them in the ground, and see what happens — and honestly, sometimes that works. Just don’t expect a perfect or high success rate right out of the gate. Gardening is a process, and every season teaches you something new.


    The Real Secret to Beginner Gardening Success

    When you start thinking about gardening, reaching for beginner-friendly crops is one of the easiest ways to increase your chances of success. Keep your growing zone and local climate in mind, and take the time to do a little research on what grows well in your area. Try not to get caught up in someone else’s garden highlight reel — what works for them may not work for you. Gardening is a learning process, and every season teaches you something new. Enjoy the process, learn along the way, and happy gardening.

  • How to Build Homesteading Confidence (Even If You’re Starting Small)

    How to Build Homesteading Confidence (Even If You’re Starting Small)

    When most people start homesteading, they want to jump in all the way.
    Chickens, garden, goats, sourdough, canning, DIY projects — all at once.

    And honestly? That’s the fastest way to feel overwhelmed, stressed out, and like you’re failing before you even get started.

    Starting small isn’t boring. It isn’t weak.
    It’s how you build real confidence that actually lasts.

    Why Starting Small Always Wins

    I preach this over and over because it’s true: starting small will always win.

    When you try to do everything at once, you get in over your head fast. You’re learning too many new skills at the same time, making constant decisions, and putting pressure on yourself to “keep up” with what you see online.

    That pressure leads to burnout.
    Burnout leads to quitting.

    Starting small does the opposite. It gives you space to learn, make mistakes, and grow without drowning in responsibility.

    Instead of doing everything, pick one thing.

    • One animal
    • One crop
    • One skill

    Learn it. Practice it. Get comfortable.
    Then — and only then — add something new.

    Master One Thing Before Moving On

    Confidence doesn’t come from doing more.
    It comes from knowing what you’re doing.

    When you focus on one animal or one growing skill, you get the chance to:

    • Learn how it really works
    • See problems before they become emergencies
    • Build routines that fit your life
    • Gain experience you can actually rely on

    Once you’ve mastered that one thing, upgrading feels exciting instead of stressful. And when you add the next thing, you’re building on a solid foundation — not scrambling to keep up.

    Small Goals = Easy Wins

    One of the biggest mindset shifts you can make is learning how to create small goals.

    Big goals are inspiring, but they can also feel heavy. Small goals are different — they’re achievable, measurable, and motivating.

    Easy wins build momentum.

    When you hit a small goal, your brain registers success. That success builds confidence. Confidence makes you more willing to keep going.

    It’s not about rushing.
    It’s about stacking wins.

    Expect Failure — and Keep Going Anyway

    Here’s the truth no one talks about enough: failure is part of homesteading.

    Plants die. Animals get sick. Projects don’t turn out the way you planned. Things break. Weather doesn’t cooperate.

    Failure doesn’t mean you’re bad at this.
    It means you’re learning.

    The key is knowing ahead of time that setbacks will happen — and deciding that you’ll keep going anyway. Confidence isn’t built by never failing. It’s built by learning how to recover and adjust.

    Remember Your “Why”

    When things get hard (and they will), your “why” matters.

    Why did you start homesteading?

    • To feed your family better?
    • To live slower?
    • To be more self-reliant?
    • To feel connected to your food and land?

    Write it down.
    Post it somewhere you’ll see it.
    Keep a picture, a note, or a reminder that brings you back to that reason.

    On the days you feel overwhelmed or discouraged, that “why” can keep you grounded.

    Confidence Is Built — Not Born

    You don’t wake up one day confident at homesteading.
    You build it through small steps, patience, and grace with yourself.

    Start small.
    Learn deeply.
    Expect mistakes.
    Celebrate progress.

    That’s how confidence grows — quietly, steadily, and sustainably.

    And remember: you don’t have to do everything to be doing enough. 🌱

  • Beginner Homestead Animals: Common Mistakes You Can Avoid

    Beginner Homestead Animals: Common Mistakes You Can Avoid

    One of the first questions new homesteaders ask is, “What animals should I start with?”

    And the truth is — every homesteader’s version of a “beginner animal” is different.

    Your space, climate, budget, time, personality, and goals all play a role. What feels easy for one person might feel completely overwhelming for someone else. That’s why instead of giving you a one-size-fits-all answer, I want to walk through some common “starter” animals and the beginner mistakes you can avoid before you bring them home.

    I’ll also sprinkle in a few honest homestead thoughts I wish more people talked about.


    Chickens: Easy… Until They’re Not

    In my opinion, chickens are often the easiest beginner livestock — depending on the breed and your expectations.

    One of the biggest mistakes I see is people choosing chickens based solely on looks. Fancy feathers are great, but they don’t help much if the bird can’t handle your climate.

    Things to consider before buying chicks:

    • Heat tolerance vs. cold tolerance
    • Egg production vs. dual purpose
    • Temperament (some breeds are much friendlier than others)

    👉 Beginner mistake to avoid: Buying whatever chicks are available without researching whether they’ll thrive where you live.

    My homestead thought: Chickens will teach you routine, responsibility, and patience. They’re forgiving enough to learn with, but they still require daily care. If chores already feel overwhelming, start small — less birds taken care of beats a full coop of neglected ones.


    Ducks: Adorable, Entertaining… and Very Wet

    Ducks are often labeled as beginner friendly, but they come with quirks that surprise a lot of new homesteaders.

    Ducks must have access to water deep enough to dunk their heads and clear their nares (nostrils). This is non-negotiable for their health.

    Other common duck mistakes:

    • Underestimating how messy they are
    • Brooding them indoors without proper ventilation
    • Assuming ducklings are waterproof

    Ducklings don’t develop their down coats or oil glands until about 6–8 weeks old. That means:

    • They love water
    • But they are not waterproof
    • They can chill quickly and get sick if they can’t dry off properly

    👉 Beginner mistake to avoid: Letting ducklings play in water without immediate access to warmth and a dry area.

    My homestead thought: Ducks are joy-filled chaos. If you love watching animals and don’t mind extra cleaning, they’re wonderful. If mess stresses you out, ducks might test your patience more than chickens ever will.


    Turkeys: Sensitive Babies, Hardy Adults

    Turkeys get a bad reputation, but honestly? Turkeys are just… big chickens.

    The challenge is the beginning.

    For the first 4–6 weeks, turkey poults are:

    • More temperature sensitive
    • Less forgiving of mistakes
    • More fragile than chicks

    Once they pass that stage, many homesteaders find them surprisingly straightforward.

    👉 Beginner mistake to avoid: Treating turkey poults exactly like chicks without adjusting brooder temperatures and care.

    My homestead thought: Turkeys teach you attentiveness. They’ll force you to slow down, observe, and respond quickly. If you enjoy learning through close observation, they can be incredibly rewarding.


    Quail: Small Birds With Big Learning Curves

    Quail are often suggested for small spaces, but they require careful setup.

    One of the most common (and heartbreaking) beginner mistakes is this:
    👉 Quail can drown in water dishes.

    To prevent this:

    • Use shallow waterers designed for quail
    • Add marbles, rocks, or pebbles to water dishes

    They’re fast, fragile, and don’t tolerate mistakes well.

    👉 Beginner mistake to avoid: Using standard poultry equipment without modifications.

    My homestead thought: Quail are not “set it and forget it” birds. They’re great for people who like precision and structure, but they’re not as forgiving as chickens or ducks.


    Goats: Let’s Stop Calling Them Beginner Animals

    I’m going to be honest here.

    If you start your homestead with goats… you’re either very confident or a little wild.

    Goats require:

    • Excellent fencing (and then better fencing)
    • Consistent parasite management
    • Nutrition knowledge
    • Daily observation

    They’re intelligent, curious, and always testing limits — both physical and mental.

    👉 Beginner mistake to avoid: Getting goats because they’re cute or popular on social media.

    My homestead thought: Goats are not difficult because they’re bad animals — they’re difficult because they’re smart. They require leadership, consistency, and patience. They will make you a better animal keeper, but they’ll humble you first.


    Cows: Simple Animals With Big Needs

    Cows can actually be fairly easy animals to manage — if you’re prepared.

    They need:

    • Adequate pasture
    • Strong, reliable fencing
    • Space to move and graze
    • Long-term planning

    They’re not forgiving of shortcuts, especially when it comes to space and infrastructure.

    👉 Beginner mistake to avoid: Underestimating how much room and planning cows require.

    My homestead thought: Cows teach respect. Their size alone demands calm, intentional handling. If you’re someone who likes structure and routine, cows can be incredibly grounding animals.


    Pigs: Breed Choice Changes Everything

    Not all pigs are created equal.

    Breeds like:

    • Kunekune
    • Guinea hogs

    are often considered more beginner friendly because they’re:

    • Smaller
    • More docile
    • Easier to manage

    That said, they’re also much fattier breeds, which isn’t everyone’s preference for meat.

    Many people raise them for butcher, but that’s a personal decision.

    I’ll be honest — I have a pig who’s basically a pet. She’s chill, eats anything and everything, and genuinely enjoys long walks. 😂

    👉 Beginner mistake to avoid: Choosing pig breeds without understanding size, temperament, and end goals.

    My homestead thought: Pigs are smarter than people expect. If you treat them with respect and consistency, they’re some of the most enjoyable animals to raise.

    wrote it in the same voice and depth as the rest of the article.


    Rabbits: Quiet, Efficient… and Not as Low-Maintenance as People Think

    Rabbits are often suggested as one of the best beginner homestead animals — and in some ways, they are.

    They’re quiet, don’t require a lot of space, and can be incredibly efficient producers. But there are a few common beginner mistakes that catch people off guard.

    Common rabbit mistakes:

    • Keeping them in direct heat without airflow
    • Assuming wire cages don’t need resting mats
    • Not protecting them from predators
    • Underestimating how sensitive they are to stress

    Rabbits do not handle heat well. Temperatures above the mid-80s can quickly become dangerous without shade, airflow, and frozen water bottles or cooling methods.

    They also have delicate feet. Wire cages without resting boards can lead to sore hocks, which are painful and avoidable with proper setup.

    👉 Beginner mistake to avoid: Assuming rabbits are “easy” because they’re quiet and small.

    My homestead thought: Rabbits are calm animals that require intentional care. If you’re someone who likes quiet, routine, and efficient systems, rabbits can be a great fit. But they’re not hands-off animals — they reward consistency, not neglect.


    Final Thoughts: Start Where You Are

    There is no universal beginner animal.

    The best animals to start with are the ones that:

    • Fit your space
    • Match your climate
    • Align with your goals
    • Work with your daily routine

    Every homesteader learns by doing. Mistakes happen — what matters is planning thoughtfully and being willing to adjust as you grow.

  • 10 Ways to Lower Homestead Costs (Without Sacrificing Quality or Comfort)

    10 Ways to Lower Homestead Costs (Without Sacrificing Quality or Comfort)

    Homesteading is an incredibly rewarding lifestyle — but let’s be honest, it can also get expensive fast. Feed costs go up, electricity spikes in the winter, projects add up, and before you know it, the budget feels tighter than last year’s jeans.

    The good news? There are dozens of simple, realistic ways to lower homestead costs without sacrificing your quality of life. In fact, most of these tips will make your homestead more efficient while freeing up money for the projects and animals you really care about.

    Here are 10 practical, beginner-friendly ways to shrink your expenses and stretch your resources further.


    1. Reuse What You Already Have (The #1 Homesteader Money Saver)

    If there’s one rule every homesteader learns early on, it’s this:

    Reuse before you buy.

    From scrap wood to old jars to leftover fencing materials — what you already have is almost always cheaper (and usually faster) than running to the store.

    Common things every homesteader reuses:

    • Old feed bags → weed barrier, trash liners, storage
    • Glass jars → pantry storage, seed saving, fermenting
    • Scrap lumber → nesting boxes, shelves, temporary fencing
    • Buckets → soaking grain, watering animals, hauling compost
    • Totes with broken lids → mini raised beds or brooder bins

    Every reused item is one less thing you need to spend money on. And the savings add up fast.

    💡 Pro Tip: Before buying ANYTHING, ask yourself:
    “Can I build this? Borrow it? Or repurpose something instead?”


    2. Ferment Your Animal Feed to Stretch It Further

    Feed is one of the biggest expenses on the homestead — especially if you have chickens, ducks, or pigs.

    Fermenting feed is an easy way to:
    ✔ Reduce feed consumption by 20–30%
    ✔ Improve gut health
    ✔ Increase egg production
    ✔ Boost nutrient absorption

    All you need is water, a bucket, and 24–48 hours.

    Fermented feed is more filling, so your animals eat less but stay healthier. That means fewer feed runs, less waste, and better overall performance.

    💡 Pro Tip: Start with small batches until you find the perfect consistency. It should be like thick oatmeal — not soup.


    3. Shop From Your Pantry Before Making Your List

    One of the biggest invisible money leaks?
    Buying food you already have.

    Before making a grocery list, shop your pantry, fridge, and freezer first.
    You’ll be shocked how many meals you can create without adding anything to your cart.

    Try this weekly routine:

    1. Check what needs to be used up (produce, dairy, frozen meats).
    2. Build 3–5 meals around those items.
    3. Write a grocery list ONLY for what’s missing.

    This simple habit cuts grocery spending dramatically while reducing food waste — a win-win.


    4. Line-Dry Your Clothes (A Hidden Energy Saver)

    Dryers are one of the biggest electricity hogs in the home.

    Line-drying clothes can:
    ✔ Cut your electric bill
    ✔ Reduce wear on clothes
    ✔ Add that wonderful “fresh air” smell

    Even drying HALF your loads on a line or rack makes a noticeable difference.

    💡 Bonus: In the summer, line-drying helps keep your house cooler by not running the hot dryer inside.


    5. Hand-Wash Dishes When You Can

    It sounds old-fashioned, but choosing to hand-wash small loads of dishes (especially when you’re already at the sink cooking or cleaning) uses significantly less water and electricity.

    You don’t have to hand-wash everything — just the quick stuff.
    It all adds up on your utility bill.


    6. Use a Wood Stove or Fireplace Instead of Electric Heat

    If you have access to wood, using a fireplace or wood stove can save hundreds of dollars each winter.

    Benefits include:
    🔥 Lower electric or propane bills
    🔥 Warmer, more even heat
    🔥 The ability to cook or boil water in emergencies
    🔥 Backup heat during outages

    Even running your wood heat a few nights a week reduces overall heating costs.

    💡 Pro Tip: Stock up on free or cheap wood from tree services, storm-damaged branches, or fallen trees on your land.


    7. Thrift, Barter, or Buy Used Before Shopping New

    Homestead essentials don’t need to be shiny and brand new.

    Check these first:

    • Facebook Marketplace
    • Local farm swaps
    • Estate sales
    • Thrift stores
    • Community buy/sell groups

    You can find fencing, tools, canning jars, heaters, buckets, brooders, and even animal shelters for a fraction of retail price.

    And don’t forget bartering!
    Eggs, produce, or labor can often be traded for tools or supplies.


    8. Grow and Preserve Foods You Use Most

    Instead of trying to grow everything at once, focus on the foods your family actually eats.

    Grow your most-used staples:

    • Potatoes
    • Tomatoes
    • Lettuce
    • Herbs
    • Green beans
    • Peppers

    Then preserve the extras by canning, freezing, dehydrating, or fermenting.
    This reduces grocery spending AND keeps your pantry stocked year-round.


    9. Repair Instead of Replace

    The homestead lifestyle comes with broken tools, ripped gloves, loose screws, cracked buckets, and leaking hoses — constantly.

    Before tossing anything, ask yourself:
    “Can I fix this for cheaper than replacing it?”
    Most of the time, the answer is YES.

    Simple repairs can add years to your tools and equipment.

    💡 A small repair kit goes a long way: duct tape, JB Weld, zip ties, replacement parts, extra screws, hose menders, etc.


    10. Start Small — Add More Only When You’re Ready

    One of the most expensive homestead mistakes?
    Expanding too fast.

    Every new animal comes with:
    ✔ Feed
    ✔ Shelter
    ✔ Watering equipment
    ✔ Bedding
    ✔ Emergency costs

    Every new garden bed comes with soil, compost, fencing, and irrigation needs.

    Growing slowly protects both your wallet and your sanity.

    💡 Rule of Thumb:
    If you can’t afford the setup, the feed, AND the emergency fund…
    wait.

    Your homestead will grow stronger — and cheaper — when you take it one step at a time.


    Final Thoughts

    Lowering homestead costs isn’t about cutting corners — it’s about working smarter, being resourceful, and building systems that support you long-term.

    Reuse what you can.
    Grow what you eat.
    Invest slowly.
    Fix things when they break.
    And always, ALWAYS check your scrap pile first.

    With a little creativity, your homestead can become not only more self-sufficient… but more affordable, too.

  • 5 Simple Homestead Organization Systems That Actually Work

    5 Simple Homestead Organization Systems That Actually Work

    Let’s be honest: homesteading comes with a lot of moving parts. Feed schedules, breeding records, garden plans, never-ending projects, and that mountain of laundry that somehow multiplies overnight.

    If you’ve ever felt like you’re juggling too many things (while holding a feed bucket and a coffee mug), you’re not alone. Over the years, I’ve learned that staying organized doesn’t mean having a perfect system — it just means having simple habits that help the chaos make sense.

    Here are five systems I use to keep my homestead (and my sanity) in check.

    1. Keep a Homestead Binder

    Your binder is your best friend — a place to keep all your important information in one spot. It doesn’t have to be fancy; just functional.

    Here’s what I include in mine:

    • Education & Notes: Animal care tips, and any research or education about future animals I plan to raise.
    • Goals & projects: what I’m working on this season or hope to build next year.
    • Animal records: medications, vaccinations, births, and weights.
    • Pasture rotation logs: where animals grazed and when.

    It’s part planner, part memory keeper — and when life gets hectic, having it all written down is a lifesaver.

    Need a starting point? I have a printable homestead binder available on my website with clean, beginner-friendly pages.

    2. The 5-Minute Tidy Rule

    This rule changed my life: if it takes five minutes or less, do it now.
    Wipe the counter. Put away the boots. Fold the towels.

    Those little tasks may seem minor, but they add up fast — and they keep the house (and barn) from turning into a full-blown disaster zone.

    The same goes for your feed room, workshop, or garden shed. A quick tidy here and there keeps big messes from ever forming.

    3. Practice the O.H.I.O. Rule — Only Handle It Once

    When you pick something up, put it where it actually belongs.
    Don’t move it from one pile to another or set it “for later.”

    Whether it’s a bucket, a feed scoop, or your mail, handle it once.
    Put it in its home, and move on. It saves time, brain space, and a whole lot of clutter.

    4. Use Color-Coded Bins or Shelves

    This is a small change that makes a huge difference — especially if you have multiple animals or shared supplies.

    Color-coding helps everyone (including helpers, kids, or partners) know what goes where.

    • Blue bins: poultry supplies
    • Green bins: garden tools
    • Yellow bins: goat or livestock gear
    • Red bins: emergency or medical items

    You can use tape, bins, or even painted shelf edges — whatever fits your setup. The goal is simple: make it easy to find what you need and just as easy to put it back.

    5. Create Themed Days (and Keep a Realistic Project List)

    It’s easy to feel overwhelmed when every task feels urgent. The truth? It’s not.

    I like to give my week a rhythm by assigning themed days:

    • Feed Day Friday – check and restock feed, hay, minerals.
    • Meal Prep Monday – batch-cook and plan dinners.
    • Clean-Up Day – catch up on laundry, dishes, and deep cleaning.

    I also keep a “Project List” — but here’s the key: it’s an eventually list, not a today list.
    I write everything down so I don’t forget it, but I remind myself constantly:

    “It doesn’t all have to be done. In fact, it’ll never be done — and that’s okay.”

    Homesteading is a lifestyle, not a finish line.

    Final Thoughts

    Staying organized isn’t about perfection — it’s about peace of mind. A binder, a few color bins, and some simple routines can transform the daily chaos into something that feels doable.

    Remember: your homestead will never be fully finished, and that’s part of its beauty. You’re growing, learning, and creating something meaningful — one small, organized step at a time.

  • 7 Pantry Staples Every Homesteader Should Have Year-Round

    7 Pantry Staples Every Homesteader Should Have Year-Round

    A well-stocked pantry is the heartbeat of any homestead. Whether you’re deep in canning season or throwing together a last-minute dinner, having reliable staples on hand makes everything smoother.

    Over the years, I’ve learned that there are a few items I never let myself run out of — simple, versatile ingredients that stretch meals, preserve food, and keep us prepared for whatever comes our way.

    Here are my 7 must-have pantry staples that every homesteader should keep stocked year-round.

    1. Dried Beans and Lentils

    They’re affordable, filling, and incredibly versatile. Dried beans and lentils can be used in soups, stews, casseroles, or canned for quick, ready meals. Lentils cook faster and don’t need soaking, which makes them perfect for those days when you forget to plan dinner.

    💡 Tip: Store in airtight jars or food-grade buckets with oxygen absorbers to extend shelf life. Rotate them yearly for freshness.

    2. Flour and Grains

    Flour is the base for so many homestead staples — bread, pancakes, biscuits, tortillas, you name it. I like to keep both all-purpose and whole wheat flour, along with oats, cornmeal, and rice (more on rice below!). These shelf-stable grains can carry you through busy seasons or lean times.

    💡 Tip: Freeze flour for 48 hours before long-term storage to prevent pests. Then transfer it to airtight containers.

    3. Rice

    Rice deserves its own category because of how versatile and long-lasting it is. It pairs with nearly any meal and stores beautifully. We keep both white rice (for long-term storage) and brown rice (for flavor and nutrition, though it has a shorter shelf life).

    💡 Tip: Store rice in sealed containers or mylar bags with oxygen absorbers. A 5-gallon bucket can hold around 35 pounds — that’s a lot of meals!

    4. Salt — The Ultimate Preserver

    Salt isn’t just for flavor — it’s a tool for survival. It’s essential for curing meat, fermenting vegetables, and preserving food. I always keep sea salt for everyday cooking and pickling salt for canning.

    💡 Tip: Skip iodized salt for canning projects — it can cloud your jars and change the taste.

    5. Home-Canned Meat and Broth

    Few things make me happier than seeing rows of home-canned meat and broth on my shelves. It’s convenient, shelf-stable protein ready for any meal. Whether it’s turkey, chicken, or beef, I can throw together soups, dips, and casseroles in minutes — no thawing required.

    💡 Tip: Check out my post on From Freezer to Pantry: How I Pressure Can Turkey for Long-Term Storage for exact times and steps.

    6. Tomatoes and Tomato Products

    Tomatoes are one of the most versatile ingredients in the pantry — think sauces, soups, stews, chili, and salsa. Every year, I can plenty of diced tomatoes, tomato sauce, and paste so we’re set until next harvest.

    💡 Tip: Add bottled lemon juice or citric acid when canning to keep the acidity safe for storage.

    7. Vinegar

    If I could only keep one “multi-tool” in my kitchen, it would be vinegar. It’s used for cleaning, pickling, cooking, canning, and even animal care. I keep both white distilled vinegar (for cleaning and canning) and apple cider vinegar (for marinades, dressings, and even goat care!).

    💡 Tip: Store vinegar in a cool, dark place. It lasts indefinitely when sealed properly.

    Final Thoughts

    A well-stocked pantry is about more than just food — it’s about security, simplicity, and peace of mind. When you build your pantry with intention, you’re not just preparing for busy seasons; you’re investing in your family’s independence year-round.

    These seven staples have earned a permanent spot in my pantry because they’re versatile, affordable, and practical — the kind of ingredients that keep our homestead running, no matter the season.

    What’s one item you can’t live without in your pantry? Let me know in the comments below!