Tag: small scale homesteading

  • “I Can’t Do It All” to “I’ll Do It My Way”: Finding Freedom in Everyday Homesteading

    Homesteading has a way of making us feel like we have to do everything all at once. You scroll through Pinterest or Instagram and see the perfect bread loaves, the spotless garden rows, the DIY farmhouse kitchen, and you think—“I can’t do it all.” And honestly? You’re right.

    But here’s the secret: you don’t have to.

    Homesteading isn’t about perfection or doing everything in one season. It’s about creating a lifestyle that works for you, in your space, on your budget, with your schedule. When you shift your mindset from “I can’t do it all” to “I’ll do it my way,” homesteading suddenly becomes doable, sustainable, and—most importantly—enjoyable.

    Perfection Isn’t the Goal—Progress Is

    There’s a lot of pressure in the homesteading world to make everything picture-perfect. But let’s be real: your goats are going to break a fence, your garden will get weedy, and that sourdough starter might flop. That doesn’t mean you’re failing—it means you’re learning.

    Progress happens in the small steps: planting one raised bed this year instead of an entire acre, raising two chickens before you invest in a full flock, or canning just a few jars instead of a pantry wall. These little wins build your skills and your confidence.

    Pinterest-Worthy vs. Real Life

    Pinterest and Instagram can be inspiring, but they can also be discouraging. Behind every “perfect” homestead photo is a mess you don’t see—the dishes piled up in the sink, the weeds just out of the camera frame, the failed projects tucked away in the shed.

    Real life homesteading is messy. It’s mud on the boots, crooked fences, and bread that doesn’t always rise. And that’s okay. What matters isn’t how it looks online—it’s how it feels to you.

    Doable and Workable Beats Perfect

    A homestead that works for your family doesn’t have to look like anyone else’s. Maybe your animals are in smaller pens than someone else’s. Maybe your garden is containers on the deck instead of rows in a field. Maybe your bread comes from a bread machine instead of a handmade sourdough.

    That doesn’t make it less valuable—it makes it workable. And a homestead that actually fits into your life will always beat one that leaves you burned out chasing perfection.

    Not Everything Works for Everyone—and That’s Perfectly Okay

    Some people thrive on dairy goats, others realize they hate milking and switch to chickens. Some people love pressure canning, others prefer freezing their harvest. What works beautifully for one homesteader might not fit your lifestyle at all.

    Instead of seeing that as failure, see it as freedom. You don’t have to copy anyone else’s version of homesteading. You get to create your own.

    Shifting the Mindset

    The most freeing mindset shift you can make is this:

    • From: “I can’t do it all.”
    • To: “I’ll do it my way.”

    That simple reframe takes the pressure off. It gives you permission to try, to fail, to adjust, and to find what actually works for your life. And that’s what true homesteading is about—building a lifestyle that sustains you, not one that drains you.

    Final Thoughts

    Your homestead doesn’t have to be perfect to be worth it. It doesn’t have to be Pinterest-worthy to be valuable. It just has to be yours—messy, doable, workable, and real.

    So, the next time you find yourself saying, “I can’t do it all,” remind yourself: you don’t have to. You only have to do it your way.

  • 15 Frugal Homesteading Hacks That Will Save You Hundreds Every Year

    15 Frugal Homesteading Hacks That Will Save You Hundreds Every Year

    When you’re running a homestead, every penny counts. Between feed, supplies, and maintenance, costs can creep up fast. That’s why learning frugal homesteading hacks can make all the difference. With a little creativity, resourcefulness, and a willingness to barter, you can stretch your budget without sacrificing quality or productivity.

    Here are 15 practical frugal homesteading hacks that can save you hundreds of dollars each year.

    1. Repurpose Old Feed Bags

    If you’re raising animals, chances are you go through a lot of feed—and end up with a stack of empty feed bags. Instead of sending them to the landfill, give them a second life. Most modern feed bags are made from woven polypropylene, which is durable, water-resistant, and surprisingly versatile.

    You can cut them open and lay them flat to use as:

    • Weed barriers in the garden. Simply place them under mulch or soil in pathways to block sunlight and keep weeds from sprouting.
    • Protective tarps for covering firewood, hay, or equipment during wet weather.
    • Ground covers when working on muddy areas to keep boots clean and prevent erosion.

    If you’re crafty, you can also sew feed bags into:

    • Tote bags for groceries, farmers’ market hauls, or carrying tools around the homestead.
    • Storage bags for organizing seasonal gear, blankets, or livestock supplies.
    • Harvest bags for carrying produce from the garden without worrying about dirt or moisture damaging the container.

    Some homesteaders even get creative and turn them into aprons, wall organizers, or chicken coop curtains. With a quick rinse and a little imagination, your pile of “trash” becomes a stash of ready-to-use, free materials—saving you money and reducing waste in the process.

    2. Barter Skills Instead of Spending Cash

    One of the oldest and most valuable tools in a homesteader’s money-saving arsenal is the art of bartering. Instead of pulling out your wallet every time you need something done, think about what you can offer in exchange.

    Have an overabundance of eggs in spring? Trade them with a neighbor for fresh honey or homemade bread. Got a bumper crop of tomatoes or zucchini? Swap with someone who raises meat rabbits or has extra firewood. Even baked goods, canned jams, and herbal remedies can be valuable currency in a barter-friendly community.

    Bartering isn’t just about goods—it’s also about skills. If you’re handy with carpentry, you could repair a friend’s chicken coop in exchange for them helping you install a water line to your barn. Maybe you have knowledge in animal care and can check in on someone’s livestock while they’re on vacation, and in return, they’ll help you with fencing or tractor repairs.

    The beauty of bartering is that it:

    • Keeps cash in your pocket while still meeting your needs.
    • Strengthens community ties, since you’re building a network of mutual support.
    • Reduces waste, because you’re making use of extra goods or spare time rather than letting them go unused.

    The more you practice bartering, the more you’ll discover its hidden benefits. You’ll not only save money but also feel more connected to the people around you—something money simply can’t buy.

    3. Save Seeds from Your Garden

    Buying seed packets every spring can really add up—but the good news is, you don’t have to. By learning the simple skill of seed saving, you can create a self-sustaining cycle in your garden and cut this recurring cost entirely.

    Start by selecting your healthiest, most productive plants—the ones that thrived in your soil, resisted pests, and produced well in your specific climate. Saving seeds from these plants means you’ll grow a stronger, more resilient garden year after year because you’re naturally selecting varieties that adapt to your unique growing conditions.

    For example:

    • Tomatoes: Let a few fruits fully ripen on the vine, scoop out the seeds, ferment them in a jar of water for a few days, rinse, and dry them for storage.
    • Beans and peas: Allow pods to dry on the plant until they rattle, then shell and store in an airtight container.
    • Herbs like basil or dill: Let them flower and go to seed, then shake the dry seed heads over a paper bag to collect them.

    Not only does this save you money, but it also helps preserve heirloom varieties and maintain your own personal seed bank for years to come. Plus, there’s something deeply satisfying about planting seeds you grew, harvested, and saved with your own hands—it’s the ultimate full-circle homesteading moment.

    4. Make Your Own Cleaning Products

    Store-bought cleaning supplies may look convenient, but they can quietly eat away at your homestead budget—not to mention introduce unnecessary chemicals into your home. By making your own cleaners from simple, pantry-friendly ingredients like vinegar, baking soda, and essential oils, you can cut your cleaning costs down to just pennies per batch while keeping your home safe for family, pets, and livestock.

    Here are a few easy recipes to get started:

    • All-Purpose Cleaner: Mix 1 part white vinegar with 1 part water in a spray bottle. Add 10–15 drops of lemon or lavender essential oil for scent. Perfect for counters, windows, and sinks.
    • Scrubbing Paste: Combine baking soda with just enough water to make a paste. Use it to tackle tough stains on stovetops, sinks, and tile grout.
    • Homemade Disinfectant: Mix 2 cups water, 1 tablespoon liquid castile soap, and 10 drops of tea tree oil for a gentle but effective germ-fighting spray.

    The beauty of homemade cleaners is that you control the ingredients—meaning no mystery fragrances, no harsh chemicals, and no pricey plastic bottles to throw away. Many homesteaders even take it a step further by reusing spray bottles, storing baking soda in glass jars, and infusing vinegar with citrus peels or herbs for a pleasant, natural aroma.

    Making your own cleaning products not only keeps more cash in your pocket but also supports a more sustainable, self-reliant lifestyle—two big wins in the frugal homesteading playbook.

    5. Compost Everything You Can

    Composting is one of the simplest and most cost-effective ways to boost your homestead’s productivity while keeping waste out of the landfill. By turning kitchen scraps, yard clippings, garden waste, and even animal bedding into nutrient-rich compost, you can drastically cut down—or even eliminate—your need for store-bought fertilizers.

    Nearly anything organic can go into your compost pile, including:

    • Vegetable and fruit peels
    • Coffee grounds and tea leaves
    • Eggshells
    • Grass clippings and leaves
    • Straw or hay bedding from chicken coops or rabbit hutches
    • Shredded paper or cardboard (avoid glossy or colored paper)

    Not only does composting save money on soil amendments, but it also creates healthier, more productive gardens. The finished compost improves soil structure, increases water retention, and feeds your plants with a slow-release blend of nutrients perfectly balanced by nature.

    If you don’t have much space, you can still compost in smaller setups like tumbler bins, worm bins (vermicomposting), or even a discreet corner of your yard. For homesteaders with livestock, adding used bedding into your compost not only recycles the material but also speeds up decomposition due to the nitrogen-rich manure.

    In short, composting turns what you might have thrown away into black gold for your garden—a true frugal homesteading win.

    You can download my free composting cheat sheet here.

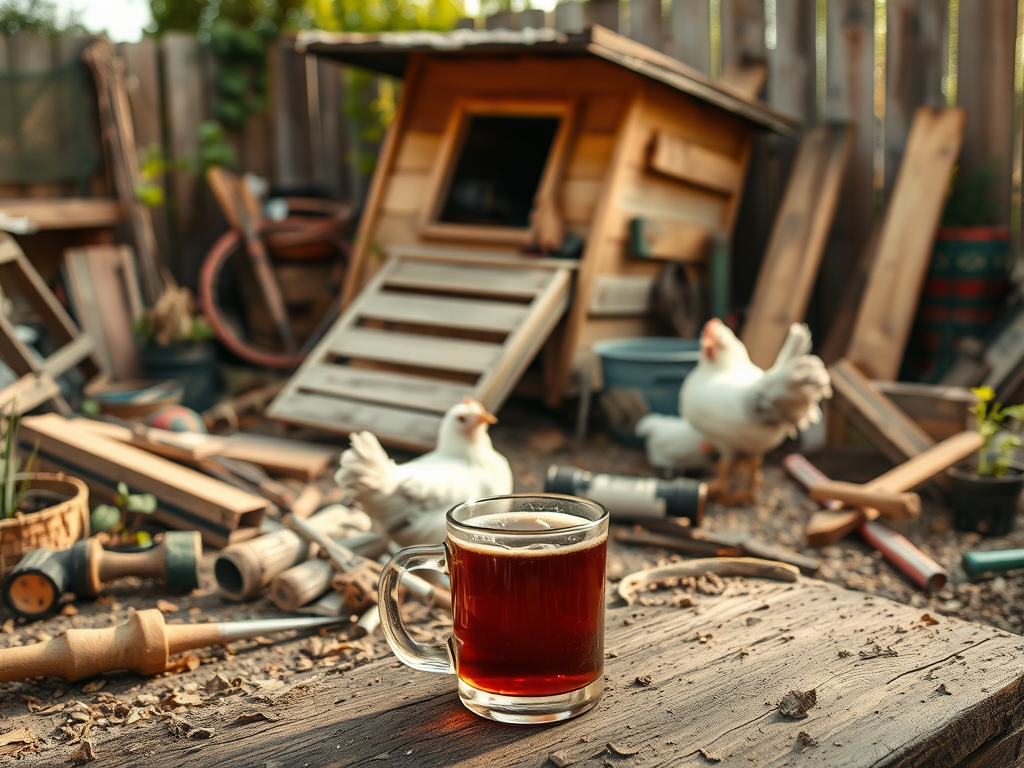
    6. Build Instead of Buy

    One of the biggest money-saving skills you can develop on your homestead is learning to build things yourself. From chicken coops and rabbit hutches to raised garden beds, trellises, and storage shelves, DIY projects can save you hundreds—sometimes thousands—of dollars compared to store-bought versions.

    Instead of heading straight to the hardware store, look for reclaimed materials first. Old pallets, salvaged fencing, scrap lumber, and used hardware can often be found for free or cheap from:

    • Local construction sites (ask permission before taking anything)
    • Craigslist or Facebook Marketplace’s “free” section
    • Friends or neighbors tearing down old sheds, barns, or fences
    • Habitat for Humanity ReStores

    Not only will building your own structures keep your homestead budget in check, but it also allows you to customize the design to fit your exact needs. For example:

    • A chicken coop with extra ventilation for hot climates
    • Raised beds built tall enough to reduce bending and strain
    • Shelves designed to fit your specific canning jar sizes

    And the satisfaction? Priceless. Every time you gather eggs from a coop you built with your own hands, or harvest tomatoes from a bed you crafted out of reclaimed wood, you’ll know you’re building not just a homestead—but a lifestyle of self-reliance.

    7. Cook from Scratch

    One of the most rewarding and budget-friendly habits you can develop on a frugal homestead is cooking from scratch. Instead of spending money on overpriced processed foods, you can make healthier, tastier meals right in your own kitchen—often for a fraction of the cost.

    Start by building your meals around homegrown ingredients. Fresh vegetables from your garden, eggs from your hens, or herbs from your windowsill planter can become the foundation for soups, stir-fries, casseroles, and baked goods. Even if you can’t grow everything you eat, buying staple items in bulk—like flour, beans, rice, and oats—will dramatically lower your grocery bill.

    Examples of frugal homestead cooking:

    • Turning excess garden zucchini into bread, muffins, or fritters
    • Making bone broth from leftover chicken or beef bones for soups and stews
    • Canning tomatoes for pasta sauces and salsa instead of buying jars at the store
    • Baking your own bread, tortillas, and crackers instead of buying packaged versions

    Cooking from scratch also means you have complete control over what goes into your food—no preservatives, artificial flavors, or hidden costs from “convenience” packaging. Over time, you’ll develop a recipe rotation that’s both cost-efficient and deeply satisfying, turning your kitchen into the true heart of your frugal homestead.

    8. Raise Dual-Purpose Livestock

    On a frugal homestead, every animal should earn its keep in more than one way. By choosing dual-purpose livestock, you maximize the return on your investment while reducing the need to buy separate animals for different jobs. This approach saves money, space, and feed—while still meeting multiple needs for your homestead.

    For example, ducks are excellent for both fresh, nutrient-rich eggs and natural pest control. They happily roam the garden eating slugs, snails, and insects—reducing the need for chemical treatments. Similarly, goats can supply fresh milk for drinking, cheese, and yogurt, while also clearing brush and weeds from hard-to-maintain areas of your property.

    Other great dual-purpose options for a frugal homestead include:

    • Chickens – Provide both eggs and meat
    • Rabbits – Great for meat production and their manure is an excellent cold fertilizer
    • Sheep – Offer meat and wool for spinning or selling
    • Geese – Supply meat, eggs, and can act as natural “watchdogs” for your property

    By selecting animals that can fill multiple roles, you’ll cut feed costs, reduce infrastructure expenses, and get more out of every resource—an essential mindset for anyone committed to frugal homesteading.

    9. Use Solar Lighting in Outbuildings

    On a frugal homestead, every dollar saved on utilities adds up. One simple way to cut costs is by installing solar-powered lighting in barns, sheds, chicken coops, and other outbuildings. These lights are inexpensive, easy to set up, and don’t rely on your home’s electrical system—perfect for remote areas of your property.

    Solar lights can keep your pathways safe at night, illuminate workspaces for evening chores, and even deter predators around animal pens. Many models come with motion sensors or timers, so you only use energy when needed, maximizing efficiency.

    Examples of practical uses:

    • Barns and tool sheds – Illuminate corners for easy access to tools and feed
    • Chicken coops – Extend daylight hours in winter to maintain egg production naturally
    • Garden paths – Provide safe walking routes without running electrical wiring
    • Outdoor workstations – Great for evening canning, repairs, or hobby projects

    Investing in solar lighting is a smart, long-term strategy for any frugal homestead, reducing both your electricity bills and your carbon footprint while keeping your homestead functional and safe.

    10. Learn Basic Animal Care Skills

    Knowing how to care for your animals yourself can save you hundreds—or even thousands—of dollars each year in vet bills. By learning basic skills like trimming hooves, checking for common health issues, administering simple medications, and handling minor injuries, you can keep your livestock healthy without overspending.

    For example:

    • Hoof trimming – Prevents lameness in goats, sheep, and cows, reducing costly vet visits
    • Vaccinations & deworming – Administering routine care yourself keeps animals disease-free
    • Minor injuries – Treat small cuts or abrasions at home instead of rushing to a vet for every scrape
    • Animal handling – Proper restraint and handling techniques reduce stress for both you and the animal, lowering the chance of accidents

    Learning these skills doesn’t require formal training; online tutorials, local homesteading groups, or even workshops at feed stores can teach you the essentials. Not only does this approach cut costs, but it also increases your confidence and independence on your frugal homestead.

    11. Reuse Glass Jars and Containers

    On a frugal homestead, every little bit of reuse helps stretch your budget. Glass jars from canning, sauces, pickles, and other condiments don’t have to be tossed—they’re perfect for multiple purposes around your homestead.

    Some practical ways to reuse glass jars include:

    • Food storage – Store dry goods like grains, beans, or spices in clean jars to keep your pantry organized
    • Seed starting – Small jars are great for sprouting seeds or starting seedlings indoors before transplanting
    • Canning and preserving – Reuse jars for your own homemade jams, sauces, or pickles, saving money on packaging
    • DIY projects – Make lanterns, soap dispensers, or craft organizers with jars to reduce the need for buying new containers
    • Gifting – Fill jars with homemade treats, bath salts, or spice mixes to give as thoughtful, low-cost gifts

    Not only does reusing glass jars reduce waste, but it also aligns perfectly with frugal homesteading principles, helping you save money while staying organized and creative.

    12. Grow Perennials

    One of the smartest strategies on a frugal homestead is to invest in plants that keep giving year after year. Perennial fruits, herbs, and vegetables not only save money on seeds and seedlings each season, but they also reduce labor and time spent replanting annual crops.

    Some great perennial options include:

    • Fruits: Strawberries, raspberries, blueberries, and apple or pear trees can produce for years with minimal upkeep.
    • Herbs: Rosemary, thyme, oregano, and chives will regrow every spring, making them a cost-effective addition to your kitchen garden.
    • Vegetables: Asparagus, rhubarb, and certain varieties of kale or artichokes provide reliable harvests without annual replanting.

    Beyond saving money, perennials build long-term sustainability on your homestead. They improve soil health, attract pollinators, and reduce the overall maintenance required each year—freeing you to focus on other homestead projects.

    By choosing perennials strategically, you’re not just cutting costs—you’re creating a resilient, productive, and self-sufficient homestead that pays off year after year.

    13. Buy in Bulk

    One of the simplest ways to save money on a frugal homestead is to buy staples in bulk whenever possible. Items like animal feed, grains, flour, sugar, rice, and beans often cost significantly less per unit when purchased in larger quantities.

    Tips for buying in bulk on a frugal homestead:

    • Storage is key: Invest in airtight containers, bins, or barrels to keep bulk items fresh and pest-free.
    • Plan ahead: Track your usage so you don’t overbuy items that may spoil before you can use them.
    • Seasonal deals: Take advantage of sales or harvest seasons when prices are lower, and stock up for the year.
    • Split bulk purchases: If storage is limited, consider sharing bulk orders with neighbors or friends to get the cost savings without crowding your space.

    Buying in bulk isn’t just about saving money—it’s about building a more efficient, self-sufficient homestead. You’ll spend less time shopping, reduce multiple trips to the store, and have essential supplies on hand when you need them, all while keeping your homestead budget in check.

    14. Repair Before Replacing

    On a frugal homestead, one of the most overlooked ways to save money is to repair items instead of immediately replacing them. Whether it’s clothing, tools, furniture, or equipment, taking the time to patch, mend, or fix can save you hundreds of dollars a year.

    Practical repair tips for a frugal homestead:

    • Clothing & Textiles: Keep a sewing kit handy to patch holes, reinforce seams, or even upcycle old clothing into new items.
    • Tools & Equipment: Sharpen blades, tighten loose parts, or replace worn handles on tools before buying new ones.
    • Furniture & Wood Projects: Minor scratches, wobbly legs, or broken hinges can often be fixed with basic woodworking skills and a few supplies.
    • Plumbing & Small Repairs: Learn simple fixes for leaky faucets, clogged drains, or loose pipes—these small skills prevent costly professional bills.

    By making repairing a habit, you not only stretch your homestead budget but also embrace a mindset of resourcefulness and sustainability. Every item you save from the landfill is a win for your wallet and the planet.

    15. Share Resources with Neighbors

    A frugal homestead isn’t just about cutting costs—it’s also about building community. One of the smartest ways to save money is to share resources with fellow homesteaders in your area.

    How sharing can help your homestead budget:

    • Equipment: Big-ticket items like tillers, livestock trailers, pressure washers, or generators can be prohibitively expensive to buy on your own. Pool resources with neighbors and rotate usage, reducing individual costs.
    • Tools & Supplies: From shovels to pruning shears, keeping a shared tool library ensures everyone has access without cluttering storage or overspending.
    • Livestock & Feed: Sometimes neighbors can split feed orders, share breeding stock, or coordinate bulk purchases of hay or grain.
    • Skills & Labor: Trade your expertise—like canning, carpentry, or animal care—for help on projects you’re less skilled at.

    Sharing resources strengthens your local homesteading network, reduces unnecessary spending, and encourages collaboration. It’s a win-win for both your wallet and your community, and it embodies the true spirit of frugal homesteading: working smarter, not harder.

    Why Frugal Homesteading Works

    Frugality isn’t about doing without—it’s about making the most of what you have. By embracing frugal homesteading hacks, you’ll not only save money but also live more sustainably, build stronger community ties, and become more self-reliant.

  • Homestead Budget 101: 5 Things You Don’t Need to Buy as a Beginner

    Homestead Budget 101: 5 Things You Don’t Need to Buy as a Beginner

    Starting your homestead is exciting, but it can also feel overwhelming—especially when every new tool, animal, or gadget seems essential. Beginners often make the mistake of overspending early, leaving them strapped for cash when the things that really matter come along. Managing your homestead budget wisely is key to building a sustainable and successful homestead. Here are 5 common areas where homesteaders overspend and smarter alternatives to save money while still getting results.

    1. Fancy Livestock Before You’re Ready

    It’s tempting to splurge on heritage chickens, rare goats, or miniature cows, but buying animals before you understand your homestead’s layout, workload, and local climate can backfire.

    Instead: Start with low-maintenance, beginner-friendly animals. For example:

    • Chickens: Start with a few hardy, easy-to-raise breeds like Rhode Island Reds or Buff Orpingtons.
    • Ducks: Start with a small flock of hardy, beginner-friendly breeds like Pekin or Khaki Campbell to learn their care without feeling overwhelmed.
    • Goats: While goats are not on my beginner friendly list. If you must, begin with a pair of standard dairy or meat goats to learn their care without feeling overwhelmed. Dwarf varieties are also available in certain breeds which is what I personally choose to raise.

    By starting small, you’ll protect your homestead budget while mastering animal care.

    2. Expensive Tools You Don’t Really Need

    High-end tractors, electric fencing systems, or specialty gardening tools might look impressive, but they’re not essential for your first year.

    Instead: Invest in multipurpose, durable, and affordable tools:

    • A good shovel, hoe, and rake can handle most garden and small farm tasks.
    • Hand tools and repurposed materials can often replace pricey gadgets for your initial setup.

    Focusing on what you’ll actually use daily helps you stick to your homestead budget and avoid unnecessary expenses.

    3. Large Garden Infrastructure

    Building huge raised beds, a greenhouse, or a complex irrigation system right away can drain your budget. Beginners often underestimate the costs and maintenance of large setups.

    Instead: Start small. Try:

    • Container gardening or a few modest raised beds.
    • DIY trellises and simple row covers to protect crops.
    • Expand gradually as you understand your garden’s needs and your local climate.

    Starting with a manageable garden keeps your homestead budget in check and ensures you can maintain it long-term.

    4. Pre-Packaged Feed or Supplements

    Many beginners overspend on premium feeds, vitamins, or supplements for their livestock. While some are necessary, much of the “extra” is marketing.

    Instead: Learn what your animals truly need and what you can produce at home. For example:

    • Supplement chickens with kitchen scraps and garden greens.
    • Mix homemade minerals for your goats or cows, adjusting for what your pasture may be lacking.
    • Rotate pastures and grow fodder to reduce feed costs.

    Keeping an eye on your feed and supplement spending protects your homestead budget while still providing healthy nutrition for your animals.

    5. “Trendy” Homestead Products

    There’s a world of shiny homesteading tools, décor, and kits that promise to make life easier—but beginners often buy them on impulse. Think artisanal soap-making kits, specialty fermenting crocks, or boutique chicken coops.

    Instead: DIY, upcycle, or borrow.

    • Repurpose containers for fermenting.
    • Build your own small chicken coop from scrap wood.
    • Start simple with soap or candle recipes before investing in fancy equipment.

    Learning to be resourceful will help you stick to your homestead budget while gaining valuable skills.

    Final Thoughts: Spend Smart, Grow Gradually

    Starting a homestead doesn’t require a huge budget—it requires planning, patience, and prioritization. By avoiding these overspending traps and focusing on essentials, you’ll save money, reduce stress, and set yourself up for long-term success.

    Remember: your homestead will grow with you, not the other way around. Start small, learn as you go, and spend where it truly matters to protect your homestead budget.

  • What to Do When Your DIY Projects Don’t Go as Planned (Hint: Embrace the Chaos)

    What to Do When Your DIY Projects Don’t Go as Planned (Hint: Embrace the Chaos)

    Let’s face it: DIY projects on the homestead are not always the Pinterest-worthy, smooth-sailing, “look how perfect this turned out!” moments we envision. Sometimes, things go hilariously wrong. You might find yourself standing in a puddle of sawdust, holding a power tool, wondering how exactly you managed to turn a simple garden shed project into a full-blown disaster. Or maybe that chicken coop you thought you’d whip up in a weekend has turned into a leaning tower of wonky wood, with more gaps than a spaghetti strainer.

    But here’s the truth: when you’re homesteading, chaos is inevitable. And while it’s easy to throw in the towel when things go awry, the real beauty of homesteading comes in embracing those failures, learning from them, and—most importantly—having a good laugh. If you’re feeling like your DIY homesteading projects are taking an unexpected turn, take a deep breath, grab a cup of coffee (or a beer, I won’t judge), and read on for some encouragement and practical advice on how to roll with the punches.

    First Things First: Take a Step Back (and Maybe a Deep Breath

    It’s easy to get frustrated when your latest homesteading project isn’t going according to plan. Whether you’re trying to build a chicken coop, start a garden bed, or install a new fence, things rarely go off without a hitch. If your DIY project is starting to look more like a horror show than a success story, step back.

    Take a breather. Get away from the project for a bit and give yourself a moment to clear your mind. Sometimes, a fresh perspective (and a little bit of space) is all it takes to see the solution. I once spent two days trying to build my brooder shed (don’t ask), only to realize I had the walls upside down.

    Pro Tip: If you’re working on something more intense like fencing or building structures, take breaks and pace yourself. That way, you’ll avoid burnout and the temptation to “rush through it” (which, as we all know, leads to more chaos).

    Learn to Laugh at Your Mistakes (They Make the Best Stories)

    Okay, maybe you’ve spent days building a coop, only to realize the door is on backwards. Or perhaps you tried to fix a leaky faucet and somehow flooded the entire kitchen instead. It happens to the best of us. So, instead of letting it get you down, embrace the comedy of the situation. After all, you’re likely to look back on the disaster and laugh.

    Case in point: I once tried to build a garden trellis using a combination of left over gazebo poles and wire. I meant to create a sturdy framework for my pickling cucumbers, but ended up with a lopsided, wobbly structure that looked more like a half-hearted attempt at modern art. I had to embrace the fact that it wasn’t going to win any design awards, but hey—it worked! My cucumbers climbed the structure just fine. Sometimes, the beauty of DIY is that it’s uniquely imperfect, and that’s okay.

    Pro Tip: When things go wrong, share the experience! Posting funny stories or photos of your homesteading fails online will not only make you feel better, but you might just inspire someone else who’s dealing with a similar disaster. Trust me, you’re not the only one who’s ever had a “what was I thinking?” moment!

    DIY Fail? It’s Actually a Learning Opportunity (Really!)

    While it’s tempting to call it quits when a project doesn’t go as planned, remember that every mistake is a learning opportunity. No one gets everything perfect the first time (or the second or third, let’s be real). The key is to learn from the experience and adjust for next time.

    I had an epic fail while building a raised garden bed one summer. The boards I used were too short, which led to uneven sides and, well, a very weirdly shaped bed. After much frustration and some choice words, I realized that this was an opportunity to learn how to make better measurements. (I also learned to triple-check my math next time, but that’s another story.) In the end, I fixed the raised bed with a bit of extra wood and a lot of patience.

    Pro Tip: Keep a notebook (or digital file) of lessons learned from your DIY projects. This way, you can refer to it next time you’re tackling something similar. Write down measurements, materials, and tips to avoid repeating the same mistakes.

    Ask for Help (Yes, Even If You’re a “DIY Master”)

    Sometimes, our pride gets in the way. “I can handle this on my own,” we think, even when things are clearly falling apart around us. But here’s the thing: you don’t have to do it alone. Whether you need an extra set of hands, some advice from an expert, or a quick tutorial, asking for help doesn’t make you less of a homesteader—it makes you a smarter one.

    If something is outside of your skill set, don’t hesitate to call in an expert or ask a fellow homesteader for help. It’s a lot less stressful and will save you time and frustration.

    Pro Tip: Find homesteading communities online or locally. People love to share advice and offer support, and you’d be surprised how willing others are to help when you’re stuck. Plus, those communities often have a good sense of humor about DIY disasters!

    Embrace the Chaos (Because Perfection is Overrated)

    Here’s a truth bomb: homesteading is messy. Whether it’s a haphazard pile of firewood or a crooked fence that you somehow can’t bring yourself to fix, things rarely go according to plan—and that’s okay. Perfection is overrated anyway. It’s the imperfect, quirky nature of DIY that makes homesteading so rewarding.

    I’ve had more than one garden project that didn’t go according to plan. One time, I planted my tomato plants a little too close together (oops), and instead of the neat row of plants I envisioned, I ended up with a tangle of vines. But you know what? It didn’t matter. The tomatoes grew just fine, and the viney chaos made it all the more charming. Plus, the kids loved trying to navigate the jungle to pick the ripe ones!

    Pro Tip: Instead of chasing perfection, focus on functionality and enjoyment. Is your chicken coop a bit crooked? Is your garden bed a little lopsided? If it works and your animals are happy, that’s all that matters. Let go of the need for everything to be “picture perfect.”

    Fix It, Learn From It, and Keep Going

    It’s normal to feel like quitting when things don’t go right, but remember, it’s all part of the process. Some of your best projects will come from fixing what went wrong the first time. Take the opportunity to roll up your sleeves, adjust your plans, and keep going. One of the greatest aspects of homesteading is problem-solving—and let’s face it, sometimes the most creative solutions come from those “uh-oh” moments.

    Final Thoughts: DIY Projects Are About the Journey, Not the Destination

    So, the next time your DIY project goes completely off the rails, remember to embrace the chaos. Laugh at your mistakes, learn from them, and keep moving forward. After all, homesteading is all about adapting to whatever life throws your way—whether it’s a wonky shed or an overly enthusiastic goat chewing through your garden plans.

    At the end of the day, these imperfect projects are what make the experience memorable and fun. And you never know—your “failed” DIY project might turn into your proudest accomplishment, even if it’s a little wobbly around the edges.

  • How I Grow with the Homesteading Seasons: A Year on My Pacific Northwest Homestead

    How I Grow with the Homesteading Seasons: A Year on My Pacific Northwest Homestead

    Homesteading isn’t just a lifestyle—it’s a rhythm that flows with the natural seasons. On my small homestead nestled in the Pacific Northwest, every season brings a new set of responsibilities, challenges, and joys. Understanding the homesteading seasons is key to building a sustainable and fulfilling life close to the land.

    Whether you’re just starting out or deep into your homesteading journey, knowing what to expect from each season can help you plan ahead, reduce burnout, and enjoy the process more fully. Here’s what life looks like on my homestead, season by season.

    Winter: Rest, Reset, and Indoor Growing

    Winter is the slowest season on our homestead—and we embrace it. While snow and frost blanket the garden beds, this season gives us a chance to rest and reflect. Our animals require basic care: feeding, water checks (especially in freezing temps), and shelter maintenance. But compared to summer, their needs are minimal.

    It’s also the perfect time for planning. I spend my evenings with seed catalogs, budgeting for the year ahead, and experimenting with indoor growing methods like microgreens and herbs under grow lights. Understanding the homesteading seasons means appreciating this necessary lull—winter is for hibernation, both for nature and the homesteader.

    Spring: New Life and New Beginnings

    Spring is when everything bursts into action. The garden begins to wake up, and so do the projects. Depending on your setup, you might be incubating eggs, bringing home new chicks or ducklings, or watching for signs of labor in pregnant goats or sheep from the previous year’s breeding.

    Spring is also a busy time for planting. Soil preparation, composting, and succession sowing keep us busy as we try to get ahead before the summer heat hits. On my homestead, this homesteading season becomes very real in spring—it’s a time of energy and motion, and the farm feels alive again.

    Summer: Full Tilt Homesteading

    Summer is the heart of the homestead hustle. The garden is in full swing, animals need extra attention (especially in the heat), and the harvests start rolling in. If you raise meat animals, this is also a time when harvesting may begin for broilers, rabbits, or even ducks.

    Preservation kicks into high gear—canning, fermenting, dehydrating, freezing. It’s not unusual to be up late boiling jars or checking the dehydrator while making dinner. On my homestead, we lean into the long days and try to keep pace with nature’s abundance.

    Understanding the homesteading seasons helps keep burnout at bay. Summer is busy, yes—but it’s also deeply rewarding.

    Fall: The Big Shift

    Fall is the season of transition and preparation. The weather begins to cool, and if you’ve planted a fall garden, it’s a good time to enjoy cool-weather crops like kale, carrots, and broccoli.

    For us, fall is also butchering season. Our meat birds are processed, and we begin preparations for butchering our hogs as we near the colder months. It’s bittersweet but necessary, and part of honoring the cycle of life on the homestead.

    Fall is also a time to clean up the garden, mend fences, and prepare animal shelters for the cold months ahead. For those who follow the homesteading seasons, fall is when we start to wind down, stock up and prepare to hunker down for winter.

    End of Fall into Winter: The Final Push

    The end of fall into early winter is hog butchering season on our homestead. We wait until the temperatures drop to help keep the meat safe during processing. Freezers are filled, lard is rendered, and smoked meats are prepped for the pantry.

    This time of year wraps up our homesteading seasons and reminds us of the importance of planning, pacing, and working with the natural cycles. We slow down once again and welcome the restful rhythm of winter.

    Final Thoughts

    Every homesteader’s year will look a little different depending on your climate, goals, and setup. But understanding and honoring the homesteading seasons can help you build a more peaceful, productive, and balanced life on your land. Whether it’s seed-starting in March, harvesting in August, or butchering in November—each season has a purpose.

    On my homestead, I’ve learned to grow with the seasons, not against them—and that mindset has made all the difference.

  • How to Decide What Animals Are Right for Your Small Farm

    How to Decide What Animals Are Right for Your Small Farm

    Starting a small farm is an exciting journey, and one of the biggest decisions you’ll make is choosing which animals to raise. From chickens to goats to pigs, each animal offers unique benefits and comes with its own set of needs. But how do you decide which animals are the best fit for your farm?  

    Whether you’re looking for eggs, milk, meat, or simply a more sustainable lifestyle, this guide will help you evaluate your goals, resources, and capabilities to choose the perfect animals for your small farm.  

    Start with Your Farm’s Goals

    Before you choose any animals, consider what you want to achieve with your small farm.  

    Eggs or Dairy: If your goal is a steady supply of eggs or milk, chickens or dairy goats may be a good place to start.  

    Meat Production: If you’re looking to raise your own meat, animals like pigs, rabbits, or sheep might be ideal.  

    Land Management: For clearing brush or improving pastures, goats or grazing animals like sheep or cows can be invaluable.  

    Companionship and Hobby Farming: If your primary goal is to enjoy the experience of caring for animals, chickens or ducks are fun and beginner-friendly.  

    Understanding your goals will narrow down your options and help you choose animals that align with your vision.  

    Assess Your Land and Space  

    The size and quality of your land will play a major role in determining which animals you can raise.  

    Small Spaces: If you only have a small backyard or limited acreage, chickens, rabbits, or ducks are great options since they don’t require much space.  

    Moderate Space: With a few acres, you can consider goats, pigs, or sheep. These animals need more room to roam and graze.  

    Larger Acreage: If you have 10+ acres, you can think about larger livestock like cows or horses. These animals require significant space and grazing land to thrive.  

    Also, consider the quality of your land. Goats, for example, are excellent for hilly or rocky terrain, while sheep prefer lush pastures.  

    Factor in Time and Labor 

    Different animals require different levels of care and time commitment.  

    Low Maintenance: Chickens, ducks, and rabbits are relatively low-maintenance animals. They need daily feeding, water, and a clean coop, but their care is manageable for beginners or busy schedules.  

    Moderate Maintenance: Goats and sheep require more attention, including proper fencing, health checks, and occasional hoof trimming.  

    High Maintenance: Larger animals like cows and horses need significant time for feeding, grooming, and pasture management.  

    Be realistic about how much time and energy you can dedicate to your animals each day.  

    Consider Your Budget  

    The cost of raising animals can vary widely depending on the species and your setup.  

    Initial Costs: Consider the price of purchasing the animals, building housing, and setting up fencing or infrastructure. For example, a chicken coop is much cheaper than a barn for cows.  

    Ongoing Costs: Factor in feed, bedding, veterinary care, and supplies. Larger animals like cows and pigs will eat much more than chickens or rabbits, leading to higher feed costs.  

    Unexpected Expenses: Be prepared for emergencies, like vet visits or equipment repairs, that can add to your overall costs.  

    Choose animals that fit within your budget, especially if you’re just starting out.  

    Research Local Regulations

    Before you bring animals to your farm, check local zoning laws and regulations.  

    – Some areas have restrictions on livestock, especially in suburban or urban locations.  

    – You may need permits for certain animals or be required to follow specific guidelines for housing and fencing.  

    – Keep in mind that roosters, for example, can be noisy and may not be allowed in some neighborhoods.  

    Understanding the rules in your area will save you from potential fines or the heartbreak of having to rehome your animals.  

    Evaluate Your Climate  

    Not all animals thrive in every climate, so it’s essential to consider your local weather conditions.  

    Cold Climates: Animals like sheep, cows, and certain chicken breeds are hardy and can handle cold winters with proper shelter.  

    Hot Climates: Goats, pigs, and heat-tolerant chickens like Leghorns do well in warmer regions.  

    Extreme Weather: If you live in an area with extreme heat, cold, or storms, invest in sturdy shelters and infrastructure to protect your animals.  

    Choose animals that are well-suited to your climate to ensure their health and well-being.  

    Start Small 

    If you’re new to farming, it’s best to start with one or two types of animals and expand as you gain experience.  

    Chickens: A small flock of hens is a great way to begin. They’re easy to care for, provide fresh eggs, and can help control pests in your garden.  

    Rabbits: These quiet, low-maintenance animals are excellent for small spaces and can provide meat or fertilizer for your garden.  

    Goats: Dairy goats are a good next step if you’re ready to tackle milking and want a steady supply of milk for your family.  

    Starting small allows you to learn the ropes without becoming overwhelmed.  

    Learn About Each Animal’s Needs

    Do your homework before bringing any animals to your farm.  

    Housing: What kind of shelter do they need? Chickens require a secure coop, while goats need a barn or covered pen.  

    Fencing: Some animals, like goats, are escape artists and require strong, well-designed fencing.  

    Diet: Learn about each animal’s nutritional requirements and plan for feed and supplements.  

    Understanding the specific needs of your chosen animals will set you up for success and keep your animals happy and healthy.  

    Think About Your Future Plans 

    As you choose animals, consider how they fit into your long-term vision for your farm.  

    – Do you want to expand your operation in the future?  

    – Are you raising animals for personal use or planning to sell products like eggs, milk, or meat?  

    – Will your current infrastructure support additional animals as your farm grows?  

    Planning ahead will help you make choices that align with your goals and prevent unnecessary expenses down the line.  

    Trust Your Passion 

    Finally, let your passion guide your decision. Farming is hard work, and it’s much more enjoyable when you’re caring for animals you truly love.  

    – Do you dream of fresh eggs every morning? Start with chickens.  

    – Are you fascinated by the idea of making your own cheese? Consider dairy goats or cows.  

    – Do you love watching animals graze in your fields? Sheep or cattle might be the perfect choice.  

    The animals you choose should bring you joy and fulfillment, not just practicality.  

    Final Thoughts

    Choosing the right animals for your small farm is a deeply personal decision that depends on your goals, resources, and lifestyle. By starting with clear priorities, assessing your land and budget, and doing thorough research, you can build a farm that meets your needs and brings you lasting satisfaction.  

    Remember, there’s no “perfect” farm setup—what works for one family may not work for another. Start small, stay flexible, and enjoy the journey of learning and growing alongside your animals.  

    What animals do you have on your small farm? Or what are you planning to raise? Share your thoughts and experiences in the comments below—I’d love to hear from you!

  • Homestead Lasagna Recipe – From Our Farm to Your Table

    Homestead Lasagna Recipe – From Our Farm to Your Table

    There’s something magical about making a meal completely from scratch. Not just scratch, but your scratch—your eggs, your milk, your cheese, your beef, your herbs. A homestead lasagna recipe like this doesn’t just fill your belly—it tells a story. Every layer is a little piece of your hard work and love from the homestead.

    When I pull a bubbling lasagna from the oven, I’m not just smelling dinner—I’m smelling fresh basil from my garden, beef from the cow we raised last year, and the creamy tang of chevre cheese made from our own goats’ milk. It’s better for you, better for your family, and I swear it tastes better because you know where every ingredient came from. Today, I’m sharing my homestead lasagna recipe—complete with homemade egg noodles, a fresh tomato-basil sauce, goat cheese, and rich beef from our own land.

    Homemade Egg Noodles

    Ingredients:

    • 3 cups all-purpose flour (or fresh milled if you have it)
    • 4 large eggs (fresh from the coop)
    • 1 teaspoon salt
    • 1–2 tablespoons water (as needed)

    Instructions:

    1. On a clean counter or in a large bowl, make a mound of flour and create a well in the center.
    2. Crack the eggs into the well and sprinkle in salt.
    3. Using a fork, gently beat the eggs, slowly incorporating the flour from the sides.
    4. Knead the dough by hand for 8–10 minutes until smooth and elastic. Add water if it’s too dry.
    5. Wrap in a towel and let rest for 30 minutes.
    6. Roll out into thin sheets and cut to fit your lasagna pan. Dust with flour to prevent sticking. (I used my kitchen aide attachment.)

    Fresh Tomato & Basil Sauce

    Ingredients:

    • 10–12 ripe tomatoes (about 4 lbs), peeled and chopped
    • 4 cloves garlic, minced
    • 1 medium onion, diced
    • 1/4 cup olive oil
    • 1 cup fresh basil leaves, chopped
    • 1 teaspoon salt
    • 1/2 teaspoon pepper
    • 1 teaspoon sugar (optional, to cut acidity)

    Instructions:

    1. In a large pot, heat olive oil over medium heat. Sauté onions until soft, about 5 minutes.
    2. Add garlic and cook for 1 minute, stirring so it doesn’t burn.
    3. Add tomatoes, salt, pepper, and sugar if using.
    4. Simmer uncovered for 30–40 minutes, stirring occasionally, until thickened.
    5. Stir in fresh basil at the end for maximum flavor.
    6. Blend until smooth.

    Pro Tip: If your short on time, throw everything in a crock pot and cook on low overnight 😉

    Chevre Goat Cheese

    This is the recipe I used for my goat cheese, and it turned out beautifully. It’s not too tricky, but if you’re new to cheesemaking, I recommend starting with a simple farmer’s cheese first. Once you get the hang of it, making your own goat cheese will feel like second nature

    https://cheesemaking.com/products/chevre-goat-cheese-recipe

    Lasagna Assembly

    Ingredients:

    • Fresh egg noodles
    • Tomato & basil sauce
    • 3 cups goat cheese (I added an egg and spread like I would ricotta)
    • 2 cups shredded mozzarella cheese
    • 1 lb cooked ground beef (from our home-raised cow)
    • 1/2 cup shredded cheese of your choice for topping

    Instructions:

    1. Preheat oven to 375°F (190°C).
    2. In a skillet, brown the beef until fully cooked. Drain excess fat.
    3. In a 9×13 baking dish, spread a thin layer of sauce on the bottom.
    4. Lay down your first layer of noodles.
    5. Spread goat cheese evenly, sprinkle beef and add sauce.
    6. Repeat layers until you reach the top of the pan, ending with sauce and shredded cheese of choice.
    7. Cover with foil and bake for 30 minutes.
    8. Remove foil and bake an additional 15 minutes, until cheese is golden and bubbly.
    9. Let rest 10 minutes before slicing so it holds its shape.

    Why This Homestead Lasagna Recipe Just Tastes Better

    This homestead lasagna recipe isn’t just about the food—it’s about the connection to the ingredients. From collecting the eggs to milking the goats, from picking basil, every step adds a layer of meaning to the dish. You know exactly where it came from, and you can taste the difference in every bite.

    And while it might take more time than pulling a frozen box from the store, that’s the beauty of homesteading—you’re not just feeding your family, you’re nourishing them with real food and memories they’ll carry forever.

    So pour yourself a glass of sweet tea (or make a mixed drink), sit down with your loved ones, and enjoy a slice of your hard work.

  • Why Being an Independent Woman is Hard (And It’s Not What You Think

    Why Being an Independent Woman is Hard (And It’s Not What You Think

    When people talk about being an independent woman, the conversation often revolves around strength, self-sufficiency, and freedom. Society applauds women who juggle careers, finances, relationships, and personal growth with grace. And while independence is empowering, there’s another side of the story that isn’t often discussed: the mental strain of carrying it all on your own.  

    Contrary to popular belief, the hardest part of being an independent woman isn’t the physical labor or even the responsibility of making decisions. It’s the emotional and mental load of doing everything by yourself—day in, day out. It’s the quiet battles, the invisible burdens, and the exhaustion of never having someone to share the weight.  

    Let’s take a closer look at why independence, while rewarding, can also feel incredibly heavy.  

    The Mental Load of Always Being “On”

    Independence often requires constant vigilance and planning. You’re the one making all the decisions, big and small—whether it’s managing your finances, planning meals, or solving unexpected problems. There’s no partner or team to fall back on when you’re overwhelmed.  

    This mental load—the invisible work of thinking, organizing, and worrying—can be exhausting. It’s not just about completing tasks but also about anticipating needs and preparing for what’s next. And when you’re the only one doing it, there’s no escape from the constant mental to-do list.  

    The Emotional Toll of Being Your Own Support System 

    As an independent woman, you pride yourself on being strong and self-reliant. But that often means you’re the one cheering yourself on when times get tough. There’s no shoulder to cry on after a bad day, no one to remind you that you’re doing a good job when you’re feeling unsure.  

    While independence is empowering, it can also be lonely. You carry the weight of your own emotions, struggles, and triumphs, often without anyone to share them with. The pressure to stay resilient, even when you’re struggling internally, can take a toll on your mental health.  

    Decision Fatigue Is Real 

    When you’re independent, every decision—big or small—rests on your shoulders. What career path should you take? Should you invest in this or save for that? What’s the best way to handle a difficult situation? Even simple choices, like what to eat for dinner, can feel draining after a long day.  

    Decision fatigue is real, and it’s something independent women face constantly. Without someone to share the load or offer input, the weight of every choice becomes heavier.  

    The Pressure to Do It All (And Do It Perfectly) 

    There’s a societal expectation that independent women should be able to do it all: excel at work, maintain a social life, keep a tidy home, stay fit, and somehow have time for self-care. This pressure to perform at a high level in every area of life can feel overwhelming.  

    Even though you know perfection is impossible, the constant push to meet unrealistic standards can leave you feeling inadequate or burnt out. The mental strain of trying to balance it all—without letting anything slip—is a heavy burden to bear.  

    The Fear of Failure (Because There’s No Backup Plan)  

    When you’re independent, failure can feel even more intimidating. If something goes wrong, there’s no safety net or backup plan. You’re the one responsible for picking up the pieces, regrouping, and moving forward.  

    This fear of failure can create a constant undercurrent of anxiety. Even when you’re succeeding, the knowledge that you’re entirely on your own can make it hard to relax and enjoy the moment.  

    The Unseen Effort Behind the Independence 

    People often admire independent women for their strength and resilience, but they rarely see the effort it takes to maintain that independence. From managing finances to maintaining your home to staying on top of your health, being independent requires consistent effort and discipline.  

    It’s not glamorous or easy. Behind every success is a woman who’s working hard to keep all the pieces of her life in place—often without any help or recognition.  

    Independence Can Feel Isolating  

    While independence brings freedom, it can also create a sense of isolation. When you’re used to relying on yourself, it’s easy to pull away from others—whether out of pride, habit, or fear of appearing vulnerable.  

    Over time, this self-reliance can make it harder to build meaningful connections or ask for help when you truly need it. The result? A cycle of loneliness and emotional exhaustion that’s hard to break.  

    How to Lighten the Load

    If you’re an independent woman feeling the weight of it all, know that you don’t have to carry everything alone. Here are a five ways to ease the mental and emotional strain:  

    1. Set Boundaries: You don’t have to say yes to everything. Protect your time and energy by setting clear boundaries.  

    2. Ask for Help: Independence doesn’t mean you have to do everything yourself. Lean on friends, family, or professionals when you need support.  

    3. Prioritize Self-Care: Take time to rest, recharge, and do things that bring you joy. You can’t pour from an empty cup.  

    4. Let Go of Perfection: Embrace the idea that “good enough” is perfectly fine. You don’t have to excel at everything.  

    5. Build a Support Network: Surround yourself with people who understand and uplift you. Having a tribe makes the journey easier.  

    Final Thoughts  

    Being an independent woman is both empowering and challenging. While it brings freedom and self-sufficiency, it also comes with an invisible mental load that’s easy to overlook.  

    It’s important to recognize that independence doesn’t mean doing everything alone. Asking for help, setting boundaries, and prioritizing your well-being are just as important as achieving your goals. After all, strength isn’t about how much you can carry—it’s about knowing when to set the load down.  

    If you’re an independent woman feeling the strain, remember: you’re not alone, and it’s okay to take a step back. Share your thoughts or tips in the comments—I’d love to hear how you navigate the challenges of independence.

  • How to Preserve Your Harvest Like a Boss

    How to Preserve Your Harvest Like a Boss

    Ah, the harvest. It’s the time of year when your garden (or small farm, or backyard plot of land that you’re totally pretending is a small farm) is overflowing with fruits, vegetables, and herbs. You’ve worked hard all season, and now you’re staring down a bounty that might just rival the best of them. But what do you do with all of that glorious produce before it turns into a wilty mess?

    Enter the world of preserving. Whether you’re canning, freezing, dehydrating, or pickling, preserving your harvest is like the ultimate way to give your summer garden a second life—in winter. You can enjoy those homegrown tomatoes, cucumbers, and berries long after the growing season has ended. But here’s the kicker: preserving your harvest is more than just a fun weekend activity. It’s a workout, a battle of willpower, and a test of endurance. And trust us, by the time you’re done, you’ll have earned every jar of jam.

    Ready to preserve your harvest like a boss? Let’s dive in.

    The “Canning Workout” Is Real (and It’ll Test Your Patience)

    You thought canning was all about “just popping some lids on jars and calling it a day,” right? Think again. Canning is a full-body workout. From lifting 50-pound bags of tomatoes to sterilizing jars (which requires you to stand in front of a hot, steaming pot for what feels like hours), you’ll get a workout that leaves you feeling like you just finished a marathon—except instead of crossing the finish line, you’re left with a kitchen covered in sticky syrup and a dozen jars of peaches that need labeling.

    After a long canning session, your arms already feel like jelly from lifting all those full jars in and out of the canner. Then comes the final step—lining up your shiny jars in the pantry like an army of glass soldiers, ready to help you tackle the winter months.

    After hours of chopping mountains of veggies and stirring pots of simmering sauce, your hands are cramped, your arms ache, and you’re wondering if this counts as your workout for the day. But when you pop open that jar of rich, homemade tomato sauce in the middle of January, every sore muscle feels worth it.

    Pro Tip: Try enlisting the help of your kids, spouse, or neighbors. The more hands, the less chance of you actually pulling a muscle in the middle of a canning session.

    Preserving Is a Marathon, Not a Sprint

    When you think about preserving your harvest, it’s easy to picture a one-day project, but oh no, my friend. This is not a “weekend project” that’s done in an afternoon. This is a multi-day, multi-week, full-on operation. Canning, pickling, and freezing involve multiple stages: washing, peeling, chopping, boiling, and—don’t forget—the actual preserving process. You will be spending so much time in the kitchen, your kitchen timer will become your new best friend.

    Let’s break it down: You might start by blanching peas, then move on to chopping strawberries for jam, followed by making a huge pot of pickled beets that has to simmer for what feels like an eternity. And by the time you’re finally through the whole process, you’ll realize you’ve spent the entire day just getting the food ready for preserving.

    Yes. Yes, you did.

    Pro Tip: Break up the work over a few days. Tackle different crops on different days so you don’t feel like you’re drowning in jars of food (and emotions). It’s a marathon, not a sprint.

    You’ll Develop a Love-Hate Relationship with Your Freezer

    Ah, the freezer—your trusty companion in the preserving process. Whether you’re freezing herbs, berries, or entire meals (hello, freezer meals!), the freezer becomes a lifeline for extending the life of your harvest. But with great freezer space comes great responsibility. ( That’s how that saying goes…right?)

    You’ll soon discover that the freezer is a magical place, but one that requires a Tetris-like ability to organize. You’ll find yourself stacking and re-stacking frozen bags of peas, green beans, and berries like a pro, constantly trying to squeeze one more item in, all while hoping you won’t accidentally forget about that bag of corn you froze two years ago. (Spoiler alert: You probably will forget it, but that’s okay. It’s probably fine.)

    Pro Tip: Label everything. Seriously. Write down the date you froze it and what it is. Extra points if you make a list to put on the outside of your freezer so you know what’s in it!

    You’ll Have a “Canning Party” (But It’s Really Just You, Your Stove, and a Lot of Snacks)

    You’ve heard of a “potluck,” but how about a “canning party”? Okay, so maybe a canning party sounds like a fantasy. Maybe it’s just you, your giant stockpot, and your bestie (who happens to be your spouse) slaving away in the kitchen, but hey, that’s a party too, right?

    The beauty of canning is that it doesn’t require much—just you, your produce, and your undying determination. You’ll find that after a few hours of chopping and stirring, the only thing that keeps you going is the snacks you’ve brought to the table. We’re talking chocolate, chips, and maybe a glass of wine (if you’re feeling extra fancy). It’s the perfect combination of work and reward.

    And if you’re lucky, you might even get a “canning cheerleader” who runs in and out of the kitchen, bringing you refills of iced tea and high-fiving you for every jar sealed. That’s what we call a canning party—homestead style.

    Pro Tip: If you want to really make it a party, invite some friends over to help, and let them think they’re doing the work. If they don’t know the joy of “boiling water and jars” yet, it’s your chance to introduce them to the magic of preserving.

    You’ll Have Jars Everywhere (And You’ll Love It)

    After a successful canning or preserving session, you’ll realize that your kitchen now looks like a glass jar convention. Everywhere you turn, there’s a jar. Jars in the fridge. Jars on the counters. Jars in the pantry. It’s a beautiful, jar-filled chaos, and you’re living for it. It’s the sign that you’ve conquered the harvest and are ready to face the winter like a true homesteading champion.

    And yes, there will be a moment when you open the pantry and realize you’re actually running out of space. But that’s a problem for future you. For now, you’re basking in the glory of all those beautifully sealed jars filled with your hard-earned bounty.

    Pro Tip: Organize your jars in a way that makes you feel like a proud homesteader, like by color or type of food. You’ll want to be able to grab a jar of apple butter without having to dig through 16 jars of canned tomatoes first.

    Final Thoughts: It’s Totally Worth It (But You’ll Need a Nap)

    Preserving your harvest isn’t for the faint of heart, but the payoff is worth every drop of sweat. It’s a lot of work, it’s messy, and it’ll test your patience—but at the end of the day, you’ve got jars of homemade goodies that will remind you of summer, even in the coldest months.

    So grab your canning jars, dust off your freezer, and get to work. You’ve got this. And hey, don’t forget to take a break for a snack—after all, canning is just as much about enjoying the fruits of your labor as it is about the actual process.

    Happy preserving, and remember: every jar is a badge of honor!

  • Turn Your Homestead Animals Into Income: 7 Side Hustles You Can Start Today

    Turn Your Homestead Animals Into Income: 7 Side Hustles You Can Start Today

    Homesteading isn’t just about saving money—it can also be a way to make money! Whether you’re trying to pay for feed, fund future projects, or build a part-time income stream, your animals can do more than just provide food for your table. They can also help support your homestead financially.Here are 7 creative and practical ways to turn your animals into a profitable side hustle—no giant farm required.

    1. Sell Fresh Eggs

    Let’s start with the obvious one—eggs are selling like crazy. People are sick of the unreliable grocery stores and looking for farm fresh. So if you have a flock of laying hens or ducks, you can easily sell extra eggs to friends, neighbors, or at your local farmers market.

    Tips to boost egg sales:

    • Use a cute egg carton label with your farm name.( Mine say “Becky’s FarmFresh Butt Nuggets)
    • Offer delivery or pickup once a week.

    Educate people on why your eggs are better (free-range, no soy, etc.). Or if you have ducks you can explain the nutrient differences compared to chickens. If you don’t know check out this article.

    2. Hatch and Sell Chicks or Ducklings

    If you have a rooster or drake and an incubator (or a broody mama), you’re in business! Selling chicks or ducklings is an excellent way to earn extra cash, especially in spring.

    People are always looking for:

    • Laying breeds (like Buff Orpingtons or Khaki Campbells)
    • Meat birds
    • Rare or heritage breeds

    Just make sure you follow any local laws and sell at a few weeks old if your customers aren’t equipped for brooding.

    3. Sell Compost or Aged Manure

    Chicken, goat, rabbit, and even duck manure makes amazing compost for gardeners—and people will pay for it!

    If you compost it properly and offer it by the bag or scoop, you can turn waste into a steady income stream, especially in the spring and summer months when gardens are going strong.

    4. Offer Farm-Fresh Fertilized Eggs

    Fertilized eggs are in high demand for folks who want to hatch their own birds at home. This is an easy add-on if you already have a rooster or drake with your flock.

    Make sure to:

    • Collect and store eggs carefully.
    • Label them clearly as fertilized and hatching-ready.
    • Ship or deliver them quickly to maintain viability.

    5. Sell Animal Fiber (Goats, Rabbits, Alpacas)

    If you have fiber animals like Angora rabbits or goats, you can sell their fiber raw, washed, or even spun into yarn. Fiber arts are a booming niche, and people love buying natural products directly from small farms.

    Even small amounts can sell for a premium if you market them right.

    6. Rent Out Your Animals for Events or Education

    This one’s a bit outside the box—but highly profitable! Some people are willing to pay for:

    • Mobile petting zoos
    • Educational visits to schools or libraries
    • Goat yoga (yes, it’s a real thing!)
    • Seasonal farm photo shoots

    If your animals are friendly and well-socialized, you can turn them into local celebrities and charge for their time.

    7. Sell Value-Added Products

    Take what your animals give you and turn it into something more valuable:

    • Make and sell homemade soaps with goat milk
    • Sell egg-based baked goods (check local laws first)
    • Package and sell dehydrated dog treats made from farm-raised meat

    The more unique and branded your product is, the better it will sell!

    Bonus Tip: Share Your Journey Online

    Document your homesteading life on social media, YouTube, or a blog. You’d be surprised how many people want to learn from you—and that audience can eventually become a source of income through affiliate links, digital products, or courses.

    Final Thoughts

    You don’t need a huge farm to make money with animals—you just need a little creativity and the willingness to hustle. Whether you’re selling eggs or hosting goat yoga, these small income streams can add up and help support the lifestyle you love.

    Start with one idea, test it out, and watch your homestead go from hobby to hustle.