Tag: homesteading

  • How to Raise Chickens on a Budget: A Beginner’s Guide

    How to Raise Chickens on a Budget: A Beginner’s Guide

    Raising chickens is one of the most rewarding things you can do on a homestead—fresh eggs, natural pest control, and endless entertainment! But if you’ve been holding off because you’re worried about the cost, we’ve got good news: you can absolutely raise chickens without breaking the bank.

    With a little creativity and planning, it’s possible to start and maintain a healthy flock on a tight budget. Here’s how to do it:

    Start Small and Smart

    You don’t need a massive flock to get started. Begin with 3–6 hens—enough to give you regular eggs but not so many that feed and housing costs get overwhelming. Many beginners also choose to skip the rooster if they’re not planning to hatch eggs (and want to avoid noise complaints!).

    Build Your Own Coop (or Upcycle One)

    Coops can get expensive fast—some premade ones cost hundreds of dollars. But chickens don’t care about fancy. Use scrap wood, pallets, or even an old shed to build your own coop. Check local classifieds or Facebook Marketplace for free or cheap materials—or even an unused dog house you can convert!Just make sure it’s predator-proof, dry, and well-ventilated.

    Buy Chicks from Local Sources

    Hatcheries are great, but you might find better prices buying chicks locally—especially from farm swaps, feed stores, or other homesteaders. Some people even give away extra chicks for free or cheap in spring.

    Bonus tip: Don’t go overboard with rare or fancy breeds if you’re on a budget. Stick with hardy, reliable layers like Rhode Island Reds, Australorps, or Buff Orpingtons.

    Feed Them Smarter

    Feed can be one of the biggest ongoing costs—but there are ways to slash that bill:

    • Ferment your feed (it stretches farther and improves digestion).
    • Give kitchen and garden scraps (they love veggie peels, bread ends, and more).
    • Let them free-range when safe to supplement their diet with bugs and greens.
    • Grow your own feed, like sunflowers, pumpkins, and greens.

     Use DIY Waterers and Feeders

    You don’t need expensive feeders or waterers. A 5-gallon bucket and a few nipples or PVC pipe can make a perfect gravity-fed waterer. Same goes for feeders—there are tons of easy, low-cost DIY tutorials out there.

    Skip the Heat Lamp (If You Can)

    If you’re raising chicks in spring or summer and can brood them inside, you might not need a heat lamp running 24/7. A well-insulated brooder with a heating pad or a safe radiant heater can cost less to run and be safer overall.

    Keep It Clean to Avoid Medical Expenses

    Healthy chickens = fewer expenses. Keep their coop clean, dry, and well-ventilated to avoid disease. Give them grit, oyster shell, and fresh water. A little prevention goes a long way toward saving money down the road.

    Barter with Other Homesteaders

    Need a rooster? Extra feed? Materials for a coop? Try trading! Many homesteaders love to barter, and you might be able to swap eggs, labor, or produce for what you need. Check local homesteading or farming groups online.

    Reuse What You Have

    Before you buy anything, look around your property. Can you turn an old dog crate into a brooder? Repurpose old fence posts for a chicken run? Use leftover wire for a predator screen? Homesteading on a budget is all about creativity.

    Let Your Chickens Work for You

    Chickens don’t just give you eggs—they’re also great composters, pest controllers, and tillers. Let them help in the garden, turn compost, and reduce your need for pesticides or fertilizers. That’s money saved across your whole homestead!

    Final Thoughts

    You don’t need a lot of money to raise happy, productive chickens. With a few frugal hacks and a little elbow grease, you can build a thriving flock that earns its keep and brings joy to your homestead.

    Start simple, stay resourceful, and enjoy every quirky, egg-laying minute of it!

  • What to Do when your garden looks like a jungle(without giving up and moving to the city)

    What to Do when your garden looks like a jungle(without giving up and moving to the city)

    Let’s face it—gardening isn’t always as picturesque as the Instagram-perfect photos you see online. Sometimes, despite your best intentions, your garden transforms into something that resembles a jungle. Vines are sprawling, weeds are taking over, and you can’t tell the difference between your carrots and the dandelions at this point. And let’s not even talk about the path you used to walk on—it’s practically a secret tunnel now.

    If this sounds familiar, don’t panic. You’re not alone in this. Most gardeners have experienced the chaos of a garden gone rogue. But instead of pulling up stakes and heading straight to the city, let’s talk about what you can do to tame your unruly garden and turn it back into the thriving space you’ve always wanted.

    Grab your gardening gloves, a strong cup of coffee, and let’s dive into the chaos—because the jungle can be tamed!

    Step 1: Take a Deep Breath (And a Step Back)

    Before you grab your machete and start hacking away, take a moment to breathe. Your garden may look wild, but it’s not beyond saving. The first step is to approach the situation with a calm mindset. Yes, your cucumber vines may have overrun the beans, but that’s fixable.

    Think of this as your garden’s “teenage phase.” Every garden goes through a rebellious stage, and it’s up to you to guide it back on track. The key is to not get overwhelmed by the mess. Take it one step at a time, and remember: the jungle is a place of possibility—just like your garden.

    Step 2: Assess the Situation (And Have a Laugh)

    Take a walk around your garden, and give yourself a moment to laugh at the chaos. Sure, your peas may be dangling from the tomato cages, and the pumpkins are now attempting to conquer the entire backyard, but that’s okay!

    While you’re surveying the scene, make a mental (or written) note of what’s working and what needs immediate attention. Is the garden completely overrun with weeds? Are there areas where plants have died off and need to be pulled? Or are there sections that are just a little too “enthusiastic” in their growth?

    The important thing here is to stay positive. A garden jungle means there’s life—perhaps a little too much of it—but there’s growth. And growth means you’re doing something right!

    Step 3: Start with the Weeds (They’re Not the Cool Kids)

    Weeds are the ultimate party crashers. They show up uninvited and spread like wildfire. And if you don’t take care of them first, they’ll take over your garden like an invasive species. But don’t worry—weed removal doesn’t have to be a back-breaking task. It’s all about strategy.

    Here’s what you can do:

    • Pull Weeds by Hand: Start by pulling out weeds by hand, focusing on the areas with the most visible weeds. For stubborn weeds, grab a garden fork to loosen the soil and remove them root and all.
    • Mulch, Mulch, Mulch: Once you’ve removed the weeds, lay down a thick layer of mulch around your plants. This will help smother new weed growth while also keeping the soil moist. It’s like a cozy blanket for your garden.
    • Use a Weed Barrier: For larger areas that are completely overtaken, consider using a landscape fabric or a biodegradable weed barrier to prevent the weeds from coming back in full force.

    Step 4: Take Control of the Overgrown Plants (Don’t Be Afraid to Prune)

    Now, it’s time to tame the jungle—carefully, of course. Overgrown plants are like unruly children who need some boundaries. While you don’t want to be too harsh (after all, they’ve worked hard to grow), it’s important to prune and trim where necessary.

    Here’s how to do it:

    • Prune Back Vines: If your vines are spreading like wildfire, carefully trim them back to keep them within their designated areas. For example, trim your tomato vines back to prevent them from taking over your entire garden bed. If you’ve got pumpkins running wild, redirect them into a more manageable space or prune off some of the extra growth.
    • Cut Back Overgrown Perennials: For perennials that have become leggy or too big, trim them back to encourage new growth and prevent them from crowding other plants. If your herbs have started to resemble small shrubs, cut them back to allow space for other plants to breathe.
    • Remove Dead or Damaged Plants: Sometimes, the jungle gets a little too crazy and you’ll find plants that have outgrown their spot or have died off completely. Pull them out to make room for the healthy ones that still have plenty of growing to do.

    Step 5: Create Clear Paths (So You Can Actually See Your Garden)

    A garden jungle is beautiful in its own way, but it’s hard to appreciate the beauty when you can’t even walk through it. Creating clear paths through your garden will make it more functional and easier to maintain.

    Here’s how to carve out your garden’s “roads” and make the jungle more navigable:

    • Lay Down Gravel or Wood Chips: If you’ve got garden beds that are difficult to walk around due to overgrowth, consider laying down a path of gravel, wood chips, or even bark mulch. These materials will help define your paths while making it easier to walk around.
    • Use Edging to Define Garden Beds: If your plants are spilling out of their designated areas, use stone, brick, or even plastic edging to create clear boundaries for your garden beds. This will prevent plants from spreading too far and keep the rest of your garden organized.
    • Add Trellises or Cages for Climbing Plants: If your vines and climbing plants are taking over everything, install trellises or plant cages to keep them contained and give them a proper structure to grow on. Not only will this help control the spread, but it’ll also give your plants the support they need to grow upward instead of outward.

    Step 6: Reevaluate What You Want to Grow (Be the Boss of Your Garden)

    A jungle is all about wild, unchecked growth—but that’s not always what you want for your homestead. This might be the perfect time to reevaluate what you want to grow in your garden. Are there plants that aren’t giving you the results you were hoping for? Are there some you can’t manage, or that are taking up space without rewarding you with a bountiful harvest?

    Here’s what you can do:

    • Remove Low-Value Crops: If you’ve got crops that have taken over but haven’t produced as much as you hoped, it might be time to let them go. For example, if your zucchini plants are sprawling everywhere but the fruit has been disappointing, it may be time to cut them back or replant something else in their place.
    • Plan for Better Spacing Next Season: Once your jungle has been tamed, make a mental note for next year’s planting. Will your tomatoes be better off in a raised bed? Will your squash thrive with a little more space? Take advantage of this season’s chaos as a learning experience for better planning in the future.

    Step 7: Embrace the Chaos (And Learn to Love It)

    Finally, sometimes you have to accept that your garden will never be perfectly manicured, and that’s okay. Nature doesn’t have a straight line, and neither should your garden. Embrace the chaos! Some wild growth is not only healthy but beneficial. Wildflowers, pollinators, and even a few “weeds” can help support your garden’s ecosystem.

    The jungle may look overwhelming, but it’s a sign that your plants are thriving. And while it’s essential to get things back under control, you can still leave room for nature to do its thing. Your garden doesn’t have to be a perfect picture—it can be a joyful, thriving, messy, beautiful work in progress. And that’s the real beauty of homesteading.

    Conclusion: From Jungle to Joyful Garden

    So, what do you do when your garden looks like a jungle? You get to work, but you don’t give up. You tackle the weeds, prune the plants, and create paths for easy navigation. You learn from the chaos, and you embrace the wild beauty that nature brings to your homestead.

    Most importantly, don’t get discouraged. Every garden has its ups and downs, and a bit of mess is part of the process. Whether it’s your first garden or your fifth, a little jungle is a sign of life—and life is always worth the effort.

  • 10 Ways to Save Money on Animal Feed Without Sacrificing Nutrition

    10 Ways to Save Money on Animal Feed Without Sacrificing Nutrition

    Feeding animals is one of the biggest ongoing costs on a homestead—but it doesn’t have to break the bank. Whether you’re raising chickens, ducks, goats, or rabbits, there are smart, sustainable ways to cut feed costs without compromising your animals’ health. In fact, many of these tips can even improve their diets and overall well-being!

    Here are 10 tried-and-true ways to save money on animal feed while keeping your flock or herd happy and healthy.

    1. Ferment Your Feed

    Fermenting feed is one of the easiest ways to stretch your feed budget. By soaking grains or pellets in water for 24-48 hours, you increase nutrient absorption and feed efficiency. Fermented feed is easier to digest and packed with beneficial probiotics—so your animals get more out of less.

    2. Let Them Free-Range (When Safe)

    Allowing chickens, ducks, and even pigs to free-range gives them access to bugs, grass, seeds, and other natural snacks. This can significantly reduce how much feed you need to provide, especially in the warmer months. Plus, your animals will love the enrichment and variety.

    3. Grow Your Own Fodder

    Growing sprouted grains like barley, wheat, or oats is a great way to produce fresh green feed—cheaply! Fodder systems are simple to set up and require minimal space. A few trays can produce pounds of nutrient-rich feed daily, perfect for supplementing your animals’ diet.

    4. Feed Kitchen and Garden Scraps

    Don’t toss those veggie trimmings or stale bread—feed them to your animals! Chickens, ducks, and pigs especially love leftovers. Just make sure the scraps are safe (no moldy or salty foods) and you’re reducing waste and your feed bill in one go.

    5. Mix Your Own Feed

    Buying bulk grains and mixing your own custom feed can save money over pre-mixed bags. It also allows you to tailor your mix to your animals’ specific needs. You’ll want to do some research, but it can be worth the effort for long-term savings.

    6. Plant a “Feed Garden”

    Grow crops specifically to feed your animals—think sunflowers (for seeds), pumpkins (for both flesh and seeds), kale, and comfrey. These are nutrient-dense, easy to grow, and your animals will gobble them up!

    7. Buy in Bulk and Split with Friends

    Many feed stores offer discounts on bulk purchases. Team up with fellow homesteaders to split large orders—saving you money and reducing trips to the store. Some co-ops even allow group ordering of grains or supplements.

    8. Raise Insects for Protein

    Mealworms and black soldier fly larvae are excellent protein sources for chickens and other poultry. You can raise them with very little space and feed them scraps. It’s a nearly free protein supplement your birds will love.

    9. Minimize Waste

    A lot of feed is lost to spillage, wet weather, or pests. Use feeders that reduce waste, store feed in sealed containers, and only offer what your animals can finish in a day. Small changes here can make a big dent in your feed bill over time.

    10. Cull or Sell Extra Animals

    As hard as it can be, feeding animals that aren’t producing (or that your homestead can’t support) eats into your budget. Consider selling extra roosters, older hens, or unproductive animals. This frees up resources and gives you more wiggle room to care for the animals that are pulling their weight.

    Final Thoughts

    Saving money on animal feed doesn’t mean cutting corners—it’s about being smart, resourceful, and using what you have. Many of these strategies will not only reduce your costs but improve your animals’ health, too.

    So get creative, think outside the feed bag, and remember: a well-fed homestead doesn’t have to cost a fortune.

  • Budget Friendly Homestead Recipes

    Budget Friendly Homestead Recipes

    As a homesteader, one of the most rewarding aspects of our lifestyle is the ability to grow your own food. But, even with a garden full of fresh produce, the reality of cooking for your family can still be a challenge when it comes to budgeting. That’s where budget-friendly homestead recipes can come into play. These recipes make the most of what you already grow, raise, or preserve on your homestead, allowing you to cook hearty, wholesome meals without breaking the bank.

    By focusing on simple, cost-effective ingredients that you can harvest yourself or purchase locally, you can cut down on grocery store expenses while still enjoying delicious, nutritious meals. Here are some budget-friendly homestead recipes that will help you make the most of your homestead harvest while saving you money.

    Vegetable Soup: A Homesteader’s Classic

    When you have an abundance of vegetables from your garden, one of the easiest ways to use them up is by making a large pot of vegetable soup. Not only is it hearty and comforting, but it’s also a versatile dish that can be customized based on what you have on hand.

    Ingredients: Whatever vegetables are in season (carrots, potatoes, tomatoes, onions, zucchini, kale, etc.), garlic, vegetable or chicken stock, and herbs like thyme or rosemary. You can also add dried beans or lentils to stretch the meal and add protein.

    How to Make It:

    1. Chop up your vegetables and sauté garlic and onions in a large pot with some olive oil or butter.
    2. Add the chopped vegetables, stock, and herbs, and bring it to a boil. Then, let it simmer for 30-45 minutes until all the veggies are tender.
    3. For a heartier soup, add beans or lentils, which are both cheap and filling.

    Tips for Saving Money: Use what you have in abundance! You can freeze any leftover soup to eat later. Adding inexpensive grains like rice, barley, or oats also stretches the meal and adds fiber.

    Vegetable soup is a great way to use up leftover produce and can be made in large batches to feed a crowd or provide meals for the week ahead.

    Homemade Chicken or Veggie Stock

    Making homemade stock is one of the best ways to utilize parts of animals or vegetables that might otherwise go to waste. Chicken bones, vegetable scraps, and herb stems can be simmered together to create a rich, flavorful stock that you can use in soups, stews, or risottos.

    Ingredients: Chicken bones or vegetable scraps (onion peels, carrot ends, celery stalks, etc.), herbs like thyme, rosemary, bay leaves, and peppercorns.

    How to Make It:

    1. Place your chicken bones or veggie scraps into a large pot and cover with water.
    2. Add your herbs and seasonings, then bring it to a boil.
    3. Reduce the heat and let it simmer for at least 2 hours (the longer, the better). For a richer flavor, you can simmer the stock for 6-8 hours.
    4. Strain out the solids and store the stock in containers for later use. You can freeze stock in ice cube trays for easy portions.

    Tips for Saving Money: Making stock from leftover scraps means you’re reusing parts of food that would have been thrown away. Plus, you’ll have a flavorful, homemade stock on hand for cooking at no extra cost.

    Homemade stock enhances the flavor of many dishes, adds nurtrients and is a great way to utilize what would otherwise be food waste.

    Cabbage Stir-Fry with Eggs

    Cabbage is one of the most budget-friendly vegetables you can grow on your homestead, and it can be turned into a delicious, hearty meal with just a few ingredients. This cabbage stir-fry recipe is simple, filling, and perfect for when you’re looking for a quick meal that stretches your food supply.

    Ingredients: Cabbage (shredded), eggs, soy sauce (or homemade if you have the ingredients), garlic, and any leftover vegetables or herbs you have in the fridge.

    How to Make It:

    1. Heat oil in a large skillet and sauté garlic until fragrant.
    2. Add the shredded cabbage and cook, stirring occasionally, until the cabbage wilts and caramelizes slightly.
    3. Push the cabbage to the side of the skillet, crack eggs into the pan, and scramble them.
    4. Once the eggs are cooked, stir everything together and season with soy sauce or your preferred seasoning.

    Tips for Saving Money: Cabbage is incredibly affordable and lasts a long time in storage. This recipe is also versatile, so you can throw in any extra vegetables or meat scraps to give it a little more variety.

    This simple stir-fry can feed a family and uses up those extra heads of cabbage you may have growing in your garden.

    Homemade Bread (No-Knead or Basic Loaf)

    Bread is a staple in many homesteads, and making your own is not only satisfying but also budget-friendly. Homemade bread can be made with just a few basic ingredients that you likely already have in your pantry, and it can be baked in large batches to feed the whole family.

    Ingredients: Flour, yeast, salt, water, and a bit of honey or sugar (optional).

    How to Make It:

    1. Combine your dry ingredients (flour, salt, yeast) in a large bowl.
    2. Slowly add water and mix until you form a sticky dough.
    3. Cover and let it rise for 12-18 hours (a slow rise improves flavor).
    4. After the dough has risen, fold it over a few times, shape it into a loaf, and bake in a preheated oven (450°F) for about 40-45 minutes.

    Tips for Saving Money: Making bread from scratch is a fraction of the cost of store-bought loaves, and you can bake it in large quantities to freeze for later. You can also experiment with adding in herbs, cheese, or even leftover grains to flavor your bread.

    Homemade bread is an essential homestead recipe that not only saves you money but also provides a comforting, fresh side to any meal.

    Simple One-Pot Stews or Casseroles

    One-pot meals are the ultimate homesteading hack for saving time and money. You can throw together a variety of vegetables, grains, and meats (or beans) into one pot to create a delicious and filling meal that serves a crowd.

    Ingredients: Leftover vegetables, grains like rice or barley, beans or lentils, and your choice of protein (chicken, pork, beef, or a plant-based option). Season with garlic, onions, and herbs from your garden.

    How to Make It:

    1. In a large pot, sauté onions and garlic, then add in your protein (if using) and cook until browned.
    2. Add in your vegetables, grains, and beans, then cover with broth or water.
    3. Bring to a boil, then simmer until everything is tender and the flavors have melded together (about 45 minutes to an hour).
    • Tips for Saving Money: These dishes are perfect for using up whatever leftover ingredients you have in your fridge or garden. You can make a big batch to last the week and freeze portions for future meals.

    One-pot meals are an efficient way to make a hearty, cost-effective meal that stretches your homestead ingredients.

    Conclusion

    Cooking on a homestead doesn’t have to be expensive or complicated. By focusing on what you grow or raise yourself, you can create delicious, wholesome meals that are easy on your budget. Simple ingredients like vegetables, grains, and herbs can be transformed into flavorful dishes that provide nourishment and satisfaction to your family.

    The key to saving money is planning your meals around what’s in season, making the most of leftovers, and incorporating affordable staples like beans, rice, and cabbage into your recipes. By following these budget-friendly homestead recipes, you’ll be able to feed your family well while sticking to your homestead’s budget.

    Start incorporating these cost-effective meals into your routine and watch how much money you can save. Not only will you have a stockpile of healthy, homemade food, but you’ll also develop a deeper appreciation for the fruits of your labor.

    I hope this article helps you showcase how easy and rewarding it is to create budget-friendly meals on a homestead! Let me know if you want to adjust anything or add any specific recipes.

  • How to Make a Completely Homemade Pizza (Dough, Cheese & Sauce from Scratch)

    How to Make a Completely Homemade Pizza (Dough, Cheese & Sauce from Scratch)

    There’s something truly magical about making a pizza entirely from scratch — we’re talking about the dough, the cheese, and even the sauce. Whether you’re growing tomatoes in your backyard or making cheese from fresh milk, this homestead-style pizza is wholesome, flavorful, and deeply satisfying.

    Ready to get your hands messy and make something delicious? Let’s dive in!

    Homemade Pizza Dough Recipe

    A good pizza starts with a great crust — chewy on the inside, slightly crisp on the outside.

    Ingredients:

    2 ¼ tsp (1 packet) active dry yeast

    1 ½ cups warm water (about 110°F)

    1 tbsp sugar

    3 ½ cups all-purpose flour

    2 tbsp olive oil

    1 ½ tsp salt

    Instructions:

    1. In a large bowl, dissolve the sugar in warm water. Sprinkle yeast over the top and let it sit for 5–10 minutes, until foamy.

    2. Add flour, olive oil, and salt. Mix until it forms a dough, then knead on a floured surface for 8–10 minutes until smooth and elastic.

    3. Place the dough in a greased bowl, cover with a towel, and let it rise for about 1 hour or until doubled in size.

    4. Punch the dough down and roll it out to your desired thickness.

    Tip: This recipe makes enough for two medium pizzas.

    Homemade Farmer’s Cheese (Soft, Crumbly Cheese)

    You don’t need rennet or complicated equipment — this simple cheese is fresh, easy, and perfect for pizza.

    Ingredients:

    1 gallon whole milk

    1/4 cup white vinegar or lemon juice

    1 tsp salt (optional)

    Instructions:

    1. Heat the milk in a large pot over medium heat until it starts to gently boil (around 180°F).

    2. Remove from heat and slowly stir in vinegar or lemon juice.

    3. The curds will begin to separate from the whey. Let it sit for 10 minutes.

    4. Line a colander with cheesecloth and pour in the mixture. Let it drain for 1–2 hours depending on how firm you want the cheese.

    5. Crumble over your pizza or press into a mold to slice later.

    Optional: Add herbs or garlic for extra flavor before pressing the cheese.

    Homemade Tomato Sauce (From Garden or Pantry)

    This sauce is simple, vibrant, and full of fresh tomato flavor.

    Ingredients:

    4–5 ripe tomatoes (or 1 can crushed tomatoes)

    2 cloves garlic, minced

    1 tbsp olive oil

    1 tsp salt

    1 tsp dried oregano

    1 pinch sugar (to balance acidity)

    * Optional: basil, chopped onion, red pepper flakes

    Instructions:

    1. If using fresh tomatoes, blanch and peel them first.

    2. Sauté garlic in olive oil until fragrant.

    3. Add tomatoes, salt, oregano, and sugar.

    4. Simmer uncovered for 20–30 minutes, stirring occasionally.

    5. Blend for a smoother sauce, or leave chunky for a rustic texture.

    I used frozen tomatoes from last years harvest that I hadn’t gotten around to using yet. I let it simmer all day to cook off any excess liquid plus I like my sauce to be thick and very tomato-ey.

    Putting It All Together

    1. Preheat your oven to 475°F. A pizza stone or cast iron pan works great if you have one.

    2. Roll out your dough on a floured surface and transfer to a baking sheet or stone.

    3. Spread a layer of your homemade tomato sauce.

    4. Sprinkle on your homemade cheese.

    5. Add toppings: sliced onions, garden vegetables, cured meats, olives, herbs — whatever your homestead provides!

    6. Bake for 10–12 minutes, until the crust is golden and the cheese is bubbly.

    Final Thoughts

    Making pizza entirely from scratch is a deeply rewarding experience. It connects you with your food, your land, and your kitchen in the best way possible. Whether you grow your own tomatoes or just want to try something homemade this weekend, this recipe is a delicious place to start.

  • 10 gardening Mistakes Evn the Pros make(and how to avoid them)

    10 gardening Mistakes Evn the Pros make(and how to avoid them)

    Gardening—it’s supposed to be peaceful, rewarding, and the perfect way to spend a sunny afternoon. But sometimes, despite our best efforts, the garden gods throw us a curve ball. Whether you’re just starting out or you’ve been growing tomatoes longer than you can remember, there’s one thing all gardeners have in common: we mess up.

    Yes, even seasoned pros who know the difference between a compost heap and a spaghetti squash have made mistakes. But don’t worry—every mistake is a learning opportunity (and a great blog post). Let’s dive into some of the most common gardening blunders, including ones that even the experts sometimes make, and—more importantly—how you can avoid them.

    1. Overwatering (Because You Love Your Plants Too Much)

    The Mistake:

    We’ve all been there: you see your plants looking a little droopy, and your instinct is to flood them with water. Problem solved, right? Not quite. Overwatering is one of the most common mistakes gardeners make, and even experienced green thumbs can sometimes drown their plants in love.

    The Fix:

    Make sure your soil is actually dry before reaching for the watering can. Use your finger (or a soil moisture meter) to check the soil depth. Water deeply but less frequently to encourage plants to grow strong, deep roots. And remember—plants like their feet dry, but their heads in the sun, not the swamp.

    2. Planting Too Early (Or Too Late)

    The Mistake:

    You’re eager to get started, so you rush into planting as soon as you see a warm day. Or maybe you procrastinate and plant late, hoping the season will magically stretch out. Either way, you’re probably setting yourself up for failure.

    The Fix:

    Know your frost dates! Do a little research on when it’s safe to plant in your area—both the average last frost in spring and the first frost in fall. For example, if you’re in zone 5, there’s no reason to plant tomatoes in March (trust me, the frost will win that battle). If you’re unsure, start seeds indoors and transplant when it’s safer.

    3. Not Rotating Crops (Yes, Plants Get Tired Too)

    The Mistake:

    You’ve got your favorite vegetable patch, and every year, you plant the same thing in the same spot. It’s easy, right? You know exactly where to put the tomatoes, and you’re on autopilot. But plants, like people, get cranky when you don’t give them a break.

    The Fix:

    Crop rotation is key to healthy soil and preventing disease. Try to change up what you plant in each bed every year. For example, if you planted tomatoes in one spot last year, plant beans or leafy greens there this year. It also helps prevent soil depletion by ensuring your plants don’t hog the same nutrients year after year.

    4. Planting Without Considering Sunlight (Sorry, Tomatoes, You’re Not a Shade Plant)

    The Mistake:

    You’ve got a cozy corner in your garden that seems perfect for a new plant, but you forgot one small thing: sunlight. Sure, that corner looks charming, but if it only gets two hours of sunlight a day, your leafy greens won’t be the thriving wonderland you imagined.

    The Fix:

    Check how much sunlight your plants need before you plant them. Most vegetables need at least 6 hours of direct sunlight. Pay attention to your garden’s sun patterns and try to position sun-loving plants like tomatoes and peppers in the sunniest spots, while placing shade-tolerant herbs like mint or lettuce in less sunny areas.

    5. Not Using Proper Soil (Even Plants Have Standards)

    The Mistake:

    You think all soil is the same—it’s dirt, right? Well, turns out, plants are picky. They want their soil to be nutrient-rich, well-draining, and balanced. If you plant in soil that’s too compact or lacks the right nutrients, your plants will probably not be very happy.

    The Fix:

    Know your soil! Test it if you have to (kits are super affordable and easy to use). If it’s too clay-heavy, you can amend it with compost or organic matter to improve drainage. For sandy soil, add in some compost or peat moss for better retention. And don’t forget the power of mulching to keep that soil just the way your plants like it.

    6. Ignoring Pests (They’re Watching You… And Your Lettuce)

    The Mistake:

    It starts small—a few chewed leaves here and there—but you ignore it. Soon, the damage spreads, and your garden is a buffet for every pest in the neighborhood. Even the pros sometimes get complacent, thinking they can just “wait it out,” only to find themselves in a full-blown pest war.

    The Fix:

    Stay vigilant! Inspect your plants regularly and act fast if you spot any pests. Use natural repellents like neem oil, garlic spray, or insecticidal soap. You can also attract beneficial insects like ladybugs to keep pests in check. If things really go south, a quick, eco-friendly pesticide might be needed, but always read the label to ensure it’s safe for your plants.

    Here is a little video I made a while back about some natural pest control options you can implement before buying at the store.

    7. Not Pruning (Your Plants Aren’t Hairless Wonders)

    The Mistake:

    You’ve got a beautiful bush of tomatoes, but you’re hesitant to prune it because, hey, the more branches, the merrier, right? Wrong. Not pruning can lead to overcrowding, poor air circulation, and even disease.

    The Fix:

    Don’t be afraid to prune! For tomatoes, remove the suckers (those little shoots that grow between branches) to keep the plant focused on producing fruit. For other plants, prune dead or overcrowded branches to improve airflow and encourage healthier growth.

    8. Overcrowding (Plants Are Like People—They Need Their Personal Space)

    The Mistake:

    You try to cram as many plants into one garden bed as possible, thinking that the more, the merrier. But just like at a party, overcrowding leads to stress—and in this case, poor growth and disease.

    The Fix:

    Follow the recommended spacing for each plant. If the seed packet says 24 inches apart, trust it. Crowded plants are more likely to compete for nutrients and water, and they can attract pests and diseases. Give your plants some breathing room to thrive!

    9. Planting the Wrong Plants for Your Climate (Tropical Fruits in the Arctic, Anyone?)

    The Mistake:

    You’re determined to grow a mango tree in your northern climate. While that’s an admirable goal, it’s probably not going to end well. Even seasoned gardeners occasionally get carried away with their dream plant list, not realizing some plants simply can’t handle the cold (or the heat).

    The Fix:

    Research which plants grow best in your hardiness zone. Choose crops that are suited to your climate. For example, mangos belong in tropical climates, not in snowstorms. Instead, try cold-hardy varieties of fruits and vegetables, like apples or kale, that can thrive in your growing zone.

    10. Forgetting to Enjoy the Process (It’s Not Just About the Harvest)

    The Mistake:

    You get so caught up in getting everything perfect—having the perfect soil, spacing, and harvest—that you forget to take a step back and enjoy the garden for what it is: a beautiful, living thing that brings joy, relaxation, and a little dirt under your fingernails.

    The Fix:

    Take time to appreciate the process. Watch the bees buzz around your flowers, listen to the rustle of leaves in the breeze, and enjoy the satisfaction of seeing your hard work come to life. Gardening isn’t just about the end result—it’s about the journey, too.

    Conclusion

    Gardening can be a tricky, rewarding adventure, and even the most experienced gardeners make mistakes along the way. But the beauty of gardening is that we can always learn and improve, one plant at a time. So, the next time you make a mistake (and trust me, you will), just remember: even the pros have been there. Embrace it, learn from it, and, above all, keep gardening with a smile.

  • How to Budget for a productive garden season

    How to Budget for a productive garden season

    Homesteading is all about making the most of what you have, and that includes your garden. One of the most important steps in ensuring a productive and financially sustainable garden is planning and budgeting. While gardening can be an enjoyable and rewarding experience, there are costs involved—seeds, soil amendments, tools, and equipment can all add up quickly. With a little foresight and strategy, you can reduce waste, maximize your harvest, and save money along the way. Here’s how to budget for a productive garden season on your homestead.

    Assess Your Garden’s Needs

    Before you can start budgeting, it’s essential to evaluate your garden’s needs. Take a look at last season’s harvest to see what worked and what didn’t. Which crops were abundant, and which ones struggled? Assess what tools or equipment you might need to upgrade or replace, such as gardening gloves, watering systems, or soil testers.

    Make a list of the crops you plan to grow, paying attention to any new varieties or seeds you may want to try. Prioritize the crops that will give you the most yield and those that are most expensive to buy in the store, such as tomatoes, peppers, or herbs. If you’re growing for a market or local sales, plan for crops that will give you the best return on investment.

    Plan Your Seed and Plant Purchases Wisely

    Seeds are one of the most significant costs when it comes to gardening, so it’s important to plan your purchases carefully. Here are a few strategies for getting the best value:

    • Buy in bulk: If you plan to grow a particular crop in large quantities, consider buying seeds in bulk. Often, bulk seed purchases have a lower cost per unit, and you’ll have enough for multiple seasons.
    • Save your seeds: Many homesteaders save seeds from their own harvest to plant the next year. This can significantly reduce costs, especially for crops like tomatoes, beans, and peas. Just be sure to properly store the seeds to keep them viable for future seasons.
    • Buy from local seed swaps or farmers’ markets: If you’re looking to experiment with new varieties, try attending seed swaps or purchasing from local farmers’ markets. Not only does this support your local community, but you might find seeds that are more suited to your specific growing region.
    • Consider perennial plants: While it may be a larger upfront investment, planting perennials (like asparagus, rhubarb, or certain herbs) can save you money over the long run. Once established, these plants will yield year after year, eliminating the need for yearly seed purchases.

    Track Soil Amendments and Fertilizers

    Healthy soil is the foundation of a successful garden, and the right amendments and fertilizers can make a significant difference in plant health. However, the costs of soil improvement can add up quickly.

    • Test your soil: Start by testing your soil’s pH and nutrient levels. Many agricultural extension offices offer free or low-cost soil testing services. Once you know what your soil needs, you can avoid purchasing unnecessary amendments.
    • Compost: Rather than buying bags of compost or fertilizer, start your own compost pile using kitchen scraps, yard waste, and animal manure. This reduces the need for store-bought fertilizers and helps improve your soil’s structure over time.
    • Mulch: Mulching your garden can help retain moisture, prevent weeds, and improve soil health. Consider making your own mulch from grass clippings, leaves, or straw, which are often free or low-cost.

    Invest in Tools and Equipment

    Gardening tools can be an investment, but they can also save you time and effort. While you don’t need to buy every tool in the store, there are a few key items that can make gardening more efficient.

    • Start with the basics: A quality shovel, hoe, rake, and pruners are essential tools for any garden. You don’t need to buy high-end versions right away, but investing in durable, good-quality tools will save you money in the long run, as they’ll last longer.
    • Shop second-hand: Check local thrift stores, yard sales, or online marketplaces for gently used gardening tools. Many homesteaders find that buying second-hand saves them a significant amount of money without sacrificing quality.
    • Prioritize multi-functional tools: Consider investing in tools that serve multiple purposes, like a hoe that can also function as a rake or a watering system that can be adjusted for different parts of the garden.

    Maximize Space and Minimize Waste

    Efficient use of your garden space can help you get the most out of every square foot, reducing the amount of seed and resources you need. This not only saves money but also increases your harvest.

    • Plan your layout carefully: Use companion planting techniques to make the most of your garden space and promote plant health. For example, planting nitrogen-fixing legumes like beans alongside heavy feeders like corn can help naturally fertilize the soil.
    • Practice succession planting: To extend your harvest and reduce the need for new seeds, practice succession planting. This means planting crops in intervals, so as one crop finishes, another is already maturing.
    • Start small: If you’re new to gardening or don’t have a lot of space, it’s better to start small and gradually expand. It’s easy to get excited and plant too much, but starting small allows you to learn, adjust, and avoid wasting resources on crops that won’t thrive.

    Monitor and Adjust Your Budget Regularly

    The key to sticking to any budget is monitoring your expenses throughout the season. Keep track of every purchase, from seeds to soil amendments to equipment. Regularly assess your garden’s performance—if you find that some crops aren’t yielding as expected or that a particular tool is costing you more than it’s worth, adjust your plans accordingly. You can also factor in additional costs like water usage or pest management as needed.

    Conclusion

    Gardening on a homestead doesn’t have to break the bank. With a thoughtful approach to budgeting, you can reduce costs, make the most of your space, and increase your garden’s productivity. Start by assessing your garden’s needs, prioritizing your purchases, and looking for cost-saving alternatives like seed saving and composting. By keeping a close eye on your expenses throughout the season, you can enjoy a bountiful harvest without financial stress. Happy gardening!

  • How to Turn your backyard into a Mini Farm(Without Becoming a Full-Time Farmer)

    How to Turn your backyard into a Mini Farm(Without Becoming a Full-Time Farmer)

    So, you’ve decided you want to dip your toes into the world of homesteading, but the thought of moving to a giant farm and waking up at the crack of dawn every day to milk cows makes you break into a cold sweat. Fear not! You don’t have to leave your 9-to-5 job, live off the grid, or start churning butter (unless you want to of course). With a little creativity and a few simple steps, you can transform your backyard into a thriving mini farm that will give you a taste of homesteading without the full-time commitment.

    Welcome to the world of “tiny homesteading,” where you can grow your own food, raise a few chickens, and maybe even learn to enjoy a fresh egg scramble on a Sunday morning—all while keeping your day job and still having time for Netflix. Let’s dive into how you can create your own slice of farm life, minus the early mornings, endless chores, and backbreaking work.

    Start Small—You Don’t Need a Tractor (Yet)

    The most important thing to remember when transforming your backyard into a mini farm is: don’t go big right away. There’s no need to run out and buy a tractor or invest in a dozen chickens if you’re just starting out. In fact, trying to take on too much will only make you want to throw in the towel faster than you can say “compost pile.”

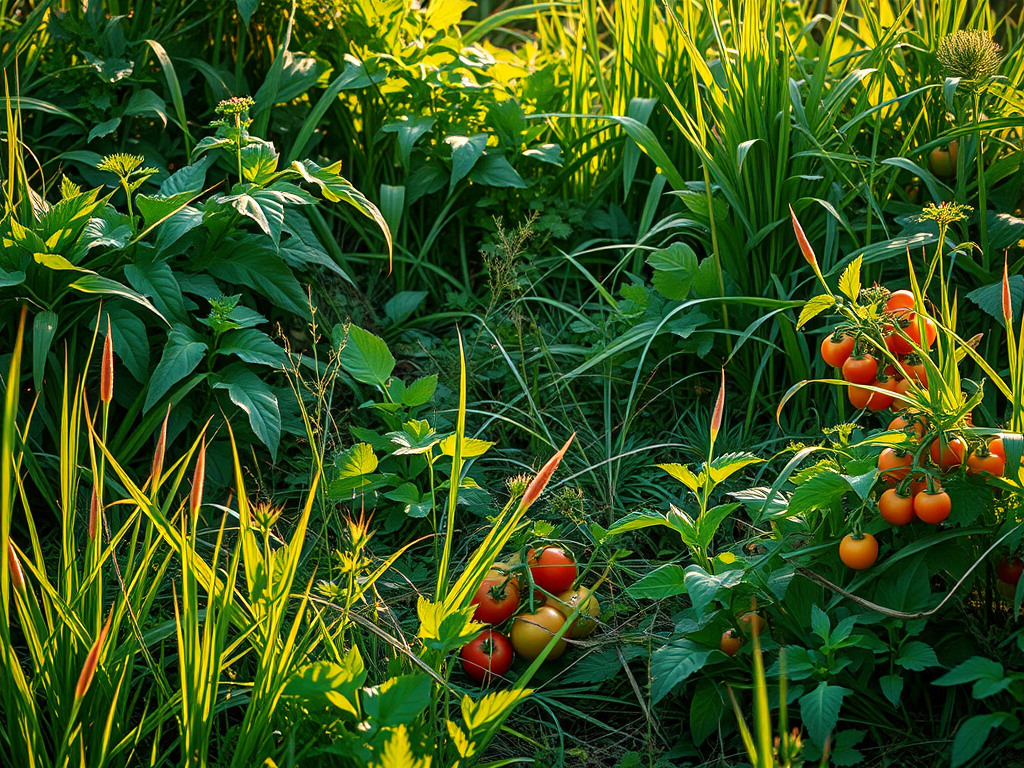
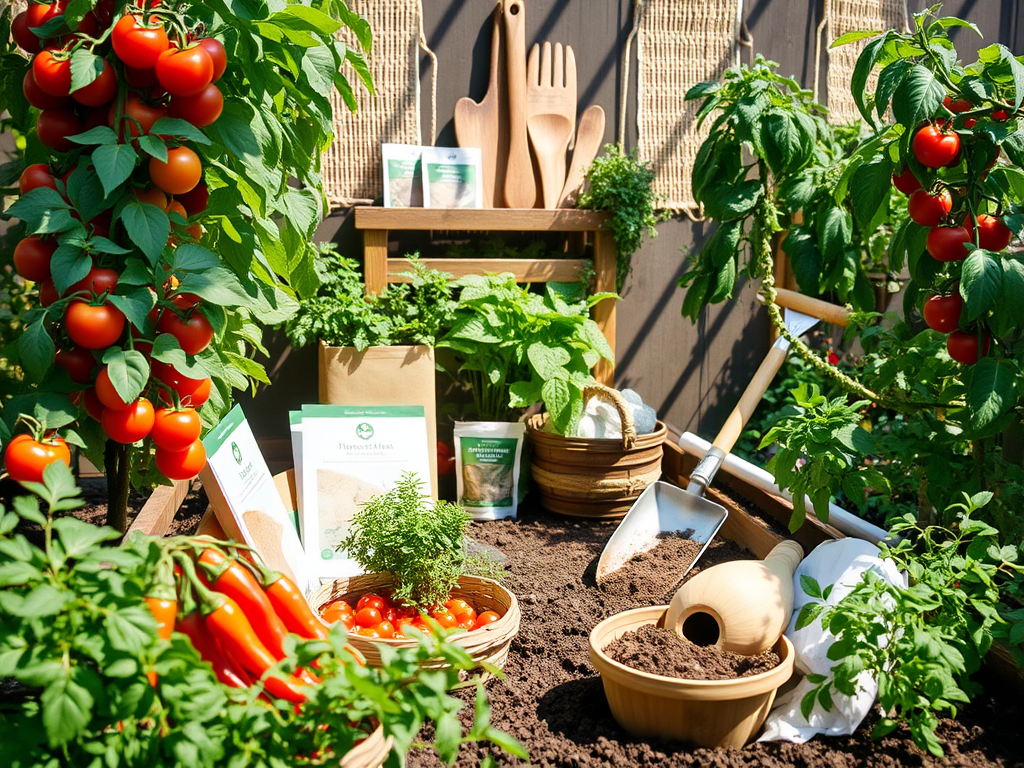
    Start with a small vegetable garden. Pick a few crops you enjoy eating, like tomatoes, lettuce, or peppers, and plant them in raised beds or containers. These are low-maintenance and will give you that satisfying “I grew this” feeling. Plus, they won’t overwhelm your weekends.

    If gardening is a whole new world for you, think about starting with a herb garden in pots. Herbs are easy to grow, don’t require a lot of space, and will make you feel like a mini-farmer even if you only have room for a few basil and rosemary plants on your kitchen windowsill. You might even start getting fancy and making your own herb-infused oils, sauces, and teas. Welcome to the world of a homesteader—where every meal feels like a culinary adventure!

    Raise a Few Chickens (But Keep It Manageable)

    Okay, so maybe you don’t have the space for a full herd of cows (and that’s okay), but chickens are totally doable, even in smaller backyards. Chickens are low-maintenance, provide eggs, and can even help you with pest control by munching on those pesky bugs.

    Start with a small flock—think 3 to 5 hens. This is enough to provide a steady supply of eggs for you and your family, but not so many that you’re buried under a mountain of chicken feed and eggs. If you have a small yard, look for compact chicken breeds like Bantams, which are smaller and take up less space. You can even consider chicken tractors, which are mobile chicken coops that let your chickens “free-range” while keeping them contained and safe.

    Pro Tip: You don’t need a rooster unless you’re planning on breeding your chickens. In fact, they tend to be noisy, and your neighbors might not appreciate the constant crowing at 5 a.m. (or sometimes 1 am.)

    Plant Edible Landscaping (Make Your Yard Work for You)

    Who says your backyard has to be all about grass and flowers? Why not turn part of it into edible landscaping? This approach is a fantastic way to integrate homesteading into your space without sacrificing aesthetics or functionality. Plus, it’s a great conversation starter for when neighbors ask what you’ve been up to.

    Consider planting things like fruit trees, berry bushes, or grapevines. These plants don’t just add beauty to your yard—they also produce delicious food. Fruit trees like apples, peaches, and plums are fairly low-maintenance once established, and berry bushes (think raspberries, blueberries, or strawberries) provide a nice burst of sweetness throughout the year.

    For even more creative ideas, look into edible flowers like nasturtiums or violets. These can be used in salads, teas, or as garnish for that homemade lemonade you’ve been meaning to perfect. Before you know it, your backyard will be a garden-to-table wonderland, and you’ll have the perfect excuse to host a dinner party every weekend.

    Try Container Gardening

    Just because you have a small backyard doesn’t mean you can’t grow a variety of vegetables. Container gardening is your new best friend. Whether it’s for herbs, greens, or even tomatoes, you can use containers of all shapes and sizes to grow just about anything in limited space.

    Use large pots, old wheelbarrows, or even repurposed items like wooden crates to grow your favorite crops. Tomatoes, cucumbers, and peppers are all great choices for containers and require minimal space. If you’re feeling a little ambitious, try vertical gardening—use trellises or hanging baskets to grow peas, beans, or squash upward instead of outward. Not only does this save space, but it’s kind of fun watching plants grow like little climbers!

    Pro Tip: If you’re renting or don’t want to make a permanent commitment, container gardening is a flexible option that can move with you. Plus, if you’re having a bad gardening year, at least you didn’t invest in a giant patch of ground that’s now just an expensive weed farm.

    Embrace Your Inner Urban Farmer with Aquaponics or Hydroponics

    If you want to go next level without the whole “dirt everywhere” situation, aquaponics and hydroponics systems are the perfect modern solution. These methods use water to grow plants instead of soil, and they’re great for small spaces—like, say, a garage or basement.

    Aquaponics combines fish and plants in a closed-loop system where the fish waste provides nutrients for the plants, and the plants help filter the water for the fish. Hydroponics is similar, but doesn’t involve fish—just water and nutrients. Both methods can allow you to grow vegetables, herbs, and even small fruit-bearing plants indoors, year-round.

    While these systems might require an initial investment and some learning, they’re a great option for those who want to farm without all the dirt, and they’re surprisingly low-maintenance once you get the hang of it. Plus, you get to tell people you’re an urban farmer—which sounds super cool at dinner parties.

    Compost Like a Pro (It’s Basically Free Fertilizer)

    If you’re already growing food in your backyard, it’s time to compost. Composting is an eco-friendly way to recycle kitchen scraps, yard waste, and other organic materials into rich, fertile soil. Plus, it’s free—like, “I didn’t spend a dime” free—and it helps your plants grow bigger and better.

    All you need is a small compost bin (or make your own from a plastic container), a little bit of patience, and the right balance of green (nitrogen) and brown (carbon) materials. Not only does composting reduce waste, but it also means you’ll have healthy soil for your garden, which is basically a homesteader’s dream.

    Don’t Stress About Perfection—Just Have Fun!

    The key to turning your backyard into a mini farm is not to stress about being perfect. You don’t need a degree in agriculture, nor do you need to spend hours every day working your land. Homesteading is about making more from home and being closer to the land. You can accomplish this with a tiny backyard or a couple of flower pots on your balcony.

    Take it slow, enjoy the process, and don’t be afraid to experiment. If your garden doesn’t look like the ones you see in magazines, that’s totally okay. Your mini farm can be whatever you want it to be—and most importantly, it should be something that brings you joy.

    Final Thoughts: Your Mini Farm, Your Way

    So there you have it: turning your backyard into a mini farm doesn’t require a farm tractor, a huge plot of land, or becoming a full-time farmer. With a little creativity and some effort, you can grow your own food, raise a few animals, and experience the magic of homesteading in a manageable way.

    Whether you’re growing tomatoes in a container, raising chickens for fresh eggs, or starting your own herb garden, the possibilities are endless. And remember, it’s all about having fun with the process—no need to go full throttle into farming. Take it one step at a time, and you’ll be well on your way to your very own slice of homesteading paradise.

    Happy mini farming!

  • How to Start and Maintain a Compost Pile: A Beginner’s Guide

    How to Start and Maintain a Compost Pile: A Beginner’s Guide

    Composting is an environmentally friendly way to recycle organic waste, reduce landfill waste, and create nutrient-rich soil for your garden. Whether you have a small backyard garden or a larger homestead, composting is a simple and effective way to enrich the soil, minimize waste, and support sustainability. In this guide, we’ll walk you through how to start a compost pile, maintain it, what to add and what not to add, and the many benefits of keeping a compost pile.

    What is Composting?

    Composting is the process of breaking down organic materials like food scraps, yard waste, and other biodegradable materials into rich, dark, crumbly humus. This happens through the activity of microorganisms, fungi, and insects that decompose the organic matter. The result is a nutrient-dense material that can be used to improve soil quality, promote plant health, and reduce waste.

    How to Start a Compost Pile

    Starting a compost pile is easy and requires just a few basic steps.

    Choose the Right Location

    Pick a spot in your yard that is well-drained and has good air circulation. Compost piles work best when they are located in a shady area, especially in hot climates, to prevent them from drying out too quickly. Ideally, place your compost pile close to your garden or a water source, so it’s easy to access when needed. You can compost directly on the ground or use a compost bin or tumbler for a more contained, organized approach.

    Create Layers

    A well-balanced compost pile requires a mix of green (nitrogen-rich) and brown (carbon-rich) materials. Think of composting as layering the ingredients for a cake. Each layer should be around 3-6 inches deep, and you should alternate between the two types of materials.

    • Green materials include fresh, moist items like vegetable scraps, grass clippings, coffee grounds, and manure.
    • Brown materials are dry and fibrous, such as leaves, straw, shredded cardboard, and small branches.

    Start by placing a layer of coarse brown materials (like small twigs or straw) at the bottom of the pile to promote airflow. Then, alternate layers of green and brown materials, aiming for a ratio of about 3 parts brown to 1 part green. This balance ensures the right conditions for decomposition.

    Moisture and Aeration

    Your compost pile needs to stay moist, but not too wet. Think of a damp sponge—when you squeeze it, water should drip out, but it shouldn’t be soaking wet. If your compost is too dry, the decomposition process will slow down. If it’s too wet, it can become smelly and anaerobic, meaning it will rot rather than compost.

    Turn your pile regularly to allow oxygen to reach the materials and speed up decomposition. Every 2-3 weeks, use a pitchfork, shovel, or compost aerator to turn the pile, making sure to mix the materials and expose the inner layers to oxygen.

    What to Add to Your Compost Pile

    To keep your compost pile balanced and healthy, it’s essential to know what to add.

    Green Materials (Nitrogen-rich)

    These materials are fresh and moist and provide nitrogen, which helps to jumpstart decomposition:

    • Fruit and vegetable scraps
    • Grass clippings (if not too chemically treated)
    • Coffee grounds and tea bags
    • Eggshells (crushed)
    • Fresh leaves and weeds
    • Manure from herbivores (chickens, rabbits, cows, etc.)

    Brown Materials (Carbon-rich)

    Brown materials are dry and fibrous and help to provide carbon, which is essential for the composting process:

    • Dry leaves and straw
    • Wood chips, sawdust, or shavings
    • Shredded paper or cardboard
    • Cornstalks, small twigs, and small branches
    • Dead plants (without diseases)

    What Not to Add to Your Compost Pile

    While composting is a great way to recycle organic waste, not all materials are suitable for the compost pile. Adding the wrong items can disrupt the composting process and attract pests.

    Meat, Dairy, and Oils

    Meat, dairy products, and oils can attract rodents, raccoons, and other pests. These materials don’t break down well and can also produce unpleasant odors. Avoid adding:

    • Meat scraps or bones
    • Dairy products (milk, cheese, butter)
    • Fats, oils, or greasy foods

    Diseased Plants

    Composting diseased plants can spread diseases throughout your garden. If you have plants that are infected with pests or disease, it’s best to dispose of them in the trash or burn them (if allowed in your area). Avoid adding:

    • Diseased or pest-infested plants (such as plants with powdery mildew or blight)
    • Weeds that have gone to seed (they can sprout in your compost)

    Non-biodegradable Materials

    Avoid adding non-organic materials that will not break down over time, such as:

    • Plastic or synthetic materials (plastic bags, wrappers, etc.)
    • Glass or metal objects
    • Pet waste from carnivorous animals (dogs or cats)

    Chemically Treated Materials

    Materials treated with chemicals or pesticides can harm the composting process and contaminate the resulting compost. Avoid adding:

    • Grass clippings from chemically treated lawns
    • Plants treated with pesticides or herbicides

    How to Maintain Your Compost Pile

    Maintaining your compost pile is crucial to ensure it decomposes efficiently.

    Turn the Pile Regularly: Aerating the pile helps maintain oxygen flow, which speeds up the composting process. Aim to turn your pile every 2-3 weeks. If your pile seems too wet, add more brown materials to help absorb excess moisture. If it’s too dry, add some green materials or water it lightly.

    Monitor Temperature: A healthy compost pile should heat up in the center. The heat is a sign that microbial activity is breaking down the materials. The temperature should range between 120°F to 160°F (49°C to 71°C). If the pile gets too hot, turn it to cool it down, and if it gets too cold, add more green materials to raise the temperature.

    Add Moisture: Keep your compost pile moist, but not soggy. If it’s dry, sprinkle water on it to maintain the right moisture levels.

    Harvesting Your Compost: In about 3-6 months (depending on the size of the pile and how well it’s maintained), your compost will break down into dark, crumbly, and earthy-smelling material. This is your finished compost, and you can use it to enrich garden soil or as mulch.

      Benefits of Composting

      Reduces Waste: Composting reduces the amount of organic waste that ends up in landfills, which helps decrease landfill overflow and methane emissions.

      Improves Soil Health: Compost enriches soil by adding nutrients, improving texture, and increasing moisture retention, which makes plants healthier and more productive.

      Promotes Sustainability: Composting creates a closed-loop system, reducing the need for chemical fertilizers and encouraging sustainable agricultural practices.

      Reduces Greenhouse Gases: By composting rather than sending organic waste to landfills, you reduce the amount of methane produced, a potent greenhouse gas.

      Saves Money: Making your own compost means less reliance on expensive store-bought fertilizers and soil conditioners.

        Conclusion

        Starting and maintaining a compost pile is a rewarding process that benefits both you and the environment. By adding the right materials, maintaining a balance of green and brown matter, and taking care to turn the pile regularly, you can create rich, nutritious compost to improve your garden soil while reducing waste. Not only does composting help keep your garden flourishing, but it also contributes to a more sustainable and eco-friendly lifestyle.

      1. A Beginner’s Guide to Incubating Duck Eggs: From Setting Up the Incubator to Duckling Care

        A Beginner’s Guide to Incubating Duck Eggs: From Setting Up the Incubator to Duckling Care

        Incubating duck eggs can be a rewarding and exciting experience for anyone interested in raising ducks. Whether you’re a first-time incubator or looking to perfect your skills, this guide will cover everything you need to know—from why you should incubate duck eggs, to how ducks mate, how fertilized eggs are formed, and what to expect throughout the incubation process. Let’s get started!

        Why Incubate Ducks?

        Incubating ducks can be an enriching way to grow your flock, whether you’re interested in adding new members to your backyard, raising ducks for eggs or meat, or simply enjoying the process of watching tiny ducklings hatch and grow. Incubation gives you full control over the hatching process, which can help improve hatch rates compared to natural brooding.

        Additionally, it’s a great opportunity to observe the early stages of life and learn about the development of ducklings in a more hands-on way. Incubating also allows for the potential to hatch rare or special breeds that might not be readily available in your area.

        How Ducks Mate

        Before diving into the incubation process, it’s important to understand how ducks mate. Ducks typically mate in the spring and fall. During the mating season, the male (drake) will court a female (hen) through displays of affection, including vocalizations and movements(like head bobbing). Once a female is receptive, the male will mate with her. 

        After successful mating, the eggs produced by the female may be fertilized. It’s important to note that only fertilized eggs have the potential to hatch into ducklings.

        How Ducks Fertilize Eggs

        Ducks, like other birds, lay eggs with the potential to be fertilized internally after mating. The drake’s sperm fertilizes the eggs inside the female’s body before they are laid. Once the eggs are laid, they can be collected and incubated. A key point to remember is that not all eggs will be fertilized, so it’s important to check the eggs for signs of fertilization, such as veins or a developing embryo.

        Prepping the Eggs for Incubation

        Before placing your duck eggs in the incubator, it’s important to handle them with care to preserve the natural protective coating, known as the bloom. The bloom is a thin layer of protective film on the eggshell that helps prevent bacteria from entering the egg and keeps the contents fresh. When collecting eggs, avoid washing them, as this can strip away the bloom and reduce the eggs’ ability to fend off contaminants. If the eggs are dirty, gently wipe them with a dry, soft cloth or brush to remove any debris without damaging the bloom. Additionally, store the eggs at a cool, stable temperature (around 55°F or 13°C) with the large end up until you’re ready to incubate them. This ensures the eggs remain viable and the embryo develops properly once incubated. Handling the eggs gently and minimizing contact with the shell will help increase the chances of a successful hatch.

        Setting Up Your Incubator

        To successfully incubate duck eggs, it’s crucial to have the right setup. Here’s how to set up an incubator:

        Choose the Right Incubator: Select an incubator designed to hold and rotate your duck eggs. There are both manual and automatic incubators, and automatic models that turn the eggs for you are often preferred for beginners. Most models have the options to handle different sizes of eggs. Read the instructions to make sure yours is set up right.

        Temperature: The ideal temperature for incubating duck eggs is between 99.5°F and 100.5°F (37.5°C-38°C). Too high or too low of a temperature can result in poor hatch rates.

        Humidity: Humidity is equally as important as temperature. For the first 25 days, maintain humidity around 55-60%. During the final days of incubation (the last 3 days), raise the humidity to around 70% to help soften the eggshells, allowing the ducklings to hatch.

        Turning the Eggs: Ducks need their eggs turned regularly to prevent the embryo from sticking to the shell. If using a manual incubator, turn the eggs 3-5 times a day. If using an automatic incubator, the machine will handle this for you.

        Egg Position: Eggs should be placed on their sides in the incubator/pointed end down. The large end of the egg should face upward to allow for proper air sac development.

        Incubation Timeline: Week by Week

        The incubation of duck eggs typically lasts about 28 days. Here’s what you can expect each week:

        Week 1:

        – Development Begins: By the end of week 1, you’ll begin to notice small blood vessels starting to form. The eggs will appear a bit darker when candled.

        -Turning: Continue turning the eggs at least 3-5 times per day.

        Week 2:

        – Embryo Growth: The embryos continue to grow, and you may notice more developed blood vessels. The embryos are beginning to look like tiny ducklings inside their eggs.

        – Candling:Candling helps you see the development progress and ensures the eggs are still viable.

        Week 3:

        – Lung Development: By now, the ducklings have grown significantly. Their organs are starting to develop, and you may notice more prominent veins. The eggs will feel heavier due to the growing embryos.

        – Humidity Adjustment: Check the humidity and make sure it’s consistent to prevent dehydration.

        Week 4:

        – Final Week: The ducklings are almost fully developed by day 25. At this point, you’ll need to raise the humidity to 70% to help the ducklings hatch.

        – Lock down: Don’t turn the eggs anymore. Keep the temperature and humidity stable.

        What to Expect on Hatch Day

        Hatch day is one of the most exciting moments! Ducklings can take anywhere from 12 to 48 hours to fully hatch. Here’s what will happen:

        Pipping: The first sign of a hatch is when the duckling begins to pip, or break through the shell. This can take several hours as they rest in between.

        Hatching: Once the duckling has pipped and started to break the shell, they will continue to work their way out. This is a slow process, but it’s a sign that everything is going well.

        Duckling Behavior: Ducklings are covered in a soft layer of down and will be wet and tired. They will rest and begin drying off shortly after hatching.

        Caring for Your Ducklings

        Once the ducklings have hatched, it’s time for care:

        Heat Source: Provide a warm brooder to keep the ducklings warm, ideally between 85°F and 90°F (29-32°C). Gradually lower the temperature over the next few weeks.

        Water and Food: Ducklings need access to clean water and a high-quality duckling starter feed. Make sure they can easily access their food and water, but avoid deep water containers to prevent drowning.

        Space: Ducklings grow quickly, so ensure they have enough room to move around. A spacious brooder helps prevent stress.

        Socialization: Ducklings are social animals, so consider keeping multiple ducklings together for companionship.

        Special Notes

        While ducklings are naturally drawn to water and may enjoy playing in it, it’s important to remember that they don’t develop their waterproof down feathers until around six weeks of age. Until then, they can get chilled easily if left wet, which can lead to illness. If you allow them to play in water, always supervise them closely to ensure they don’t get too cold. After they have been in water, you should manually dry them off with a towel and return them to their warm brooder under the heat source to prevent hypothermia.

        Additionally, ducklings need access to clean water deep enough to allow them to clear their nares (nostrils). This is crucial for their health, as blocked nares can lead to respiratory issues. Keep water containers low enough to allow easy access but ensure the water is shallow enough to prevent accidental drowning.

        Conclusion

        Incubating duck eggs is a fulfilling experience that allows you to witness the entire life cycle of ducks. By understanding how ducks mate, how fertilized eggs develop, and the steps to ensure a successful hatch, you’ll be well on your way to raising healthy ducklings. Whether you’re hatching for fun or expanding your flock, the joy of watching ducklings grow is unmatched.

        Good luck with your incubating journey, and don’t forget to capture those precious moments on camera!

        Below you’ll see I linked my Free Printable Incubation Checklist, it applies to all poultry, just make sure you do your research as incubation days will be different.