Tag: homesteading

  • 5 Simple Homestead Organization Systems That Actually Work

    5 Simple Homestead Organization Systems That Actually Work

    Let’s be honest: homesteading comes with a lot of moving parts. Feed schedules, breeding records, garden plans, never-ending projects, and that mountain of laundry that somehow multiplies overnight.

    If you’ve ever felt like you’re juggling too many things (while holding a feed bucket and a coffee mug), you’re not alone. Over the years, I’ve learned that staying organized doesn’t mean having a perfect system — it just means having simple habits that help the chaos make sense.

    Here are five systems I use to keep my homestead (and my sanity) in check.

    1. Keep a Homestead Binder

    Your binder is your best friend — a place to keep all your important information in one spot. It doesn’t have to be fancy; just functional.

    Here’s what I include in mine:

    • Education & Notes: Animal care tips, and any research or education about future animals I plan to raise.
    • Goals & projects: what I’m working on this season or hope to build next year.
    • Animal records: medications, vaccinations, births, and weights.
    • Pasture rotation logs: where animals grazed and when.

    It’s part planner, part memory keeper — and when life gets hectic, having it all written down is a lifesaver.

    Need a starting point? I have a printable homestead binder available on my website with clean, beginner-friendly pages.

    2. The 5-Minute Tidy Rule

    This rule changed my life: if it takes five minutes or less, do it now.
    Wipe the counter. Put away the boots. Fold the towels.

    Those little tasks may seem minor, but they add up fast — and they keep the house (and barn) from turning into a full-blown disaster zone.

    The same goes for your feed room, workshop, or garden shed. A quick tidy here and there keeps big messes from ever forming.

    3. Practice the O.H.I.O. Rule — Only Handle It Once

    When you pick something up, put it where it actually belongs.
    Don’t move it from one pile to another or set it “for later.”

    Whether it’s a bucket, a feed scoop, or your mail, handle it once.
    Put it in its home, and move on. It saves time, brain space, and a whole lot of clutter.

    4. Use Color-Coded Bins or Shelves

    This is a small change that makes a huge difference — especially if you have multiple animals or shared supplies.

    Color-coding helps everyone (including helpers, kids, or partners) know what goes where.

    • Blue bins: poultry supplies
    • Green bins: garden tools
    • Yellow bins: goat or livestock gear
    • Red bins: emergency or medical items

    You can use tape, bins, or even painted shelf edges — whatever fits your setup. The goal is simple: make it easy to find what you need and just as easy to put it back.

    5. Create Themed Days (and Keep a Realistic Project List)

    It’s easy to feel overwhelmed when every task feels urgent. The truth? It’s not.

    I like to give my week a rhythm by assigning themed days:

    • Feed Day Friday – check and restock feed, hay, minerals.
    • Meal Prep Monday – batch-cook and plan dinners.
    • Clean-Up Day – catch up on laundry, dishes, and deep cleaning.

    I also keep a “Project List” — but here’s the key: it’s an eventually list, not a today list.
    I write everything down so I don’t forget it, but I remind myself constantly:

    “It doesn’t all have to be done. In fact, it’ll never be done — and that’s okay.”

    Homesteading is a lifestyle, not a finish line.

    Final Thoughts

    Staying organized isn’t about perfection — it’s about peace of mind. A binder, a few color bins, and some simple routines can transform the daily chaos into something that feels doable.

    Remember: your homestead will never be fully finished, and that’s part of its beauty. You’re growing, learning, and creating something meaningful — one small, organized step at a time.

  • Soft Homemade French Bread Loaves + Hoagie Roll Option

    Soft Homemade French Bread Loaves + Hoagie Roll Option

    There is nothing—nothing—like the smell of fresh homemade bread baking in your kitchen. It instantly makes your home feel warmer, cozier, and just… happier. And this recipe? It’s one of my absolute favorites because it’s simple, reliable, and incredibly versatile.

    This homemade French bread comes out soft, squishy, lightly golden, and perfect for serving with dinner, slicing for sandwiches, or turning into hoagie rolls. It uses everyday ingredients, requires no fancy tools, and makes two full loaves — or one loaf and a batch of hoagie rolls like I did!

    If you’ve been looking for a beginner-friendly bread recipe that works every time, this is the one.


    ⭐ Ingredients

    • 5–6 cups flour
    • 2 ¼ cups warm water
    • 2 tablespoons sugar
    • 1 tablespoon yeast
    • ¾ teaspoon salt
    • 2 tablespoons oil

    🥖 How to Make Becky’s Homemade French Bread

    1. Activate your yeast

    Pour the warm water and sugar into a large mixing bowl.
    Sprinkle the yeast on top and gently stir.
    Let it sit for a few minutes until it starts to bubble and foam — this means the yeast is alive and ready to work its magic.

    2. Add oil, salt & flour

    Stir in the oil and salt.
    Slowly add 5 cups of flour, mixing until everything is well combined.

    3. Knead the dough

    Turn your dough out onto a lightly floured surface.
    Use the remaining 1 cup of flour during kneading as needed.
    Knead for 4–5 minutes, adding flour only until the dough is soft, smooth, and just a little tacky — not sticky.

    4. Shape your loaves

    This recipe makes 2 full French bread loaves.
    Shape them however you like:

    • 2 large French loaves
    • 8 hoagie rolls
    • or 16 small bun-sized rolls

    5. Let rise

    Place your shaped loaves or rolls on a greased baking sheet.
    Cover with a towel and let rise for 1 hour, or until visibly puffy.

    Score the tops if desired — this helps the bread expand beautifully while baking.


    🔥 6. Bake

    Bake at 375°F for 20–25 minutes.

    For an extra golden brown, soft top:
    Brush with melted butter during the last 10 minutes of baking.

    The smell when these come out of the oven… heavenly.
    The texture is soft, warm, and perfectly squishy.


    🍽️ How to Use This Dough

    This dough is incredibly versatile. Try using it for:

    • French bread
    • Hoagie rolls
    • Sub sandwiches
    • Garlic bread
    • Bread bowls
    • Dinner rolls
    • Picnic sandwiches

    Once you make it, you’ll realize how many meals it fits into.


    💛 Final Thoughts

    This homemade French bread is one of those recipes that instantly becomes a family staple. It’s easy, forgiving, and makes your whole home smell amazing. Whether you’re making classic French loaves or hoagie rolls for the week, this bread is soft, warm, and absolutely delicious.

    If you make this recipe, I’d love to hear how it turned out for you!

  • 7 Last-Minute Homemade Gift Ideas from the Homestead

    7 Last-Minute Homemade Gift Ideas from the Homestead

    Let’s be honest — between chores, feeding animals, and juggling family life, the holidays can sneak up fast. Suddenly it’s a few days before Christmas, and you still need gifts for neighbors, teachers, or family.

    The good news? You don’t have to run to town or spend a bunch of money. With a few things from your pantry, garden, or craft stash, you can make thoughtful, homemade gifts that feel warm, personal, and completely you.

    Here are 7 last-minute homestead gift ideas that can be ready before the cookies cool.

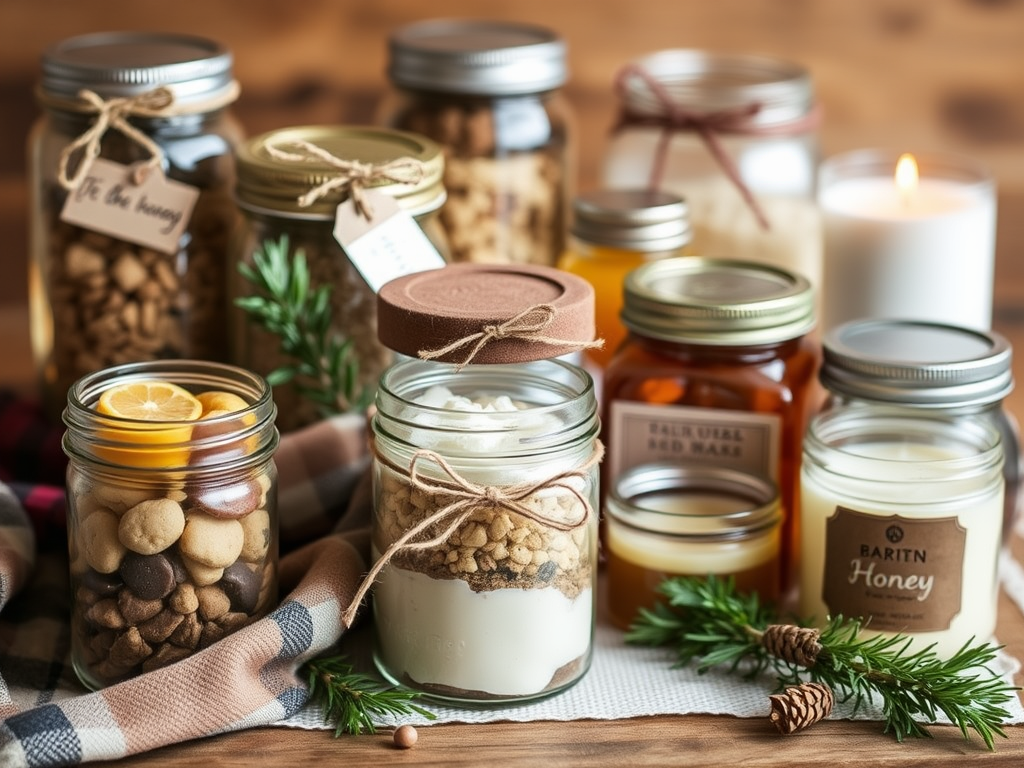
    1. Cookie or Baking Mix in a Jar

    Layer the dry ingredients for your favorite cookies, muffins, or pancakes in a mason jar. Add a cute handwritten tag with instructions (“Just add milk, eggs, and butter!”).

    💡 Homesteader Tip: Add a bit of twine, a cinnamon stick, or a scrap of plaid fabric for that cozy farmhouse touch.

    2. Infused Honey or Sugar

    Take plain honey or sugar and infuse it with herbs or spices you already have.
    Try:

    • Honey + cinnamon sticks
    • Sugar + dried lavender or vanilla bean

    Let it sit a few hours (or overnight if you have time), pour into small jars, and label with the flavor. Sweet, simple, and beautiful!

    3. Homemade Spice or Soup Mixes

    Whip up simple seasoning blends or dry soup mixes with pantry staples:

    • Taco seasoning (chili powder, paprika, cumin, garlic)
    • Ranch mix (dill, parsley, onion, salt, pepper)
    • Dry soup mix with lentils, rice, and bouillon

    💡 Packaging idea: Pour into jars or small bags, add a rustic label, and you’ve got a cozy “meal in a jar.”

    4. Fast Beeswax or Soy Candles

    If you have wax, wicks, and jars (or even old teacups), you can make candles in under an hour. Melt, pour, and scent with essential oils like peppermint, orange, or cinnamon.

    They make perfect last-minute gifts that feel handcrafted and heartfelt — no wrapping required.

    5. Herbal Bath Soaks or Sugar Scrubs

    Combine Epsom salts with a few drops of essential oil and dried herbs (lavender, mint, chamomile — whatever you’ve got!).
    Or mix sugar, coconut oil, and vanilla for a simple exfoliating scrub.

    Spoon into small jars, label, and tie with twine. Done! Perfect for teachers or hard-working homestead friends who need a little self-care.

    6. Small-Batch Jam or Syrup

    If you froze fruit from summer, thaw a few cups and make a small-batch jam or fruit syrup.
    Even a couple of half-pint jars make lovely gifts. Add a note like “From our homestead kitchen to yours.”

    7. “From the Homestead” Goodie Basket

    Combine small items you already have: a jar of pickles, some homemade bread, eggs, or soap — anything that represents your homestead.

    Put it all in a basket or reused box with tissue paper and a handwritten tag. Instant heartfelt gift that shows you care (and saves you a store trip).

    Final Thoughts

    Homemade gifts don’t have to be complicated — sometimes the simplest things are the most appreciated. Whether it’s a jar of spice mix or a cozy candle, these quick gifts come straight from the heart (and the homestead).

    So if you’re short on time this season, remember: you already have everything you need to make something beautiful, useful, and full of love.

  • The Nikki Special: Big-Batch Kielbasa Rice Dinner (Dump-and-Go)

    The Nikki Special: Big-Batch Kielbasa Rice Dinner (Dump-and-Go)

    Some recipes come from cookbooks… some come from Grandma… and some come from a coworker named Nikki who casually hands you a recipe one day and changes your entire dinnertime routine forever.

    This dish—which we lovingly call The Nikki Special—has gone through many tweaks and adjustments over the years. At this point, it’s very much my version… but the name sticks because it makes me smile every time.

    And fair warning: this makes a BIG batch.
    Like, “feed the whole family for dinner AND have lunches for the rest of the week” big.
    It’s hearty, flavorful, comforting, and ridiculously easy to customize.

    Let’s dive in!


    ⭐ Ingredients

    • 2 boxes Rice-A-Roni or 2 cups uncooked white rice
    • 1 whole onion, chopped
    • 3 bell peppers, chopped
    • 2 pint jars of homemade chicken broth
      (About 4 cups — you can do half broth, half water if needed)
    • 1 kielbasa sausage, sliced into bite-sized pieces
    • 1 can corn, drained
    • A handful of cheese, your choice (cheddar, Colby Jack, etc.)

    Optional add-ins:

    • Garlic (fresh or powdered)
    • Green onions
    • Peas
    • Mushrooms
    • Anything you’d throw in a stir fry

    🍳 How to Make the Nikki Special

    1. Cook your rice

    If you’re using Rice-A-Roni, follow the instructions on the box—just swap the water for broth for extra flavor.

    If you’re using white rice, you’ll want to season it yourself since it doesn’t come with a flavor packet. Add:

    • Salt
    • Pepper
    • Garlic powder
    • Onion powder
    • Or your favorite all-purpose seasoning blend

    This step ensures the rice is flavorful and not bland once everything comes together.

    2. Add your veggies while the rice cooks

    Throw the chopped onion and bell peppers right into the pot while the rice cooks.
    No extra pan, no extra dishes—my kind of cooking.
    They soften perfectly and add tons of flavor.

    3. Add the kielbasa

    Once the rice is done, stir in the sliced kielbasa.
    It warms through quickly and gives the dish a hearty, smoky bite.

    4. Add the corn + cheese

    Stir in:

    • 1 can of corn
    • A handful of shredded cheese

    Mix until the cheese melts and everything is combined.

    5. Taste & tweak

    Now channel your inner Ratatouille.
    Smell it. Stir it. Taste it. Adjust seasonings.
    Add more cheese, garlic, veggies—whatever makes your heart happy.

    And viola! Dinner is served.


    🍽️ Why My Family Loves This Recipe

    • Makes a HUGE batch
    • Reheats beautifully
    • Has everything in one pot (rice, veggies, protein, cheese!)
    • Easy to customize
    • Comfort food at its finest

    It’s one of those meals that somehow turns out great every single time—even when you wing it( which is essentially every meal in my household). Let me know if you try this one, and what you thought!

  • What I Wish I Knew Before Buying My First Homestead Animals

    What I Wish I Knew Before Buying My First Homestead Animals


    Starting a homestead often comes with dreams of fresh eggs, goat milk, or maybe even raising your own meat. But here’s the truth—buying animals too soon (or without the right preparation) can turn that dream into stress fast.
    When I bought my first animals, I thought I was ready. What I didn’t realize was how much work, money, and planning it really takes. So today, I want to share the biggest lessons I wish I knew before buying my first animals—so you can avoid the mistakes I made.

    Animals Cost More Than You Think

    It’s so easy to get swept up in the excitement of bringing home new animals — a $5 chick, a “free” goat from a neighbor, or a couple of ducks from the feed store. But here’s the truth: the purchase price is just the beginning of what you’ll spend.

    Feed & supplements:
    Even small animals eat more than you’d expect. A laying hen, for example, goes through roughly ¼ pound of feed per day. Multiply that by a dozen hens, and suddenly you’re buying 50-pound bags. Add in grit, oyster shell, minerals, and the occasional treat or supplement, and those “cheap chickens” start to add up fast.

    Housing & bedding:
    Animals need safe, weatherproof shelter — and that means coops, barns, or hutches that are not only built but also maintained. Repairs, predator-proofing, and fresh bedding like straw or shavings are ongoing expenses. Even the best-built coop needs regular upkeep to stay clean and dry.

    Health care:
    Whether you handle it yourself or call in a vet, animal health care isn’t optional. Vaccines, dewormers, hoof trims, and the occasional emergency visit can hit your wallet when you least expect it. And trust me — it’s never at a convenient time.

    💡 Tip: Before bringing any new animal home, set aside 3–6 months of feed, bedding, and health care costs in your budget. That cushion gives you peace of mind and keeps your homestead running smoothly when unexpected expenses pop up — because they will.

    Homestead Animals Are a Full-Time Commitment

    Animals don’t take days off — and once they’re part of your homestead, neither do you (at least not completely). They don’t care if you’re tired, working late, or dreaming of a weekend getaway. They depend on you for food, water, safety, and care every single day — rain, shine, or snow.

    Daily care:
    Feeding, watering, and cleaning pens or coops quickly become part of your daily rhythm. Chickens still need food and unfrozen water in the snow. Goats still expect breakfast and a secure fence after a windstorm. Cows still need milking — even on holidays or when you’d rather sleep in.

    No “pause” button:
    It’s one of the biggest adjustments for new homesteaders. You can’t simply skip a morning or leave town without a plan. Animals notice when routines are broken — and their health and safety depend on consistency.

    💡 Tip:
    Before bringing animals home, line up a reliable backup plan for the days you can’t be there. Neighbors, friends, or local farm sitters can be absolute lifesavers. It’s worth building those relationships early — because even the most dedicated homesteader needs a break sometimes.

    Build First, Buy Later

    One of the biggest lessons I learned the hard way was this: don’t bring animals home before you’re fully ready for them. I know how tempting it is — you see those adorable baby goats or chicks at the feed store and think, “I’ll finish the pen this weekend.” But animals don’t wait patiently while you finish your to-do list.

    Proper housing matters:
    Chickens need secure, predator-proof coops that lock up tight at night. A single weak spot is an open invitation to raccoons or foxes.

    Goats are escape artists:
    Whatever fencing you think will work — double it. Goats love to climb, lean, and test boundaries (literally). Even a small gap can turn into an impromptu jailbreak.

    Rabbits need protection too:
    Their hutches should have shade in summer, shelter from wind and rain, and wire bottoms sturdy enough to keep out predators.

    💡 Tip:
    Finish the fencing, build the coop, and test everything before you bring your animals home. It might take more time upfront, but it’ll save you endless stress, late-night chases, and potential injuries later. Your animals deserve a safe start — and you deserve peace of mind.

    Not All Breeds Are Created Equal

    It’s easy to fall in love with cute animals online — those floppy-eared goats on Instagram or the fluffy chickens at the feed store. But not every breed is right for every homestead. The animals that fit your goals, climate, and lifestyle will serve you much better than the ones that just look adorable.

    Chickens:
    Before buying, ask yourself — are you after eggs, meat, or both? Laying breeds like Leghorns or Australorps are great for daily eggs, while Cornish Cross are raised for meat. Dual-purpose breeds like Orpingtons or Plymouth Rocks can give you a bit of both but require more feed and patience.

    Goats:
    Goats come with very different skill sets. Dairy breeds like Nubians or Alpines give rich milk for cheese and soap making. Meat breeds like Boers are bulkier and better for freezer camp. There are even smaller breeds like Nigerian Dwarfs(that’s what I have) that make great family milk goats for small spaces.

    Cows:
    A Jersey cow might be perfect for a small homestead if you want rich, creamy milk — but an Angus steer is bred for beef, not daily milking. Each type has different space, feed, and care requirements.

    💡 Tip:
    Choose animals that match your homestead goals, not just your heart. The right breed will make your life easier, your projects more successful, and your animals happier in the long run. Take time to research before buying — your future self (and your feed bill) will thank you.

    Start Small & Grow Slowly

    One of the quickest ways to burn out on the homestead is by diving in too deep, too fast. When you’re just starting out, everything sounds exciting — chickens, goats, cows, rabbits, ducks! But each new species adds a layer of chores, learning, and expenses.

    Start simple:
    Begin with one type of animal and learn their needs inside and out. Master chickens before adding goats. Get comfortable with goats before moving up to cows. Each step builds your confidence and teaches valuable lessons about feed, fencing, and daily routines.

    Grow at your own pace:
    Homesteading isn’t a race — it’s a lifestyle. Expanding slowly allows you to enjoy the process instead of constantly playing catch-up. When you build solid systems first, adding new animals later feels natural instead of chaotic.

    💡 Tip:
    Think of your homestead like a garden — plant a few things, see what thrives, then add more next season. With patience and planning, you’ll grow something that truly lasts.

    Final Thoughts

    Bringing home your first animals is thrilling — there’s nothing quite like hearing that first morning cluck or watching a goat hop through the pasture. But it’s also a big commitment. If I could go back, I’d slow down, prepare more, and start smaller.

    Homesteading is about creating a life that’s sustainable, not stressful. The slower you go, the stronger your foundation will be. Take your time, do your research, and give yourself grace to learn as you grow.

    🐓 Your turn:
    What’s the first animal you dream of bringing to your homestead — and why? Share in the comments below! I love hearing everyone’s stories and seeing how each homestead journey begins.

  • Creamy Buffalo Chicken Crack Dip with Canned Chicken

    Creamy Buffalo Chicken Crack Dip with Canned Chicken

    If you’re looking for the perfect dip to take to a party, potluck, family gathering—or honestly just to enjoy on the couch while watching a movie—this Homemade Chicken Crack Dip is it.

    It’s creamy, spicy (but not too spicy), cheesy, and unbelievably easy to whip together. This is one of those dips that disappears FAST. Like… blink and it’s gone.

    I’ve been making this for years using my own canned chicken, but store-bought canned chicken works perfectly too. The real magic is in the creamy base and the buffalo sauce that brings everything to life.


    ⭐ Why I Love This Chicken Crack Dip

    • Dump-and-go style
    • Perfect for using your home-canned chicken
    • Easy to adjust spice level
    • Always a crowd-pleaser
    • Amazing with chips, crackers, veggies, or bell peppers (my favorite!)
    • No fancy skill required—just mix, bake, and enjoy

    🥣 Ingredients

    • 1 pint jar of home-canned chicken
      or 2 standard cans of store-bought chicken (drained)
    • 16 oz cream cheese, softened
    • 16 oz sour cream
    • 1 large handful shredded cheese (cheddar, Colby Jack, or your favorite)
    • Frank’s Buffalo Hot Sauce –
      About ¼ cup for mild/medium,
      ½ cup or more for spicy!
      (Or, as I do: “measure with your heart” depending on the occasion.)

    Optional toppings:

    • Extra shredded cheese
    • Sliced green onions
    • Bacon Bits

    🧡 How to Soften Your Cream Cheese

    Cream cheese MUST be softened or it won’t blend smoothly.

    • Leave it on the counter for 1–2 hours OR
    • Microwave for 10–15 seconds at a time until soft (not melted)

    🍗 How to Make Chicken Crack Dip

    1. Mix the base

    Add softened cream cheese and sour cream to your mixer bowl.
    I use my KitchenAid for this because my arms get tired, and cream cheese sometimes fights back. 😂
    Blend until completely smooth—no clumps.

    2. Add the chicken, cheese & hot sauce

    Mix in:

    • Your canned chicken
    • A handful of shredded cheese
    • Frank’s Buffalo Hot Sauce

    Start with ¼ cup of hot sauce if you’re unsure. You can always add more!
    At home I add way more because that’s how my daughter likes it.

    Mix again until everything is fully combined. Mixy mixy!

    3. Bake

    Spread your dip into a casserole dish.
    Bake at 400°F for 15 minutes or until it’s hot and bubbly around the edges.

    (Yes, 400° for 15 minutes is perfect!)


    🥨 How to Serve

    This dip is amazing with:

    • Tortilla chips
    • Crackers
    • Pita chips
    • Celery sticks
    • Bell pepper slices (my personal favorite!)

    Honestly… it’s one of those dips that tastes good with anything


    If you try this recipe, let me know what you think!
    I can almost guarantee there won’t be leftovers.

  • 5 Homestead Kitchen Hacks That Save Time, Money, and Sanity

    5 Homestead Kitchen Hacks That Save Time, Money, and Sanity

    Homesteading means a lot of home-cooked meals, but let’s be honest — the kitchen can feel like a full-time job all by itself. Between canning, baking, feeding animals, and trying to keep the counters visible, it’s easy to feel like you’re always cooking or cleaning.

    That’s why I’ve learned a few simple hacks that save me hours every single week — without cutting corners on real, nourishing food. These are the tricks I use in my own kitchen to stay organized, save money, and make cooking from scratch a little more manageable.

    1. Save Your Soup & Bone Scraps for a Weekend Cook-Down

    Don’t toss those veggie ends, onion skins, or chicken bones — they’re gold! I keep a freezer bag labeled “Soup Scraps” and add odds and ends all week long. When the bag’s full, I do a weekend broth cook-down using bones from roasted chicken, pork, or beef.

    Homemade broth is full of collagen, protein, and extra nutrition — plus it adds rich flavor to soups, stews, and sauces. I even use it in place of water when cooking rice, beans, or pasta.

    Once it’s done, I pressure can the broth so I always have jars ready to go on the shelf. It’s one of those behind-the-scenes homestead habits that makes every meal taste better.

    2. Batch Use the Oven (and Time It Right)

    If you’re going to fire up the oven, make it count! I try to bake or roast multiple things at once — like bread, casseroles, and veggies — to save energy and time.

    In the summer, do your baking first thing in the morning before the house heats up. In the winter, let the oven warmth double as a cozy space heater for the kitchen.

    Little tweaks like this stretch your resources and make cooking feel more intentional — not like an endless to-do list.

    3. Pre-Make Your Mixes

    Think of this as your homemade version of those boxed baking mixes — but healthier and cheaper. On slower days, I mix up jars or baggies of:

    • Pancake mix
    • Biscuit mix
    • Cornbread or muffin mix

    When you’re ready to cook, just add the wet ingredients. You can even write the directions right on the jar with a dry-erase marker.

    Buy in bulk to save money — I grab 25–50 lb bags of flour or oats and re-seal them into gallon-size freezer bags. It’s cheaper per pound and makes it easy to grab just what I need without hauling a huge bag every time.

    4. Clean as You Cook

    It sounds obvious, but it’s a game-changer. Keep a sink of soapy water ready while you cook and wash dishes as you go. Wipe counters between steps. Stack cutting boards neatly instead of letting them pile up.

    When dinner’s done, you’ll only have a few things left to rinse — not a mountain of dishes staring at you. Your future self will thank you!

    5. Repurpose or Reuse Leftovers

    Before you toss it, ask: can this become lunch tomorrow? Leftover roasted veggies can become an omelet. Extra rice turns into fried rice. A bit of beef roast can fill tacos or burritos.

    And if something truly isn’t edible anymore — your animals will happily take care of it. Pigs, chickens, and even compost piles appreciate those odds and ends, so nothing goes to waste.

    Final Thoughts

    Homesteading doesn’t have to mean spending all day in the kitchen. With a few smart habits — like saving your scraps, batching your baking, and cleaning as you go — you can reclaim your time and make meals that feel homegrown and hearty.

    Remember: cooking from scratch should feel rewarding, not exhausting. A little prep goes a long way toward a calm, happy, well-fed homestead.

  • Best Homemade Waffle Recipe with Quick Homemade Maple Syrup

    Best Homemade Waffle Recipe with Quick Homemade Maple Syrup

    There is nothing better than a cozy breakfast at home—especially when it involves fresh, fluffy homemade waffles and warm maple syrup bubbling on the stove. This is one of those recipes that looks and tastes fancy, but it’s actually incredibly simple to make. And if you’ve seen any of my dump-and-go style recipes before, you already know I’m not about extra dishes or complicated steps.

    Just toss it all together, plug in the waffle iron, start your syrup, and boom—breakfast magic.

    These waffles are soft on the inside, crisp on the outside, and perfect for adding chocolate chips, fruit, whipped cream, or whatever your family loves. And the homemade syrup? Let’s just say my youngest goes through it so fast that I honestly couldn’t tell you the exact shelf life… but it easily lasts a month in the cupboard in a sealed jar!

    This is one recipe pair you’re going to want to keep forever.


    🧇 Homemade Waffle Recipe

    Ingredients

    • 2 ¼ cups flour
    • ¼ cup sugar
    • 1 tablespoon baking powder
    • ½ teaspoon salt
    • ½ cup butter (melted)
    • 2 cups milk
    • 2 eggs
    • 2 teaspoons vanilla

    Optional add-ins:

    • Chocolate chips
    • Blueberries
    • Cinnamon
    • Chopped nuts

    🧇 How to Make the Waffles

    If you’ve followed my cooking style for any amount of time, you know what’s coming…

    Just toss everything in a bowl and mix it well.
    That’s it.

    No separating eggs, no beating egg whites, no mixing dry and wet ingredients in two different bowls. One bowl, one spoon, one happy cook.

    Once your batter is smooth, let it sit while your waffle iron heats up. Cook according to your waffle maker’s instructions—usually 3–5 minutes per waffle.


    🍁 Homemade Maple Syrup Recipe

    This syrup comes together so fast you won’t believe it, and it tastes way better than the store-bought versions—especially if you use the maple extract.

    Ingredients

    • 1 cup water
    • 2 cups sugar
    • 1 teaspoon molasses
    • ½–1 teaspoon maple extract
    • 1 teaspoon vanilla (optional, but makes it taste more “store bought”)

    🍯 How to Make the Syrup

    1. Bring water to a boil in a saucepan.
    2. Add sugar and molasses, stirring until dissolved (about 2 minutes).
    3. Remove from heat and stir in maple extract and vanilla (if using).
    4. Let it sit and thicken as it cools.

    That’s it!
    You just made homemade syrup in minutes.

    It stores beautifully in a sealed jar in your cupboard for up to a month—although in my house, it never lasts anywhere near that long because my youngest is obsessed with waffles.


    💛 Put It All Together

    My favorite thing about this combo is how perfectly the timing works out. Usually I start the syrup while the first waffle is cooking. By the time the last waffle comes off the iron, the syrup has thickened, cooled just enough, and is ready to drizzle.

    Fluffy waffles + warm homemade syrup = happy family.

    If you give these recipes a try, let me know what you think! I love hearing when other families enjoy these cozy homestead meals as much as we do.

  • Homestead Meal Planning: 5 Easy Meal Prep Hacks for Busy Families

    Homestead Meal Planning: 5 Easy Meal Prep Hacks for Busy Families

    5 Practical Tips I Use Every Week to Save Time, Reduce Waste, and Keep Our Homestead Kitchen Running Smoothly

    Homesteading means a lot of things — feeding animals, tending gardens, canning food, and tackling endless projects. But one chore that never ends? Cooking.
    If you’re anything like me, dinner often sneaks up right when the animals are loudest and the kids are hungriest. That’s why I’ve learned to rely on simple meal prep habits that help me cook from scratch without losing my mind.

    Here are 5 meal prep hacks I use every single week to keep our homestead meals wholesome, quick, and budget-friendly.

    1. Batch Cook Your Proteins

    If you only do one thing from this list, do this.
    On Sundays (or whatever day you can), cook all your main proteins at once. Ground beef, shredded chicken, or even a few pounds of pork roast — it all saves time later.

    Then you can mix and match throughout the week:

    • Ground beef: tacos, spaghetti, or a cheeseburger casserole.
    • Chicken: chicken salad sandwiches, soups, stir-fry, or wraps.
    • Pork: pulled-pork sliders, burrito bowls, or breakfast hash.

    Tip: Keep the seasonings neutral when batch cooking. You can always add flavor later depending on what meal you’re making.

    2. Chop and Prep Your Veggies in Advance

    A big reason home cooking feels hard is all the chopping. Save yourself from the midweek scramble by pre-cutting veggies right after your grocery or garden haul.

    • Slice onions, peppers, and carrots and store them in clear containers.
    • Wash and dry lettuce or spinach so salads come together in seconds.
    • Freeze excess garden veggies in labeled bags for quick soups or casseroles.

    Having ready-to-go ingredients makes grab-and-go cooking a breeze — and helps you use what you grow before it spoils.

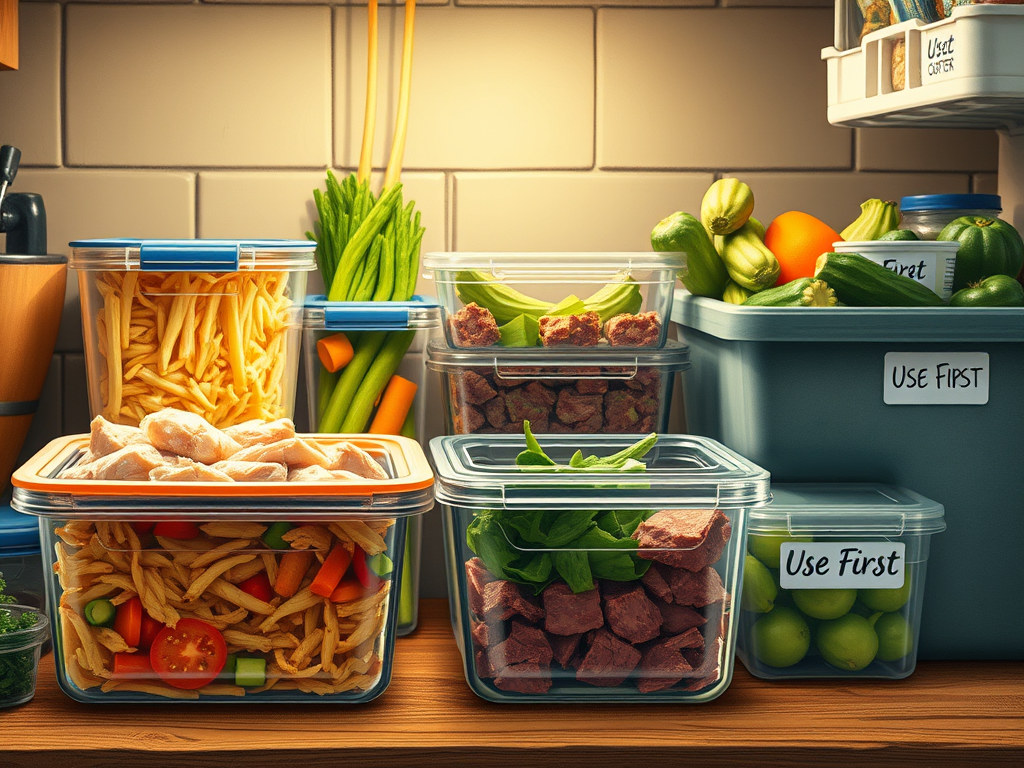
    3. Keep a “Use First” Bin in Your Fridge

    We’ve all done the fridge shuffle — moving jars and containers around until you find something that’s gone bad. To avoid that, I use a simple system:

    • A small bin(or shelf) labeled “Use First.”
    • Anything close to expiring or leftover goes in there.
    • Everyone in the family knows to check it first before grabbing something new.

    Pair this with masking tape and a Sharpie to label containers and jars with the date and contents. It’s cheap, fast, and prevents waste — plus, you’ll always know what’s next in line before it turns into a science experiment.

    4. Embrace “Base Ingredients” for Mix-and-Match Meals

    Instead of cooking full recipes every night, I prep a few base ingredients I can reuse in multiple ways:

    • Cooked rice, quinoa, or potatoes
    • Roasted veggies
    • Beans or lentils

    Then I just combine them with whatever protein or sauce we have on hand. For example:

    • Rice + shredded chicken + veggies = easy stir fry
    • Potatoes + ground beef + cheese = hearty skillet dinner
    • Beans + pork + tomatoes = quick chili

    It’s like building blocks for dinner — you can create endless combinations without starting from scratch.

    5. Make Your Pantry Work for You

    Your pantry is your best friend during busy weeks. Keep it stocked with home-canned goods, dried herbs, and staples that help stretch fresh ingredients.

    Some of my must-haves:

    • Home-canned broth or tomatoes for instant soups
    • Dried herbs and spice blends
    • Flour, oats, and baking basics
    • Rice, pasta, and beans for filling sides

    A well-organized pantry makes it easy to see what you have, plan around it, and avoid those “nothing to cook” moments.

    Final Thoughts

    Meal prepping on the homestead doesn’t have to be complicated. It’s about setting yourself up for success — cooking smart once so you can eat well all week.

    With a little organization (and a roll of masking tape), you can spend less time stressing about dinner and more time enjoying the fruits of your labor — literally.

  • No-Bake Lemon Fudge (3 Ingredients & Ridiculously Easy!)

    No-Bake Lemon Fudge (3 Ingredients & Ridiculously Easy!)

    If you’re looking for a dessert that’s sweet, creamy, refreshing, AND doesn’t require you to turn on your oven… you just found it!
    This No-Bake Lemon Fudge is one of the easiest desserts you’ll ever make—and with only three simple ingredients, your friends and family will absolutely beg you for the recipe.

    It’s bright, zesty, silky, and dangerously addicting. Also? Foolproof. Like truly “dump, melt, mix, chill” foolproof.

    Let’s get into it!


    ⭐ Why You’ll Love This Lemon Fudge

    • No baking involved (hallelujah)
    • Only 3 ingredients
    • Ready to chill in minutes
    • Perfect for holidays, BBQs, potlucks, teacher gifts… or just because
    • Kid-friendly and super customizable

    This recipe is basically sunshine in fudge form.


    🍋 Ingredients

    • 24 oz white almond bark or white chocolate chips
    • 1 (14 oz) can sweetened condensed milk
    • 1 package lemon instant pudding mix (the whole thing!)

    🔥 How to Make No-Bake Lemon Fudge

    1. Melt the chocolate

    If you have a double boiler, this is its moment to shine.
    If not? A microwave works perfectly.

    Using almond bark:
    Cut or shave it into smaller chunks so it melts faster and more evenly.

    Microwave method:
    Place the chocolate in a microwave-safe bowl and heat in 30-second intervals, stirring each time.
    Don’t skip the stirring—if you heat it too long without mixing, you’ll end up with burned chocolate in some spots and unmelted hunks in others. Trust me, 30 seconds + stir is your new best friend.

    Double boiler method:
    Heat on low and stir continuously until smooth and melty.


    2. Add the magic

    Once your chocolate is melted, stir in:

    • the full can of sweetened condensed milk, and
    • the entire package of lemon pudding mix

    Don’t skimp on the pudding mix—it helps the fudge set and gives it that delicious lemony flavor.
    Mix until everything is smooth and combined. Mixy mixy! 😄


    3. Pour & chill

    Line an 8×8 pan with parchment paper and pour the mixture in.
    Smooth the top and pop it in the fridge for 2 hours (or until firm).

    Once set, lift the fudge out by the parchment, slice into squares, and enjoy!


    🍋 Time to Taste!

    This fudge is creamy, bright, and SO refreshing. The lemon flavor makes it perfect for spring and summer, but honestly… I’d make this any day of the year.

    I’m already thinking about experimenting with other pudding flavors—maybe butterscotch? Chocolate? Banana cream?
    I’ll test them out on my coworkers first before sharing the official verdict with you. 😉

    If you try this recipe, let me know what you think! Have a wonderful day, everyone!