Tag: cooking

  • The Best Way to Build Homestead Systems: Start With What’s Causing Friction

    The Best Way to Build Homestead Systems: Start With What’s Causing Friction

    When people start thinking about building better systems on their homestead, I think one of the most common questions is:

    “What system should I build next?”

    What should I organize?
    What should I automate?
    What should I track?
    What should I fix?
    What routine should I create?

    And honestly?

    I don’t think that’s the best question to start with.

    A much better question is:

    What is causing me the most stress right now?

    What feels chaotic?
    What keeps getting pushed off?
    What do I constantly avoid?
    What takes longer than it should?
    What do I complain about over and over again?
    What keeps falling behind?

    Because most of the time, the areas creating the most friction in your life are pointing directly toward the next system you need to build.

    Your Stress Points Are Usually Leaving Clues

    I think one of the biggest mistakes people make when building homestead systems is trying to build them where they think they should.

    They see somebody online with a freezer inventory and think,
    “I need a freezer system.”

    They see someone with color-coded animal records and think,
    “I need to start tracking everything.”

    They see a beautifully organized garden binder and think,
    “I should probably make one of those too.”

    And sometimes those things are helpful.

    But sometimes they’re not the thing that actually needs your attention right now.

    If the freezer isn’t causing stress, it may not need to be the next thing you fix.

    If animal records aren’t creating problems, they may not need to be your focus right now.

    But if you’re losing your mind every evening trying to remember who needs fed, what needs watered, what you forgot, what’s still outside, what’s for dinner, and whether the animals even have enough water…

    that’s where your next system probably needs to be built.

    Because friction leaves clues.

    Stress leaves clues.

    The tasks that keep draining you are usually telling you exactly where your systems need more support.

    The Goal Isn’t to Build the Most Impressive Systems

    It’s to solve the problems that are making life harder than it needs to be.

    This is such an important mindset shift because I think a lot of homesteaders accidentally build systems for appearances instead of function.

    We build what looks organized.
    What sounds productive.
    What seems like the “right” next step.

    But practical systems matter more than impressive systems.

    A system that solves one major stress point in your real life is worth far more than a perfectly organized binder you never use.

    A routine that makes daily chores easier matters more than a planner full of color-coded goals you don’t have time to follow.

    If something on your homestead is repeatedly frustrating you, delaying you, stressing you out, or making you dread a task, that’s not just an inconvenience.

    It’s information.

    It’s showing you where your next system might need to be built.

    Sometimes the Problem Isn’t What You Think It Is

    This is where I think people get stuck.

    We often focus on the symptom instead of the actual problem.

    For example, maybe you keep telling yourself:

    “I hate watering the garden.”
    “My goats are driving me crazy.”
    “I can never find anything.”
    “I’m always behind on chores.”
    “I keep forgetting stuff.”
    “I’m so bad at keeping up with this.”

    But sometimes the thing you’re frustrated with isn’t the real issue.

    Sometimes the problem isn’t the garden.

    It’s the fact that watering is inconsistent, time-consuming, and always happening at the worst possible time.

    Sometimes the problem isn’t the goats.

    It’s the fence.

    Sometimes the problem isn’t that you’re “bad at routines.”

    It’s that your routine depends on perfect energy and zero interruptions to work.

    Sometimes the problem isn’t that you keep forgetting things.

    It’s that you don’t have a system that helps you remember them.

    That distinction matters because if you only focus on the symptom, you’ll keep trying to fix the wrong thing.

    And that’s exhausting.

    A Good Example: When a Garden Stops Feeling Enjoyable

    A lot of people start gardening because they love the idea of it.

    Fresh produce.
    Being outside.
    Growing food.
    A slower, more connected way of living.

    But sometimes the systems surrounding the garden make it feel more stressful than enjoyable.

    Instead of it being peaceful, it becomes one more thing hanging over your head.

    You’re worried about watering.
    Trying to fit it into an already full day.
    Forgetting to do it until it’s getting dark.
    Waking up late and not having time.
    Watching plants struggle because watering is inconsistent.
    Feeling guilty because the garden that was supposed to bring joy is now making you feel behind.

    At that point, the problem may not actually be the garden.

    The problem may be the watering system.

    That’s such an important difference.

    Because once you identify the real source of friction, the solution becomes a lot clearer.

    Maybe you need irrigation.
    Maybe you need a timer.
    Maybe you need to move hoses so they’re easier to use.
    Maybe you need to shrink the garden until it’s manageable.
    Maybe you need to water at a different time of day.

    The point is: once you stop blaming yourself and start looking at the system, you can actually solve the right problem.

    Complain With a Purpose

    I actually think complaining can be useful — if you use it the right way.

    Sometimes things on a homestead really are frustrating.

    Sometimes something is annoying.
    Or stressful.
    Or exhausting.
    Or inconvenient.

    And there’s nothing wrong with acknowledging that.

    But after you vent, it helps to ask:

    Why is this bothering me so much?

    What is the actual problem underneath it?
    What part of this feels hardest?
    What keeps happening over and over?
    What would make this easier?

    That’s what I mean by complaining with a purpose.

    Not just venting for the sake of venting, but using frustration as a clue.

    Because the things you complain about repeatedly are often the things that need a better system.

    Friction Often Shows Up in Repeated Patterns

    If you’re not sure where your biggest stress points are, start paying attention to repeated patterns.

    Ask yourself:

    What do I avoid until the last minute?
    What task always feels harder than it should?
    What do I keep saying I need to “get better at”?
    What problem keeps happening over and over?
    What’s eating up more mental energy than it should?
    What makes me dread part of my day?

    Some common examples might be:

    • constantly dragging hoses around to water
    • always running out of feed because there’s no system for checking inventory
    • losing tools because they don’t have a consistent place
    • forgetting to thaw dinner until it’s too late
    • feeling behind on the garden because maintenance keeps piling up
    • getting overwhelmed by egg collection, cleaning, and storage
    • not knowing what’s in the freezer
    • having animal chores spread out in a way that wastes time and energy
    • never knowing what needs done first when you walk outside

    Those are not random frustrations.

    They’re signs.

    The Best System to Build Next Is Usually the One That Reduces Daily Stress

    I think this is one of the most practical ways to approach systems:

    Instead of asking,
    “What would be nice to have?”

    Ask,
    “What would make everyday life easier?”

    That might be:

    • a better watering setup
    • a simpler feeding routine
    • a consistent spot for supplies
    • a checklist for evening chores
    • a whiteboard for freezer inventory
    • a better place to store tools
    • a weekly reset for the pantry
    • a meal plan that works with your work schedule

    Not because those things are glamorous.

    But because they reduce friction.

    And reducing friction matters.

    Because the less resistance there is between you and a task, the more likely you are to actually keep up with it.

    You Don’t Need to Fix Everything at Once

    This part matters too.

    Once you start noticing friction, it can be tempting to want to fix every single thing immediately.

    Suddenly you want to reorganize the feed room, set up irrigation, label the freezer, create a garden binder, simplify chores, and overhaul the kitchen all in one weekend.

    Please don’t do that to yourself.

    Pick the stress point that is costing you the most energy right now.

    Start there.

    Not because the other things don’t matter.

    But because solving one major source of friction often creates momentum and breathing room for the next thing.

    And that’s how good systems are built.

    Not through one giant life overhaul.

    Through solving one real-life problem at a time.

    How to Use Friction to Build Better Systems

    If you want to start using this idea on your own homestead, here’s a simple way to do it:

    1. Write down the things that frustrate you repeatedly

    Not your dream project list.

    Your actual stress list.

    What keeps annoying you?
    What keeps getting pushed off?
    What makes life harder than it needs to be?

    2. Ask what the real problem is

    Is the issue the task itself?
    Or is it the way the task is set up?

    Is the problem the animal?
    Or the fence?
    The garden?
    Or the watering system?
    The freezer?
    Or the lack of inventory?

    3. Find the smallest possible fix

    Not the perfect fix.
    Not the fanciest fix.

    The smallest one.

    Maybe it’s moving a tool closer.
    Setting a reminder.
    Putting feed where it’s easier to access.
    Installing one timer.
    Making one checklist.
    Creating one routine.

    4. Test it

    Try the adjustment.
    See if it reduces stress.
    See if it saves time.
    See if it makes the task easier to keep up with.

    If it helps, keep it.
    If it doesn’t, adjust it.

    Final Thoughts

    If your homestead feels chaotic, stressful, or harder than it needs to be, the answer is not always “be more disciplined.”

    Sometimes the answer is simply this:

    Pay attention to the friction.

    Pay attention to what keeps frustrating you.
    What keeps falling behind.
    What keeps draining your energy.
    What keeps making you feel overwhelmed.

    Because those stress points are often pointing directly toward the next system you need to build.

    You do not need to organize everything at once.

    You do not need to create the perfect homestead routine overnight.

    You just need to start noticing where life is rubbing the hardest… and build from there.

    Because the best systems usually aren’t the fanciest ones.

    They’re the ones that quietly remove stress from everyday life.


    I go deeper into this topic in this video ⬇️

  • Why Building Homestead Systems Feels So Hard (And What to Do Instead)

    Why Building Homestead Systems Feels So Hard (And What to Do Instead)

    If you’ve ever felt like you finally had your homestead running smoothly…

    the animals were getting fed on time
    the garden was mostly under control
    the house felt manageable
    you had a routine that seemed to be working

    …and then life happened and suddenly everything started falling apart again…

    You are not alone.

    One of the most frustrating parts of homesteading is feeling like you’re constantly trying to “get it together,” only to have your routines collapse the second life gets busy, stressful, or overwhelming.

    And when that keeps happening, it’s really easy to start asking yourself:

    Why can’t I keep up?
    Why do my systems keep failing?
    Why does this feel so hard?

    But honestly?

    Most people don’t struggle with homestead systems because they’re lazy.

    They don’t struggle because they’re incapable.

    And they don’t struggle because they’re just “bad” at routines.

    A lot of times, building homestead systems feels hard because the systems themselves were never designed for real life in the first place.

    A Lot of Homestead Systems Are Built Around “Best Case Scenario” Life

    I think one of the biggest reasons people struggle to build systems that actually last is because they accidentally build them around their best day.

    The day where:

    you have energy
    you’re motivated
    the weather is perfect
    nobody is sick
    nothing unexpected comes up
    your house is calm
    work isn’t overwhelming
    and you somehow have extra time

    So you sit down and make a plan.

    You decide you’re finally going to get organized.

    You’re going to meal prep, track the garden, keep animal records, stay on top of chores, preserve food, work out, drink more water, keep the house cleaner, and create a better routine all at once.

    You write it all out.

    You decide exactly when you’re going to start seeds.
    Exactly when you’re going to weed.
    Exactly how your mornings will look.
    Exactly how your evenings will run.
    Exactly what days you’ll preserve food.
    Exactly how long every task should take.

    And on paper? It looks amazing……For about a week.

    Then real life shows up.

    Work gets busy.
    A kid needs something.
    The weather changes.
    You get tired.
    You have a bad day.
    The garden needs more than you expected.
    The chickens dump their water.
    The freezer needs organized.
    Dinner takes longer than planned.

    And suddenly the system that looked so good on paper starts falling apart.

    Not because it was a bad idea.

    But because it was built around ideal conditions instead of your actual life.

    Real Life Is the Test Every Homestead System Has to Pass

    This is something I think more people need to hear:

    A system that only works when everything is going right is not a very strong system.

    Because real life is not made up of perfect days.

    Real life includes:

    busy work weeks
    bad weather
    sick kids
    low energy
    burnout
    unexpected expenses
    mental overload
    seasonal chaos
    times when you’re simply trying to make it through the day

    If a system can only function when you’re well-rested, motivated, perfectly organized, and operating at your absolute best… it’s probably going to fall apart the second life gets hard.

    That doesn’t mean you failed.

    It means the system wasn’t built with enough flexibility.

    The goal isn’t to build systems that only work on your best days.

    The goal is to build systems that still work on your average days.

    Or even your hard days.

    Because the version of you that’s tired, overwhelmed, busy, stressed, or stretched thin still deserves systems that support her too.

    Trying to Improve Everything at Once Usually Backfires

    Another reason building homestead systems feels so hard is because so many of us try to fix every area of life at the same time.

    We decide we’re going to finally “get our life together” and suddenly we’re trying to build:

    a meal planning system
    a freezer inventory system
    a garden tracking system
    an animal chore system
    a budgeting system
    a cleaning routine
    a better morning routine
    a food preservation routine
    a workout routine

    all at once.

    And for a little while, motivation makes that feel exciting.

    Motivation says:

    Let’s do all of it.
    Let’s start over.
    Let’s make everything better.
    Let’s become a completely different person by next week.

    But motivation and sustainability are not the same thing.

    Motivation is exciting.
    Sustainability is realistic.

    Motivation wants to change everything overnight.
    Sustainability asks, “Can I realistically keep doing this six months from now?”

    That’s a very different question.

    Because most people don’t burn out because they’re incapable of building systems.

    They burn out because they’re trying to build ten systems before they’ve even proven one works.

    Comparison Makes Building Systems Even Harder

    Comparison is another huge reason homestead systems feel harder than they need to.

    Maybe you follow someone online who:

    homeschools multiple kids
    bakes bread from scratch
    milks goats every morning
    preserves everything
    grows a giant garden
    raises livestock
    keeps a spotless kitchen
    and somehow seems to do it all effortlessly

    And without even realizing it, you start thinking:

    “Well if they can do it, I should be able to do it too.”

    But maybe your life looks completely different.

    Maybe you work full time.
    Maybe your kids are in sports.
    Maybe you have a long commute.
    Maybe your energy is lower right now.
    Maybe you’re in a season where you’re already stretched thin.
    Maybe your budget is different.
    Maybe your climate creates totally different challenges.

    But instead of building systems around your reality, you start trying to force someone else’s routine into your life.

    And that’s where a lot of systems start breaking down.

    The problem usually isn’t homemade meals.
    Or gardening.
    Or preserving food.
    Or raising animals.

    The problem is trying to force a system into your life that was never built for it.

    A Good Homestead System Should Work With Your Life, Not Against It

    I think one of the biggest mindset shifts in homesteading is realizing that good systems should support your life — not constantly fight against it.

    That means asking questions like:

    What do I realistically have time for right now?
    What tasks stress me out the most?
    What routines feel sustainable with my current schedule?
    What am I trying to do simply because I think I “should”?
    What keeps falling apart?
    What feels harder than it needs to be?

    Because if you’re constantly building routines that leave you exhausted, behind, and frustrated, the answer is probably not “try harder.”

    The answer may be:

    simplify the system
    build smaller
    slow down
    focus on one area at a time
    remove unnecessary steps
    adjust your expectations
    or stop trying to force your life into someone else’s version of homesteading

    Build for Your Bare Minimum, Not Your Best Day

    If there’s one thing I would encourage more homesteaders to do, it’s this:

    Build systems around your bare minimum.

    Build for the version of you that is:

    tired
    busy
    overwhelmed
    low on motivation
    mentally drained
    physically worn out
    dealing with a stressful week

    Because if your system still works during those seasons, it will probably work during almost anything.

    That doesn’t mean you can’t do more when you have the time or energy.

    Of course you can.

    But your baseline system — the one you rely on long term — should not require constant peak performance to survive.

    It should be simple enough, realistic enough, and flexible enough to still function when life gets messy.

    And honestly?

    That’s what makes a system sustainable.

    Not perfection.

    Not intensity.

    Not motivation.

    Consistency.

    Even imperfect consistency.

    What to Do Instead

    If building homestead systems has been feeling harder than it should, I’d encourage you to stop trying to fix everything at once and start here:

    1. Pick one area that’s causing the most stress

    Not ten things.
    Not your whole life.
    Just one.

    Maybe it’s feeding routines.
    Maybe it’s watering the garden.
    Maybe it’s meal planning.
    Maybe it’s freezer organization.
    Maybe it’s keeping up with animal chores.

    Start with the thing that creates the most friction in your day-to-day life.

    2. Ask what makes it hard

    Is it too time-consuming?
    Too complicated?
    Too inconsistent?
    In the wrong location?
    Dependent on motivation?
    Built around unrealistic expectations?

    3. Make it simpler

    A lot of times the best system is not the fanciest one.

    It’s the one you can actually repeat.

    That might mean:

    • fewer steps
    • a smaller version
    • a different schedule
    • moving supplies closer
    • automating part of it
    • lowering the bar temporarily
    • focusing on consistency over optimization

    4. Test it without making it personal

    If it doesn’t work right away, that does not automatically mean you failed.

    It may just mean the system needs adjusted.

    That’s normal.

    Every homestead is different.
    Every family is different.
    Every season of life is different.

    You’re allowed to experiment.

    You’re allowed to pivot.

    You’re allowed to change things until they fit.

    Final Thoughts

    If building homestead systems feels hard, it doesn’t automatically mean you’re doing something wrong.

    A lot of times it simply means you’re trying to build routines that don’t actually match the life you’re living right now.

    And that’s fixable.

    You do not need to build a perfect homestead routine overnight.

    You do not need to copy someone else’s schedule.

    You do not need to overhaul every area of your life at once.

    You just need to start paying attention to what your real life actually needs.

    Build smaller.
    Build slower.
    Build around your real schedule, your real energy, and your real season of life.

    Because the best homestead systems usually aren’t the most impressive ones.

    They’re the ones that still work when life gets messy.


    If this post resonated with you, I also go deeper into this topic in my latest YouTube workshop on building homestead systems that actually fit real life. I’ll link that video below if you want to watch the full breakdown.

  • Soft Homemade French Bread Loaves + Hoagie Roll Option

    Soft Homemade French Bread Loaves + Hoagie Roll Option

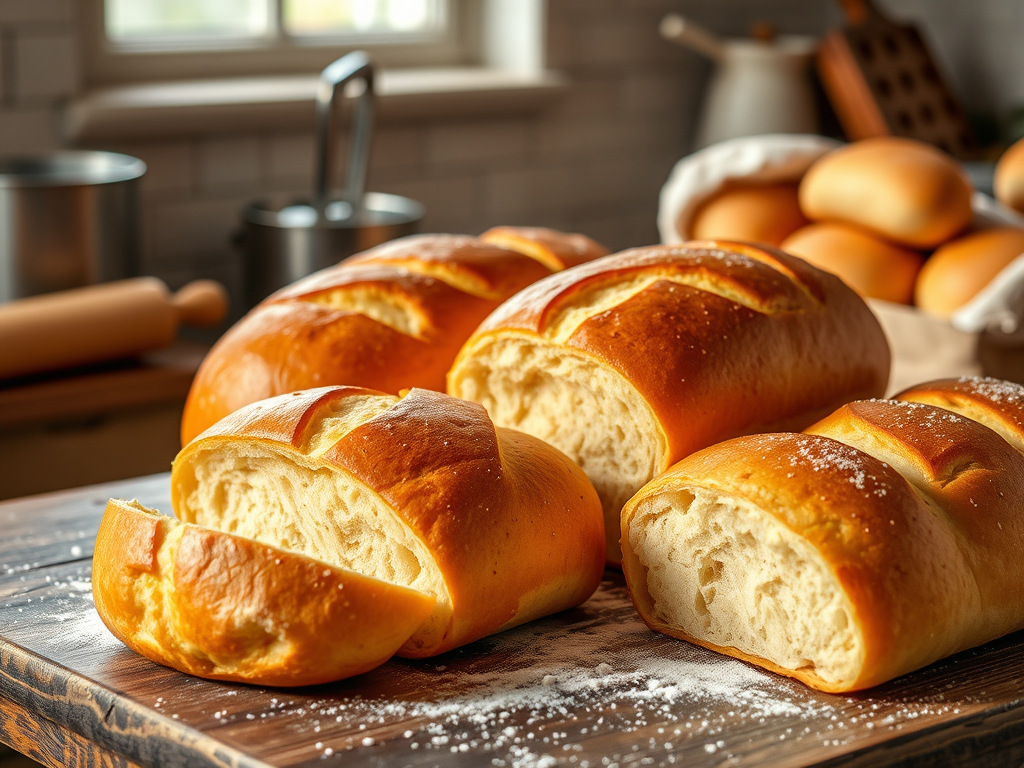
    There is nothing—nothing—like the smell of fresh homemade bread baking in your kitchen. It instantly makes your home feel warmer, cozier, and just… happier. And this recipe? It’s one of my absolute favorites because it’s simple, reliable, and incredibly versatile.

    This homemade French bread comes out soft, squishy, lightly golden, and perfect for serving with dinner, slicing for sandwiches, or turning into hoagie rolls. It uses everyday ingredients, requires no fancy tools, and makes two full loaves — or one loaf and a batch of hoagie rolls like I did!

    If you’ve been looking for a beginner-friendly bread recipe that works every time, this is the one.


    ⭐ Ingredients

    • 5–6 cups flour
    • 2 ¼ cups warm water
    • 2 tablespoons sugar
    • 1 tablespoon yeast
    • ¾ teaspoon salt
    • 2 tablespoons oil

    🥖 How to Make Becky’s Homemade French Bread

    1. Activate your yeast

    Pour the warm water and sugar into a large mixing bowl.
    Sprinkle the yeast on top and gently stir.
    Let it sit for a few minutes until it starts to bubble and foam — this means the yeast is alive and ready to work its magic.

    2. Add oil, salt & flour

    Stir in the oil and salt.
    Slowly add 5 cups of flour, mixing until everything is well combined.

    3. Knead the dough

    Turn your dough out onto a lightly floured surface.
    Use the remaining 1 cup of flour during kneading as needed.
    Knead for 4–5 minutes, adding flour only until the dough is soft, smooth, and just a little tacky — not sticky.

    4. Shape your loaves

    This recipe makes 2 full French bread loaves.
    Shape them however you like:

    • 2 large French loaves
    • 8 hoagie rolls
    • or 16 small bun-sized rolls

    5. Let rise

    Place your shaped loaves or rolls on a greased baking sheet.
    Cover with a towel and let rise for 1 hour, or until visibly puffy.

    Score the tops if desired — this helps the bread expand beautifully while baking.


    🔥 6. Bake

    Bake at 375°F for 20–25 minutes.

    For an extra golden brown, soft top:
    Brush with melted butter during the last 10 minutes of baking.

    The smell when these come out of the oven… heavenly.
    The texture is soft, warm, and perfectly squishy.


    🍽️ How to Use This Dough

    This dough is incredibly versatile. Try using it for:

    • French bread
    • Hoagie rolls
    • Sub sandwiches
    • Garlic bread
    • Bread bowls
    • Dinner rolls
    • Picnic sandwiches

    Once you make it, you’ll realize how many meals it fits into.


    💛 Final Thoughts

    This homemade French bread is one of those recipes that instantly becomes a family staple. It’s easy, forgiving, and makes your whole home smell amazing. Whether you’re making classic French loaves or hoagie rolls for the week, this bread is soft, warm, and absolutely delicious.

    If you make this recipe, I’d love to hear how it turned out for you!

  • 7 Pantry Staples Every Homesteader Should Have Year-Round

    7 Pantry Staples Every Homesteader Should Have Year-Round

    A well-stocked pantry is the heartbeat of any homestead. Whether you’re deep in canning season or throwing together a last-minute dinner, having reliable staples on hand makes everything smoother.

    Over the years, I’ve learned that there are a few items I never let myself run out of — simple, versatile ingredients that stretch meals, preserve food, and keep us prepared for whatever comes our way.

    Here are my 7 must-have pantry staples that every homesteader should keep stocked year-round.

    1. Dried Beans and Lentils

    They’re affordable, filling, and incredibly versatile. Dried beans and lentils can be used in soups, stews, casseroles, or canned for quick, ready meals. Lentils cook faster and don’t need soaking, which makes them perfect for those days when you forget to plan dinner.

    💡 Tip: Store in airtight jars or food-grade buckets with oxygen absorbers to extend shelf life. Rotate them yearly for freshness.

    2. Flour and Grains

    Flour is the base for so many homestead staples — bread, pancakes, biscuits, tortillas, you name it. I like to keep both all-purpose and whole wheat flour, along with oats, cornmeal, and rice (more on rice below!). These shelf-stable grains can carry you through busy seasons or lean times.

    💡 Tip: Freeze flour for 48 hours before long-term storage to prevent pests. Then transfer it to airtight containers.

    3. Rice

    Rice deserves its own category because of how versatile and long-lasting it is. It pairs with nearly any meal and stores beautifully. We keep both white rice (for long-term storage) and brown rice (for flavor and nutrition, though it has a shorter shelf life).

    💡 Tip: Store rice in sealed containers or mylar bags with oxygen absorbers. A 5-gallon bucket can hold around 35 pounds — that’s a lot of meals!

    4. Salt — The Ultimate Preserver

    Salt isn’t just for flavor — it’s a tool for survival. It’s essential for curing meat, fermenting vegetables, and preserving food. I always keep sea salt for everyday cooking and pickling salt for canning.

    💡 Tip: Skip iodized salt for canning projects — it can cloud your jars and change the taste.

    5. Home-Canned Meat and Broth

    Few things make me happier than seeing rows of home-canned meat and broth on my shelves. It’s convenient, shelf-stable protein ready for any meal. Whether it’s turkey, chicken, or beef, I can throw together soups, dips, and casseroles in minutes — no thawing required.

    💡 Tip: Check out my post on From Freezer to Pantry: How I Pressure Can Turkey for Long-Term Storage for exact times and steps.

    6. Tomatoes and Tomato Products

    Tomatoes are one of the most versatile ingredients in the pantry — think sauces, soups, stews, chili, and salsa. Every year, I can plenty of diced tomatoes, tomato sauce, and paste so we’re set until next harvest.

    💡 Tip: Add bottled lemon juice or citric acid when canning to keep the acidity safe for storage.

    7. Vinegar

    If I could only keep one “multi-tool” in my kitchen, it would be vinegar. It’s used for cleaning, pickling, cooking, canning, and even animal care. I keep both white distilled vinegar (for cleaning and canning) and apple cider vinegar (for marinades, dressings, and even goat care!).

    💡 Tip: Store vinegar in a cool, dark place. It lasts indefinitely when sealed properly.

    Final Thoughts

    A well-stocked pantry is about more than just food — it’s about security, simplicity, and peace of mind. When you build your pantry with intention, you’re not just preparing for busy seasons; you’re investing in your family’s independence year-round.

    These seven staples have earned a permanent spot in my pantry because they’re versatile, affordable, and practical — the kind of ingredients that keep our homestead running, no matter the season.

    What’s one item you can’t live without in your pantry? Let me know in the comments below!

  • The Nikki Special: Big-Batch Kielbasa Rice Dinner (Dump-and-Go)

    The Nikki Special: Big-Batch Kielbasa Rice Dinner (Dump-and-Go)

    Some recipes come from cookbooks… some come from Grandma… and some come from a coworker named Nikki who casually hands you a recipe one day and changes your entire dinnertime routine forever.

    This dish—which we lovingly call The Nikki Special—has gone through many tweaks and adjustments over the years. At this point, it’s very much my version… but the name sticks because it makes me smile every time.

    And fair warning: this makes a BIG batch.
    Like, “feed the whole family for dinner AND have lunches for the rest of the week” big.
    It’s hearty, flavorful, comforting, and ridiculously easy to customize.

    Let’s dive in!


    ⭐ Ingredients

    • 2 boxes Rice-A-Roni or 2 cups uncooked white rice
    • 1 whole onion, chopped
    • 3 bell peppers, chopped
    • 2 pint jars of homemade chicken broth
      (About 4 cups — you can do half broth, half water if needed)
    • 1 kielbasa sausage, sliced into bite-sized pieces
    • 1 can corn, drained
    • A handful of cheese, your choice (cheddar, Colby Jack, etc.)

    Optional add-ins:

    • Garlic (fresh or powdered)
    • Green onions
    • Peas
    • Mushrooms
    • Anything you’d throw in a stir fry

    🍳 How to Make the Nikki Special

    1. Cook your rice

    If you’re using Rice-A-Roni, follow the instructions on the box—just swap the water for broth for extra flavor.

    If you’re using white rice, you’ll want to season it yourself since it doesn’t come with a flavor packet. Add:

    • Salt
    • Pepper
    • Garlic powder
    • Onion powder
    • Or your favorite all-purpose seasoning blend

    This step ensures the rice is flavorful and not bland once everything comes together.

    2. Add your veggies while the rice cooks

    Throw the chopped onion and bell peppers right into the pot while the rice cooks.
    No extra pan, no extra dishes—my kind of cooking.
    They soften perfectly and add tons of flavor.

    3. Add the kielbasa

    Once the rice is done, stir in the sliced kielbasa.
    It warms through quickly and gives the dish a hearty, smoky bite.

    4. Add the corn + cheese

    Stir in:

    • 1 can of corn
    • A handful of shredded cheese

    Mix until the cheese melts and everything is combined.

    5. Taste & tweak

    Now channel your inner Ratatouille.
    Smell it. Stir it. Taste it. Adjust seasonings.
    Add more cheese, garlic, veggies—whatever makes your heart happy.

    And viola! Dinner is served.


    🍽️ Why My Family Loves This Recipe

    • Makes a HUGE batch
    • Reheats beautifully
    • Has everything in one pot (rice, veggies, protein, cheese!)
    • Easy to customize
    • Comfort food at its finest

    It’s one of those meals that somehow turns out great every single time—even when you wing it( which is essentially every meal in my household). Let me know if you try this one, and what you thought!

  • Creamy Buffalo Chicken Crack Dip with Canned Chicken

    Creamy Buffalo Chicken Crack Dip with Canned Chicken

    If you’re looking for the perfect dip to take to a party, potluck, family gathering—or honestly just to enjoy on the couch while watching a movie—this Homemade Chicken Crack Dip is it.

    It’s creamy, spicy (but not too spicy), cheesy, and unbelievably easy to whip together. This is one of those dips that disappears FAST. Like… blink and it’s gone.

    I’ve been making this for years using my own canned chicken, but store-bought canned chicken works perfectly too. The real magic is in the creamy base and the buffalo sauce that brings everything to life.


    ⭐ Why I Love This Chicken Crack Dip

    • Dump-and-go style
    • Perfect for using your home-canned chicken
    • Easy to adjust spice level
    • Always a crowd-pleaser
    • Amazing with chips, crackers, veggies, or bell peppers (my favorite!)
    • No fancy skill required—just mix, bake, and enjoy

    🥣 Ingredients

    • 1 pint jar of home-canned chicken
      or 2 standard cans of store-bought chicken (drained)
    • 16 oz cream cheese, softened
    • 16 oz sour cream
    • 1 large handful shredded cheese (cheddar, Colby Jack, or your favorite)
    • Frank’s Buffalo Hot Sauce –
      About ¼ cup for mild/medium,
      ½ cup or more for spicy!
      (Or, as I do: “measure with your heart” depending on the occasion.)

    Optional toppings:

    • Extra shredded cheese
    • Sliced green onions
    • Bacon Bits

    🧡 How to Soften Your Cream Cheese

    Cream cheese MUST be softened or it won’t blend smoothly.

    • Leave it on the counter for 1–2 hours OR
    • Microwave for 10–15 seconds at a time until soft (not melted)

    🍗 How to Make Chicken Crack Dip

    1. Mix the base

    Add softened cream cheese and sour cream to your mixer bowl.
    I use my KitchenAid for this because my arms get tired, and cream cheese sometimes fights back. 😂
    Blend until completely smooth—no clumps.

    2. Add the chicken, cheese & hot sauce

    Mix in:

    • Your canned chicken
    • A handful of shredded cheese
    • Frank’s Buffalo Hot Sauce

    Start with ¼ cup of hot sauce if you’re unsure. You can always add more!
    At home I add way more because that’s how my daughter likes it.

    Mix again until everything is fully combined. Mixy mixy!

    3. Bake

    Spread your dip into a casserole dish.
    Bake at 400°F for 15 minutes or until it’s hot and bubbly around the edges.

    (Yes, 400° for 15 minutes is perfect!)


    🥨 How to Serve

    This dip is amazing with:

    • Tortilla chips
    • Crackers
    • Pita chips
    • Celery sticks
    • Bell pepper slices (my personal favorite!)

    Honestly… it’s one of those dips that tastes good with anything


    If you try this recipe, let me know what you think!
    I can almost guarantee there won’t be leftovers.

  • Best Homemade Waffle Recipe with Quick Homemade Maple Syrup

    Best Homemade Waffle Recipe with Quick Homemade Maple Syrup

    There is nothing better than a cozy breakfast at home—especially when it involves fresh, fluffy homemade waffles and warm maple syrup bubbling on the stove. This is one of those recipes that looks and tastes fancy, but it’s actually incredibly simple to make. And if you’ve seen any of my dump-and-go style recipes before, you already know I’m not about extra dishes or complicated steps.

    Just toss it all together, plug in the waffle iron, start your syrup, and boom—breakfast magic.

    These waffles are soft on the inside, crisp on the outside, and perfect for adding chocolate chips, fruit, whipped cream, or whatever your family loves. And the homemade syrup? Let’s just say my youngest goes through it so fast that I honestly couldn’t tell you the exact shelf life… but it easily lasts a month in the cupboard in a sealed jar!

    This is one recipe pair you’re going to want to keep forever.


    🧇 Homemade Waffle Recipe

    Ingredients

    • 2 ¼ cups flour
    • ¼ cup sugar
    • 1 tablespoon baking powder
    • ½ teaspoon salt
    • ½ cup butter (melted)
    • 2 cups milk
    • 2 eggs
    • 2 teaspoons vanilla

    Optional add-ins:

    • Chocolate chips
    • Blueberries
    • Cinnamon
    • Chopped nuts

    🧇 How to Make the Waffles

    If you’ve followed my cooking style for any amount of time, you know what’s coming…

    Just toss everything in a bowl and mix it well.
    That’s it.

    No separating eggs, no beating egg whites, no mixing dry and wet ingredients in two different bowls. One bowl, one spoon, one happy cook.

    Once your batter is smooth, let it sit while your waffle iron heats up. Cook according to your waffle maker’s instructions—usually 3–5 minutes per waffle.


    🍁 Homemade Maple Syrup Recipe

    This syrup comes together so fast you won’t believe it, and it tastes way better than the store-bought versions—especially if you use the maple extract.

    Ingredients

    • 1 cup water
    • 2 cups sugar
    • 1 teaspoon molasses
    • ½–1 teaspoon maple extract
    • 1 teaspoon vanilla (optional, but makes it taste more “store bought”)

    🍯 How to Make the Syrup

    1. Bring water to a boil in a saucepan.
    2. Add sugar and molasses, stirring until dissolved (about 2 minutes).
    3. Remove from heat and stir in maple extract and vanilla (if using).
    4. Let it sit and thicken as it cools.

    That’s it!
    You just made homemade syrup in minutes.

    It stores beautifully in a sealed jar in your cupboard for up to a month—although in my house, it never lasts anywhere near that long because my youngest is obsessed with waffles.


    💛 Put It All Together

    My favorite thing about this combo is how perfectly the timing works out. Usually I start the syrup while the first waffle is cooking. By the time the last waffle comes off the iron, the syrup has thickened, cooled just enough, and is ready to drizzle.

    Fluffy waffles + warm homemade syrup = happy family.

    If you give these recipes a try, let me know what you think! I love hearing when other families enjoy these cozy homestead meals as much as we do.

  • No-Bake Lemon Fudge (3 Ingredients & Ridiculously Easy!)

    No-Bake Lemon Fudge (3 Ingredients & Ridiculously Easy!)

    If you’re looking for a dessert that’s sweet, creamy, refreshing, AND doesn’t require you to turn on your oven… you just found it!
    This No-Bake Lemon Fudge is one of the easiest desserts you’ll ever make—and with only three simple ingredients, your friends and family will absolutely beg you for the recipe.

    It’s bright, zesty, silky, and dangerously addicting. Also? Foolproof. Like truly “dump, melt, mix, chill” foolproof.

    Let’s get into it!


    ⭐ Why You’ll Love This Lemon Fudge

    • No baking involved (hallelujah)
    • Only 3 ingredients
    • Ready to chill in minutes
    • Perfect for holidays, BBQs, potlucks, teacher gifts… or just because
    • Kid-friendly and super customizable

    This recipe is basically sunshine in fudge form.


    🍋 Ingredients

    • 24 oz white almond bark or white chocolate chips
    • 1 (14 oz) can sweetened condensed milk
    • 1 package lemon instant pudding mix (the whole thing!)

    🔥 How to Make No-Bake Lemon Fudge

    1. Melt the chocolate

    If you have a double boiler, this is its moment to shine.
    If not? A microwave works perfectly.

    Using almond bark:
    Cut or shave it into smaller chunks so it melts faster and more evenly.

    Microwave method:
    Place the chocolate in a microwave-safe bowl and heat in 30-second intervals, stirring each time.
    Don’t skip the stirring—if you heat it too long without mixing, you’ll end up with burned chocolate in some spots and unmelted hunks in others. Trust me, 30 seconds + stir is your new best friend.

    Double boiler method:
    Heat on low and stir continuously until smooth and melty.


    2. Add the magic

    Once your chocolate is melted, stir in:

    • the full can of sweetened condensed milk, and
    • the entire package of lemon pudding mix

    Don’t skimp on the pudding mix—it helps the fudge set and gives it that delicious lemony flavor.
    Mix until everything is smooth and combined. Mixy mixy! 😄


    3. Pour & chill

    Line an 8×8 pan with parchment paper and pour the mixture in.
    Smooth the top and pop it in the fridge for 2 hours (or until firm).

    Once set, lift the fudge out by the parchment, slice into squares, and enjoy!


    🍋 Time to Taste!

    This fudge is creamy, bright, and SO refreshing. The lemon flavor makes it perfect for spring and summer, but honestly… I’d make this any day of the year.

    I’m already thinking about experimenting with other pudding flavors—maybe butterscotch? Chocolate? Banana cream?
    I’ll test them out on my coworkers first before sharing the official verdict with you. 😉

    If you try this recipe, let me know what you think! Have a wonderful day, everyone!

  • How to Make a Completely Homemade Pizza (Dough, Cheese & Sauce from Scratch)

    How to Make a Completely Homemade Pizza (Dough, Cheese & Sauce from Scratch)

    There’s something truly magical about making a pizza entirely from scratch — we’re talking about the dough, the cheese, and even the sauce. Whether you’re growing tomatoes in your backyard or making cheese from fresh milk, this homestead-style pizza is wholesome, flavorful, and deeply satisfying.

    Ready to get your hands messy and make something delicious? Let’s dive in!

    Homemade Pizza Dough Recipe

    A good pizza starts with a great crust — chewy on the inside, slightly crisp on the outside.

    Ingredients:

    2 ¼ tsp (1 packet) active dry yeast

    1 ½ cups warm water (about 110°F)

    1 tbsp sugar

    3 ½ cups all-purpose flour

    2 tbsp olive oil

    1 ½ tsp salt

    Instructions:

    1. In a large bowl, dissolve the sugar in warm water. Sprinkle yeast over the top and let it sit for 5–10 minutes, until foamy.

    2. Add flour, olive oil, and salt. Mix until it forms a dough, then knead on a floured surface for 8–10 minutes until smooth and elastic.

    3. Place the dough in a greased bowl, cover with a towel, and let it rise for about 1 hour or until doubled in size.

    4. Punch the dough down and roll it out to your desired thickness.

    Tip: This recipe makes enough for two medium pizzas.

    Homemade Farmer’s Cheese (Soft, Crumbly Cheese)

    You don’t need rennet or complicated equipment — this simple cheese is fresh, easy, and perfect for pizza.

    Ingredients:

    1 gallon whole milk

    1/4 cup white vinegar or lemon juice

    1 tsp salt (optional)

    Instructions:

    1. Heat the milk in a large pot over medium heat until it starts to gently boil (around 180°F).

    2. Remove from heat and slowly stir in vinegar or lemon juice.

    3. The curds will begin to separate from the whey. Let it sit for 10 minutes.

    4. Line a colander with cheesecloth and pour in the mixture. Let it drain for 1–2 hours depending on how firm you want the cheese.

    5. Crumble over your pizza or press into a mold to slice later.

    Optional: Add herbs or garlic for extra flavor before pressing the cheese.

    Homemade Tomato Sauce (From Garden or Pantry)

    This sauce is simple, vibrant, and full of fresh tomato flavor.

    Ingredients:

    4–5 ripe tomatoes (or 1 can crushed tomatoes)

    2 cloves garlic, minced

    1 tbsp olive oil

    1 tsp salt

    1 tsp dried oregano

    1 pinch sugar (to balance acidity)

    * Optional: basil, chopped onion, red pepper flakes

    Instructions:

    1. If using fresh tomatoes, blanch and peel them first.

    2. Sauté garlic in olive oil until fragrant.

    3. Add tomatoes, salt, oregano, and sugar.

    4. Simmer uncovered for 20–30 minutes, stirring occasionally.

    5. Blend for a smoother sauce, or leave chunky for a rustic texture.

    I used frozen tomatoes from last years harvest that I hadn’t gotten around to using yet. I let it simmer all day to cook off any excess liquid plus I like my sauce to be thick and very tomato-ey.

    Putting It All Together

    1. Preheat your oven to 475°F. A pizza stone or cast iron pan works great if you have one.

    2. Roll out your dough on a floured surface and transfer to a baking sheet or stone.

    3. Spread a layer of your homemade tomato sauce.

    4. Sprinkle on your homemade cheese.

    5. Add toppings: sliced onions, garden vegetables, cured meats, olives, herbs — whatever your homestead provides!

    6. Bake for 10–12 minutes, until the crust is golden and the cheese is bubbly.

    Final Thoughts

    Making pizza entirely from scratch is a deeply rewarding experience. It connects you with your food, your land, and your kitchen in the best way possible. Whether you grow your own tomatoes or just want to try something homemade this weekend, this recipe is a delicious place to start.

  • Homesteading: My Top Ten Tips

    Homesteading is a dream for many—living closer to nature, growing your own food, raising animals, and embracing self-sufficiency. It’s a lifestyle filled with rewards, but it’s also packed with challenges and surprises that most beginners don’t anticipate. Looking back on my journey, there are several things I wish I had known before diving into homesteading. If you’re just starting out, these lessons might save you time, money, and frustration.

    1. You Don’t Have to Do Everything at Once

    When I first started homesteading, I was eager to try it all—gardening, raising chickens, keeping bees, and preserving food—all at once. I figured if instead of just dipping a toe in, I would jump in both feet first. This was a recipe for burnout. I quickly learned that starting small and focusing on one or two projects at a time is the best approach. Homesteading is a marathon, not a sprint. There’s always time to add more as you gain experience and confidence. If you want to read about how I got started I’ll link it below.

    2. It’s Harder Than It Looks Online

    Scrolling through social media, it’s easy to romanticize homesteading. Beautiful gardens, happy animals, and rustic homes make it seem effortless. In reality, homesteading is a lot of hard work. Plants don’t always thrive, animals get sick, and fences break, a lot. Be prepared for challenges and bad days. Homesteading is about learning as you go, and remembering its okay to make mistakes.

    3. The Cost Can Add Up Quickly

    I assumed that homesteading would save me money right away, but I quickly realized that the upfront costs can be significant. Tools, seeds, fencing, animal feed, and infrastructure like coops and raised garden beds all require investment. While homesteading can save money in the long term, it’s important to budget wisely and prioritize essential projects first.  I also suggest prioritizing DIY projects and recycled materials before buying new. It’s more important for it to be purposeful than pretty.

    4. Research Is Your Best Friend

    One of the biggest lessons I learned is that knowledge is power. I made several mistakes early on because I didn’t research enough. For example, I didn’t now how to amend my soil or know what companion planting was. Let’s not start about how I misjudged the height of fencing I needed for my goat enclosure. Take the time to study your land, climate, and the requirements of the animals or plants you want to raise.  

    5. Time Management Is Key

    Homesteading is incredibly time-consuming. Between caring for animals, maintaining a garden, and tackling DIY projects, it’s easy to feel overwhelmed. I wish I had created a daily and seasonal schedule earlier to stay on top of tasks. Planning ahead, especially for busy times like planting and harvesting seasons, makes everything more manageable. 

    6. Pests and Predators Are Relentless

    One of the biggest shocks for me was how relentless pests and predators can be. From insects destroying crops to foxes breaking into the chicken coop, I learned that prevention is crucial. Invest in secure fencing, use natural pest control methods, and always be prepared to adapt your strategies.

    7. It’s Okay to Outsource Some Things

    As much as I wanted to do everything myself. I quickly realized that it’s okay to ask for help or outsource certain tasks. Whether it’s hiring someone to repair a fence or buying seedlings instead of starting from seed. Outsourcing can save you time and energy when you’re feeling overwhelmed. When I outsource I prefer to buy local or from other homesteaders to help support my community.

    8. Patience Is Essential

    Homesteading is a lifestyle that requires patience. Gardens don’t grow overnight, and animals take time to mature and produce. There will be setbacks and slow progress, but trust the process. Celebrate small victories and remember why you started.  

    9. Self-Care Matters

    In the early days of homesteading, I often worked from dawn to dusk, neglecting my own well-being. Over time, I learned that self-care is just as important as caring for your land and animals. Take breaks, rest when you need to, and make time for hobbies or relaxation to avoid burnout.  

    10. Homesteading Is a Journey, Not a Destination

    Finally, I wish I had embraced the mindset that homesteading is an ever-evolving journey. There’s always something new to learn, and your goals change over time. Instead of striving for perfection, focus on progress and enjoy the process of building a lifestyle that works for you.  

    Final Thoughts

    Homesteading is a fulfilling and transformative lifestyle, but it’s not without its challenges. By learning from my experiences, you can avoid some common pitfalls and set yourself up for success. Remember to start small, do your research, and give yourself grace as you learn and grow.  

    Whether you’re just starting out or thinking about taking the plunge, homesteading is a journey worth pursuing. What lessons have you learned or are you excited to explore? Share your thoughts in the comments below!