Tag: beginner gardening

  • How to Start a Garden with Almost No Money

    How to Start a Garden with Almost No Money

    For many people, starting a garden feels like an expensive dream. Between the cost of pots, soil, seeds, and tools, it can seem like gardening is only for those with extra money to spend. But here’s the truth: gardening has always been about creativity, resourcefulness, and working with what you have.

    You don’t need a big backyard, a fancy greenhouse, or brand-new tools to enjoy the benefits of fresh, homegrown food. With a little imagination, you can create a thriving garden on almost no budget at all.

    In this post, I’ll share practical ways you can start a garden with little to no money—whether you live in a small apartment, have a tiny backyard, or simply want to save money while growing your own food.


    1. Use What You Already Have

    Before you buy anything, look around your home—you probably already have most of what you need to get started.

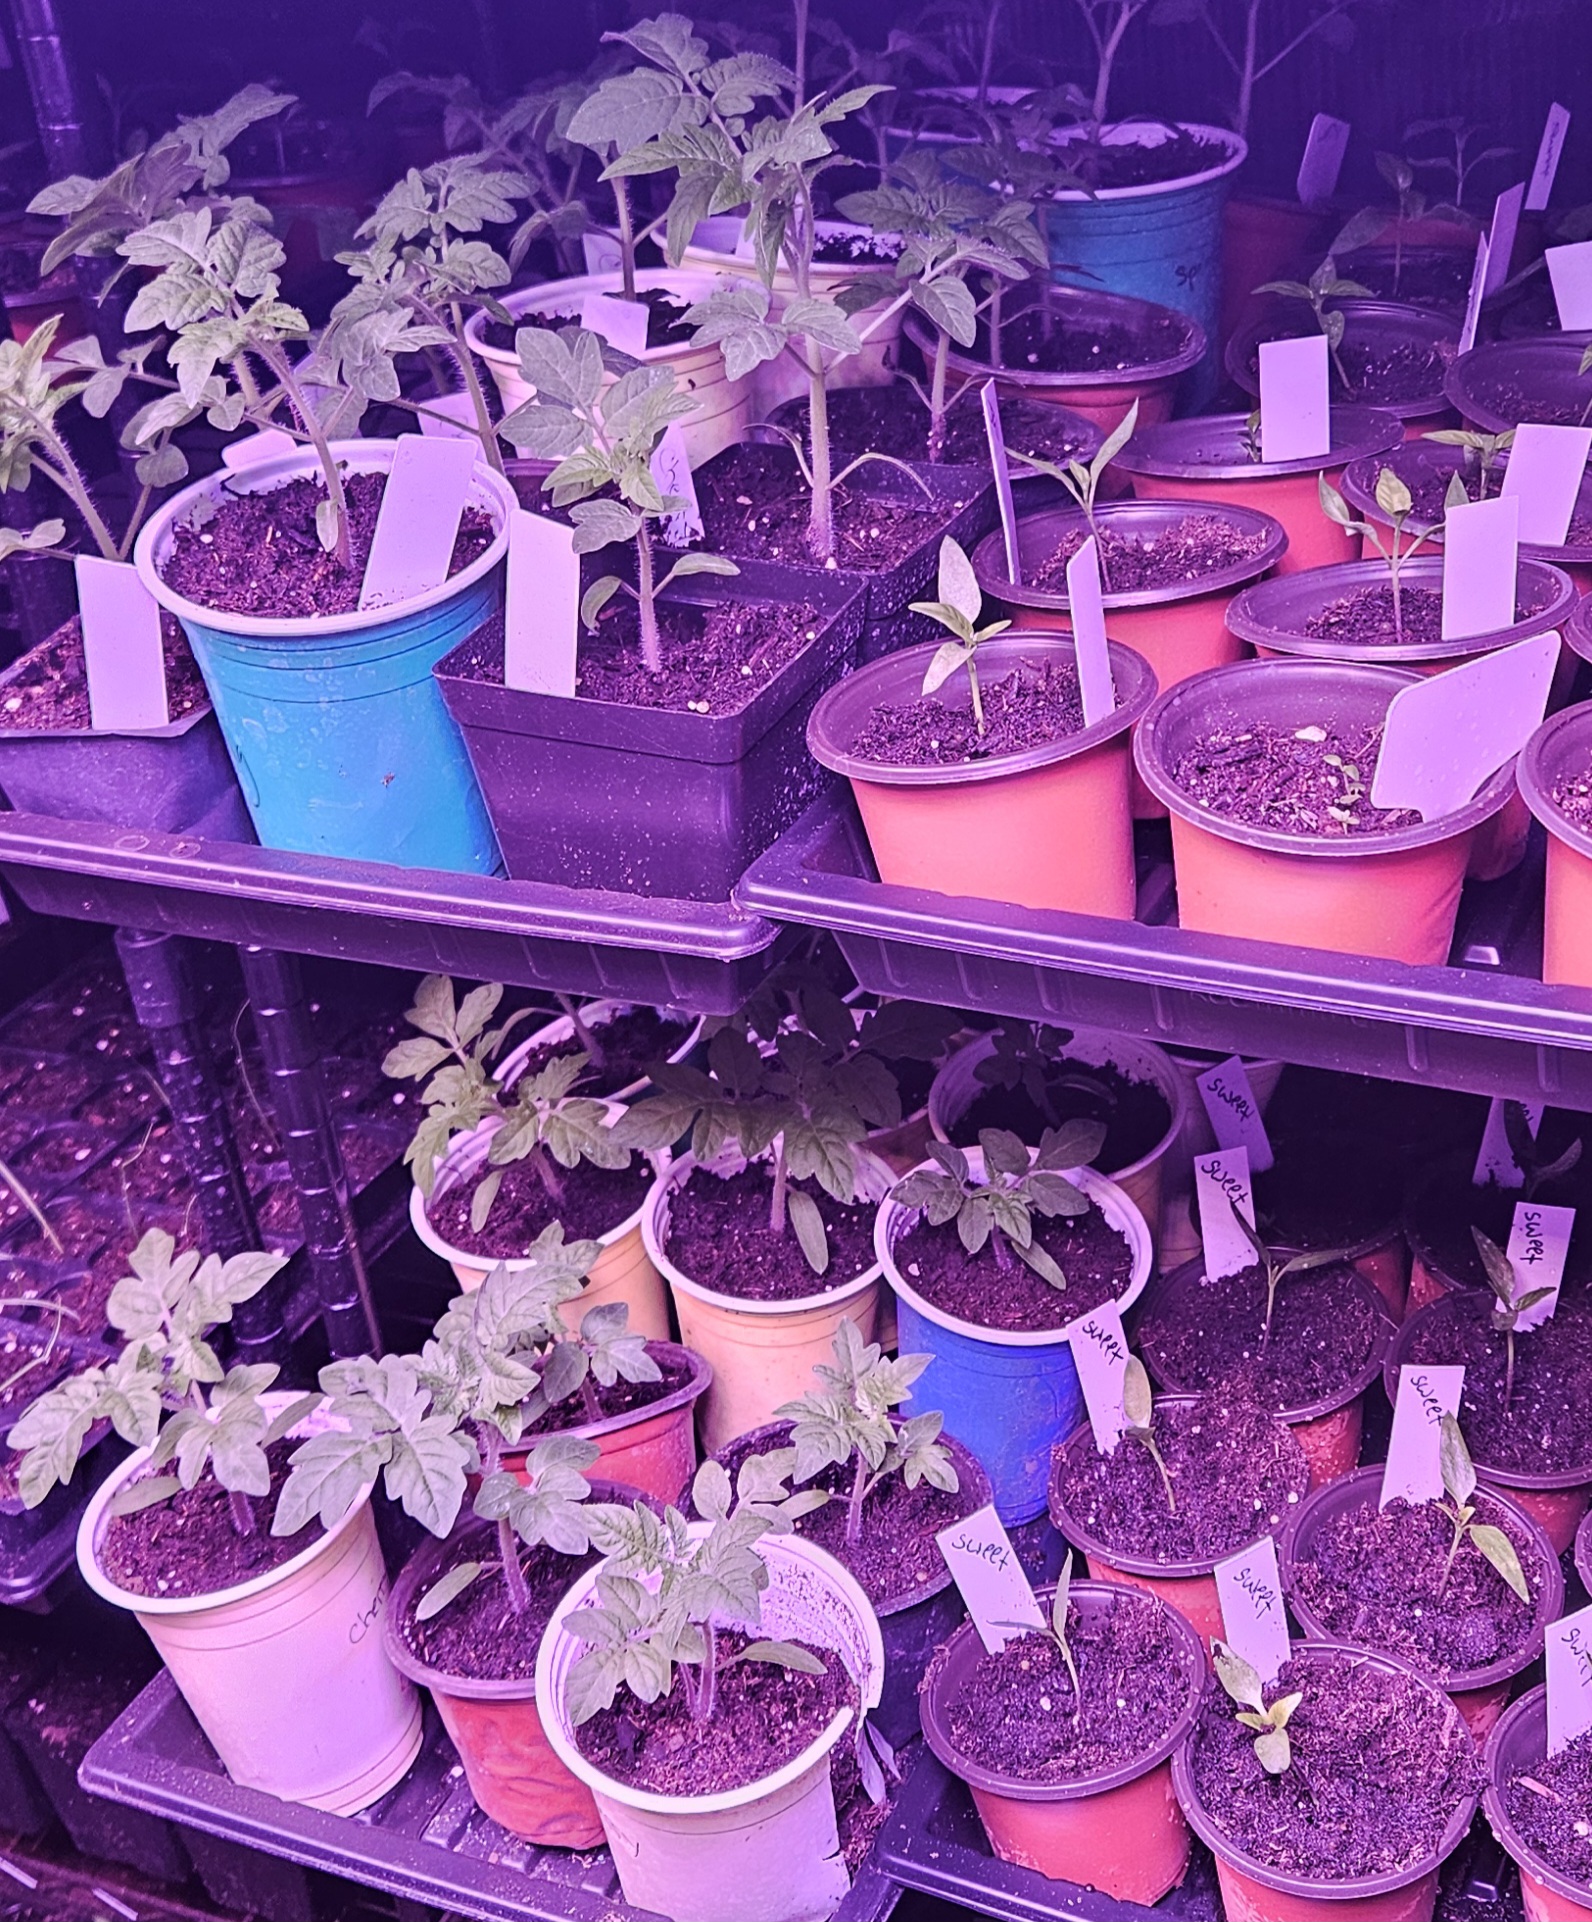
    • Repurposed Containers: Buckets, totes, yogurt cups, and even cardboard boxes can become instant planters. Just make sure to poke drainage holes at the bottom so water doesn’t pool and rot the roots.
    • Egg Cartons & Small Cups for Seed Starting: These make excellent starter trays for seeds. When the seedlings are big enough, you can transplant them to larger containers or the ground.
    • Kitchen Scraps to Regrow: Did you know you can regrow green onions, celery, and lettuce from their root ends? Place them in a shallow dish of water, and within days you’ll see fresh growth. Garlic cloves, potato eyes, and even herbs like basil can also be propagated from scraps.

    💡 Pro tip: Keep a “garden bin” for reusable items like jars, containers, and egg cartons—you’ll always have something on hand when you want to start seeds.


    2. Find Free or Cheap Soil & Compost

    Soil is the foundation of every garden, but it doesn’t have to cost a fortune.

    • Make Your Own Compost: Collect vegetable scraps, eggshells, and coffee grounds in a small compost bin or pile. Over time, it breaks down into nutrient-rich soil for your plants.
    • Mulch for Free: Rake up fallen leaves, grass clippings, or shredded paper to use as mulch. Mulch helps retain water, improve soil health, and reduce weeds.
    • Coffee Shops & Breweries: Many local coffee shops give away used coffee grounds, and some breweries will even share spent grains—both are fantastic for composting.
    • Community Resources: Check Facebook, Buy Nothing groups, Craigs list, or local garden clubs. Many people offer free dirt, compost, or extra supplies to anyone willing to pick them up.

    3. Get Seeds & Plants for Free

    Seeds can be one of the biggest costs when starting out—but they don’t have to be.

    • Seed Swaps: Many communities and online groups organize seed swaps where you can trade what you have for something new.
    • Library Seed Banks: Some libraries now offer free seeds alongside books. You “check out” seeds, grow your plants, and return saved seeds at the end of the season.
    • Regrow from the Kitchen: Garlic, onions, lettuce, and even tomatoes can be regrown from scraps or seeds inside store-bought produce. Just make sure they’re not treated with chemicals that prevent sprouting.
    • Ask Neighbors: Gardeners often end up with too many seeds or divided plants. Don’t be shy about asking—you might be surprised how generous people are with extras.

    💡 Pro tip: Save your own seeds! Once you’ve grown something successfully, collect seeds for next season—it’s free and sustainable.


    4. DIY Garden Tools & Supplies

    You don’t need an expensive set of garden tools to get started. A little creativity goes a long way.

    • DIY Watering Cans: Poke holes in the lid of an old milk jug, and you have an instant watering can.
    • Homemade Raised Beds: Use scrap wood, pallets, or even bricks to create small garden beds.
    • Simple Plant Markers: Popsicle sticks, rocks, or even painted spoons can label your plants.
    • Repurposed Household Items: Old socks or strips of cloth make great plant ties. Large plastic bottles can be cut to protect seedlings from the cold.

    💡 Pro tip: Focus on function, not appearance. Many successful gardens are built with repurposed items—what matters most is that your plants have the right conditions to thrive.


    5. Start Small & Grow Smart

    One of the biggest mistakes new gardeners make is trying to do too much, too fast.

    • Choose Easy Crops: Start with 2–3 beginner-friendly vegetables like lettuce, beans, zucchini, or radishes. They’re forgiving, fast-growing, and rewarding.
    • Container Gardening: If you don’t have a yard, containers on a balcony, patio, or windowsill can still grow a surprising amount of food.
    • Gradual Expansion: Once you see success with a few plants, add more each season. This keeps costs low and helps you learn without feeling overwhelmed.
    • Keep It Fun: Gardening should bring joy, not stress. Starting small allows you to actually enjoy the process rather than feeling pressured to manage a huge space.

    💡 Pro tip: Celebrate every harvest, no matter how small. Even one salad made from homegrown lettuce is a big win when you’re just starting out.


    Can You Really Start a Garden With No Money?

    Yes, you absolutely can start a garden with little to no money. Many successful gardens begin with repurposed containers, saved seeds, kitchen scraps, and compost made from household waste. Gardening has historically been about working with available resources rather than buying everything new. By starting small, using free materials, and gradually expanding over time, anyone can begin growing food without a large upfront investment.


    Final Thoughts

    Starting a garden with almost no money isn’t just possible—it’s rewarding. By using what you already have, seeking out free resources, and keeping things simple, you’ll quickly see that growing food doesn’t have to break the bank.

    Every tomato, bean, or herb you grow is one less you need to buy at the store, and those little wins add up fast. More importantly, you’ll gain confidence, skills, and the satisfaction of knowing you created something from almost nothing.

    Your turn: What’s the first plant you want to grow on a budget? Share your ideas in the comments—I’d love to hear your plans!


    If you’re trying to grow food while staying on budget, you may also like my book Homesteading on a Budget from The Grounded Homesteader Series.

  • 5 Essential Tips for Starting a Garden: A Beginner’s Guide to Growing Your Own Food

    5 Essential Tips for Starting a Garden: A Beginner’s Guide to Growing Your Own Food

    Gardening for self-sufficiency is a rewarding and empowering way to take control of your food sources, reduce grocery bills, and reconnect with nature. Whether you’re aiming to grow a few vegetables on your balcony or transform your backyard into a mini farm, starting a garden for self-sufficiency is easier than you might think. I’ll guide you through the basics of starting out, from choosing the right crops to planning your garden layout, so you can get started with the confidence you need to succeed.

    Why Start Gardening for Self-Sufficiency?

    Before diving into the logistics of gardening, it’s important to understand the benefits that come with growing your own food:

    1. Save Money: Growing your own fruits, vegetables, and herbs can significantly reduce your grocery costs over time.

    2. Healthier Food: You’ll have direct access to fresh, organic produce free from harmful chemicals or pesticides.

    3. Environmental Impact: Growing your own food reduces the carbon footprint associated with transportation and packaging in grocery store products.

    4. Increased Food Security: By growing your own food, you are less dependent on commercial food systems, giving you more control over your nutrition.

    Do I have you convinced? Great, let’s get started.

    1. Start Small and Plan Your Garden

    If you’re just starting out with gardening, keep it simple at first! Kick things off with a few plants and get the hang of the basics – it’ll boost your confidence and give you the experience you need before going big. There’s nothing worse than feeling discouraged after your first year just because you took on too much. Planning ahead is also key to maximizing your space and picking the right plants for your area. No need to get bummed out over a plant that just wasn’t meant to grow where you are!

    Assess Your Space:

    – Backyard: If you have a yard, you may want to start with a raised bed or traditional garden plot. Raised beds are particularly helpful for beginners because they’re easier to manage, with fewer weeds and better drainage.

    – Balcony/Patio: If you don’t have much space, container gardening is an excellent choice. You can grow herbs, leafy greens, and small vegetables in pots, ensuring that you maximize your available space.

    – Indoor: Growing food indoors can be a great option for those in apartments or colder climates. Herbs, microgreens, and even dwarf varieties of tomatoes and peppers can thrive indoors with the right lighting.

    Plan What to Grow:

    Start by thinking about the foods you use most often. Focus on crops that are easy to grow, have a high yield, and can be stored for later use. Consider growing:

    Leafy Greens: Spinach, kale, and lettuce are quick to grow and ideal for beginners.

    Root Vegetables: Carrots, beets, and potatoes are hearty and thrive in many climates.

    Herbs: Basil, mint, parsley, and cilantro are great for adding flavor to meals and grow well in small spaces.

    Tomatoes and Peppers: These are common self-sufficiency staples, and with the right care, they can be incredibly productive.

    Legumes: Beans and peas enrich the soil while providing a valuable source of protein.

    Be sure to consider your climate and growing season. Research what plants are best suited to your area and when to plant them to ensure success.

    2. Prepare the Soil

    Healthy soil is the foundation of any successful garden. For self-sufficiency, you’ll need soil that is nutrient-rich, well-draining, and capable of supporting your crops throughout the growing season.

    Improve Your Soil:

    Composting: Start composting kitchen scraps, lawn clippings, and yard waste to create nutrient-dense soil. Composting helps to enrich the soil, improve its structure, and promote healthy plant growth.

    Soil Amendments: You may need to amend your soil with organic matter such as compost, manure, or garden soil. Test your soil to see if it needs any adjustments, like adding lime for acidity or sulfur to lower pH levels.

    Mulching: Mulch helps retain moisture, suppresses weeds, and keeps the soil temperature stable. Use organic mulch like straw, wood chips, or grass clippings.

    3. Start with the Right Tools

    Having the right tools can make gardening easier and more enjoyable. Some basic gardening tools you’ll need include:

    Garden Gloves: Protect your hands from thorns, dirt, and pests.

    Trowel or Hand Fork: Essential for digging and planting small seeds or plants.

    Watering Can or Hose: Make sure your plants stay hydrated, especially during dry spells.

    Pruning Shears: These are important for trimming plants and removing dead growth.

    Spade or Shovel: Useful for digging and turning over the soil in larger beds.

    Start with a small collection of basic tools, and as you gain more experience, you can gradually expand your toolkit.

    4. Plant and Care for Your Crops

    Once your garden space is prepared and your tools are ready, it’s time to plant. Follow the recommended planting instructions on seed packets or plant labels, and ensure your crops have the proper spacing for healthy growth.

    Watering:

    Proper watering is key to plant health. While the needs of each crop vary, aim to water early in the morning or late in the evening to reduce evaporation and prevent diseases. Check your plants regularly to ensure they’re not too dry or waterlogged.

    Fertilizing:

    To boost plant growth, use organic fertilizers like compost or aged manure. Fertilize at regular intervals as recommended by the plant type, but avoid over-fertilizing, which can harm plants.

    Pest Management:

    While pests are a part of gardening, there are natural ways to manage them. Try companion planting (e.g., planting marigolds with tomatoes to deter pests), introducing beneficial insects (like ladybugs), and using organic pest control methods such as neem oil or insecticidal soap.

    5. Harvest and Store Your Crops

    The fruits of your labor will eventually come to fruition. Harvest your crops when they’re ripe, but don’t wait too long, as overripe produce can attract pests.

    Storing Your Bounty:

    Self-sufficiency involves not just growing food but also preserving it for later use. Some options include:

    Canning: Preserve fruits, vegetables, and even meats by canning them in jars. Make jams, sauces, and soups for long-term storage.

    Freezing: Many vegetables can be frozen for later use. Flash-freezing helps preserve their texture and flavor.

    Drying: Herbs, fruits, and even some vegetables can be dried and stored for extended use.

    Root Cellar: Certain crops like potatoes, carrots, and winter squash can be stored in a cool, dark place for months.

    Final Thoughts

    Starting a garden for self-sufficiency is a rewarding journey that’s all about continuous learning. Every season offers new challenges and opportunities to experiment with different crops, techniques, and food preservation methods. By starting small with a well-planned garden, focusing on soil health, and mastering the basics, you’ll set yourself up for success. As you gain experience, you’ll see your yield grow, and so will your confidence in growing your own food. Gardening is a skill that improves with time, so stay patient, curious, and enjoy watching both your garden and your self-sufficiency flourish. Happy gardening!