Tag: Start Homesteading

  • Homestead Meal Planning: 5 Easy Meal Prep Hacks for Busy Families

    Homestead Meal Planning: 5 Easy Meal Prep Hacks for Busy Families

    5 Practical Tips I Use Every Week to Save Time, Reduce Waste, and Keep Our Homestead Kitchen Running Smoothly

    Homesteading means a lot of things — feeding animals, tending gardens, canning food, and tackling endless projects. But one chore that never ends? Cooking.
    If you’re anything like me, dinner often sneaks up right when the animals are loudest and the kids are hungriest. That’s why I’ve learned to rely on simple meal prep habits that help me cook from scratch without losing my mind.

    Here are 5 meal prep hacks I use every single week to keep our homestead meals wholesome, quick, and budget-friendly.

    1. Batch Cook Your Proteins

    If you only do one thing from this list, do this.
    On Sundays (or whatever day you can), cook all your main proteins at once. Ground beef, shredded chicken, or even a few pounds of pork roast — it all saves time later.

    Then you can mix and match throughout the week:

    • Ground beef: tacos, spaghetti, or a cheeseburger casserole.
    • Chicken: chicken salad sandwiches, soups, stir-fry, or wraps.
    • Pork: pulled-pork sliders, burrito bowls, or breakfast hash.

    Tip: Keep the seasonings neutral when batch cooking. You can always add flavor later depending on what meal you’re making.

    2. Chop and Prep Your Veggies in Advance

    A big reason home cooking feels hard is all the chopping. Save yourself from the midweek scramble by pre-cutting veggies right after your grocery or garden haul.

    • Slice onions, peppers, and carrots and store them in clear containers.
    • Wash and dry lettuce or spinach so salads come together in seconds.
    • Freeze excess garden veggies in labeled bags for quick soups or casseroles.

    Having ready-to-go ingredients makes grab-and-go cooking a breeze — and helps you use what you grow before it spoils.

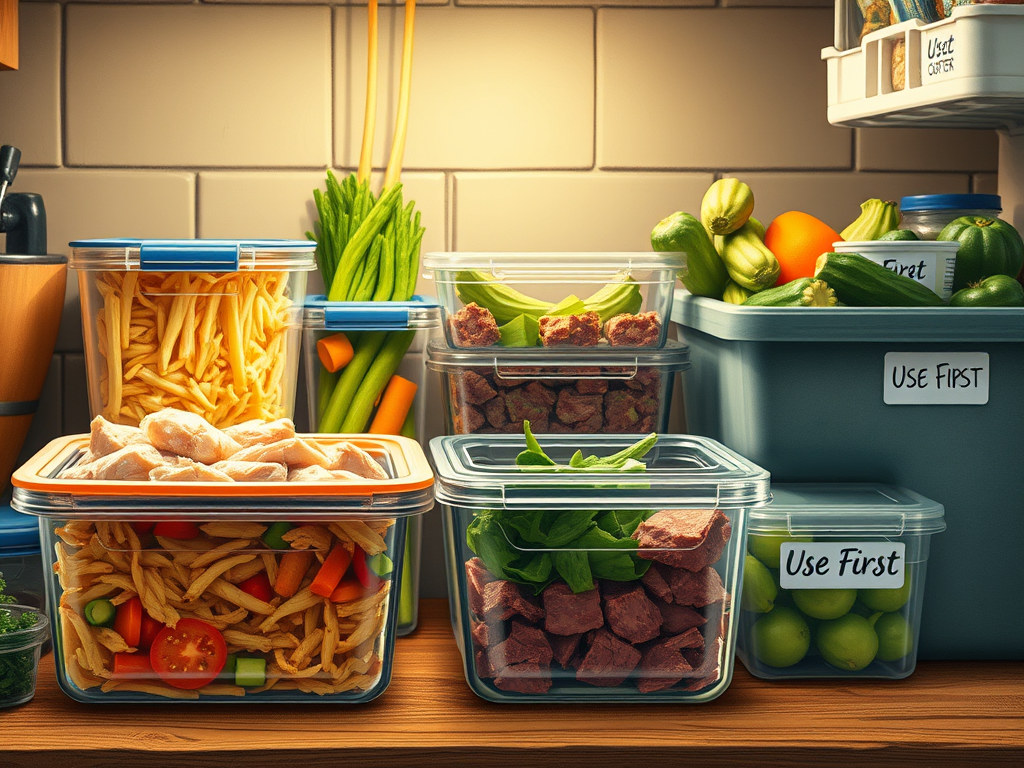
    3. Keep a “Use First” Bin in Your Fridge

    We’ve all done the fridge shuffle — moving jars and containers around until you find something that’s gone bad. To avoid that, I use a simple system:

    • A small bin(or shelf) labeled “Use First.”
    • Anything close to expiring or leftover goes in there.
    • Everyone in the family knows to check it first before grabbing something new.

    Pair this with masking tape and a Sharpie to label containers and jars with the date and contents. It’s cheap, fast, and prevents waste — plus, you’ll always know what’s next in line before it turns into a science experiment.

    4. Embrace “Base Ingredients” for Mix-and-Match Meals

    Instead of cooking full recipes every night, I prep a few base ingredients I can reuse in multiple ways:

    • Cooked rice, quinoa, or potatoes
    • Roasted veggies
    • Beans or lentils

    Then I just combine them with whatever protein or sauce we have on hand. For example:

    • Rice + shredded chicken + veggies = easy stir fry
    • Potatoes + ground beef + cheese = hearty skillet dinner
    • Beans + pork + tomatoes = quick chili

    It’s like building blocks for dinner — you can create endless combinations without starting from scratch.

    5. Make Your Pantry Work for You

    Your pantry is your best friend during busy weeks. Keep it stocked with home-canned goods, dried herbs, and staples that help stretch fresh ingredients.

    Some of my must-haves:

    • Home-canned broth or tomatoes for instant soups
    • Dried herbs and spice blends
    • Flour, oats, and baking basics
    • Rice, pasta, and beans for filling sides

    A well-organized pantry makes it easy to see what you have, plan around it, and avoid those “nothing to cook” moments.

    Final Thoughts

    Meal prepping on the homestead doesn’t have to be complicated. It’s about setting yourself up for success — cooking smart once so you can eat well all week.

    With a little organization (and a roll of masking tape), you can spend less time stressing about dinner and more time enjoying the fruits of your labor — literally.

  • The Best Cauliflower Salad for Holidays – Easy Dump-and-Go Recipe

    The Best Cauliflower Salad for Holidays – Easy Dump-and-Go Recipe

    If you’ve been around here long enough, you know I love a good dump-and-go recipe—especially the kind that makes people think you spent way more time in the kitchen than you actually did. And friends… this cauliflower salad? It’s exactly that.

    I’m normally not one for raw cauliflower. I usually prefer it cooked and softened because it’s just easier to eat. But this salad? This salad converted me. It’s creamy, crunchy, flavorful, and so ridiculously easy to throw together that you’ll find yourself making it over and over again.

    And with the holidays right around the corner, this recipe deserves a spot on your table. Trust me—bring this to a gathering and watch it disappear.


    Why This Salad Is Always a Crowd Favorite

    It’s the perfect blend of crunchy veggies, salty bacon, nutty sunflower seeds, and a creamy dressing that ties everything together. Every bite has a little bit of everything, and the flavors get even better the longer it sits.

    This is one of those dishes that tastes like something your aunt spent three hours making… except it takes about 15 minutes and almost zero effort.


    Ingredients

    • 12 slices of bacon, cooked and crumbled
    • 1 head cauliflower, cut into bite-sized pieces
    • 1 head broccoli, cut into bite-sized pieces
    • ¾ cup sunflower seeds (salted or unsalted—your call!)
    • ½ red onion, diced
    • 1 cup creamy ranch dressing
    • 1 ½ Tbsp white wine vinegar
    • ¼ cup sugar

    Directions

    1. Prep your veggies

    Cut the cauliflower and broccoli into bite-sized pieces—nothing too tiny and nothing the size of a small tree. Just nice, fork-friendly bites. And feel free to adjust the ratio while you’re at it! More cauliflower, less broccoli, or vice versa… remember, it’s your kitchen and your rules.

    Think of a good salad: you want to get a little bit of everything in one bite. That’s the goal here.

    2. Dump everything in a big bowl

    Here’s a cleaned-up, fun, and on-brand rewrite:

    Grab a big bowl—trust me, this recipe makes a generous batch.

    Add in your cauliflower, broccoli, bacon, sunflower seeds, and diced red onion.
    You can whisk the ranch dressing, white wine vinegar, and sugar together in a separate bowl…

    Or, let’s be real: just dump it straight into the big bowl and mixy-mixy. Your kitchen, your rules, soo your choice.

    Give everything a good stir until all the pieces are coated in that creamy, delicious dressing.

    3. Refrigerate

    Let the salad chill for at least 4 hours before serving.
    But if you really want the flavors to shine, make it 24 hours ahead. Everything melds together and it tastes even better the next day.


    4. Serve & Enjoy!

    Serve cold and enjoy the crunchy, creamy goodness. This is always a hit at potlucks, holidays, cookouts, and honestly… random Tuesdays.

    If you try this recipe, drop a comment and let me know what you think!
    Writing this out actually made me want to run to the store for ingredients—so don’t be surprised if I’m making a batch tonight too. 😆

  • “I Can’t Do It All” to “I’ll Do It My Way”: Finding Freedom in Everyday Homesteading

    Homesteading has a way of making us feel like we have to do everything all at once. You scroll through Pinterest or Instagram and see the perfect bread loaves, the spotless garden rows, the DIY farmhouse kitchen, and you think—“I can’t do it all.” And honestly? You’re right.

    But here’s the secret: you don’t have to.

    Homesteading isn’t about perfection or doing everything in one season. It’s about creating a lifestyle that works for you, in your space, on your budget, with your schedule. When you shift your mindset from “I can’t do it all” to “I’ll do it my way,” homesteading suddenly becomes doable, sustainable, and—most importantly—enjoyable.

    Perfection Isn’t the Goal—Progress Is

    There’s a lot of pressure in the homesteading world to make everything picture-perfect. But let’s be real: your goats are going to break a fence, your garden will get weedy, and that sourdough starter might flop. That doesn’t mean you’re failing—it means you’re learning.

    Progress happens in the small steps: planting one raised bed this year instead of an entire acre, raising two chickens before you invest in a full flock, or canning just a few jars instead of a pantry wall. These little wins build your skills and your confidence.

    Pinterest-Worthy vs. Real Life

    Pinterest and Instagram can be inspiring, but they can also be discouraging. Behind every “perfect” homestead photo is a mess you don’t see—the dishes piled up in the sink, the weeds just out of the camera frame, the failed projects tucked away in the shed.

    Real life homesteading is messy. It’s mud on the boots, crooked fences, and bread that doesn’t always rise. And that’s okay. What matters isn’t how it looks online—it’s how it feels to you.

    Doable and Workable Beats Perfect

    A homestead that works for your family doesn’t have to look like anyone else’s. Maybe your animals are in smaller pens than someone else’s. Maybe your garden is containers on the deck instead of rows in a field. Maybe your bread comes from a bread machine instead of a handmade sourdough.

    That doesn’t make it less valuable—it makes it workable. And a homestead that actually fits into your life will always beat one that leaves you burned out chasing perfection.

    Not Everything Works for Everyone—and That’s Perfectly Okay

    Some people thrive on dairy goats, others realize they hate milking and switch to chickens. Some people love pressure canning, others prefer freezing their harvest. What works beautifully for one homesteader might not fit your lifestyle at all.

    Instead of seeing that as failure, see it as freedom. You don’t have to copy anyone else’s version of homesteading. You get to create your own.

    Shifting the Mindset

    The most freeing mindset shift you can make is this:

    • From: “I can’t do it all.”
    • To: “I’ll do it my way.”

    That simple reframe takes the pressure off. It gives you permission to try, to fail, to adjust, and to find what actually works for your life. And that’s what true homesteading is about—building a lifestyle that sustains you, not one that drains you.

    Final Thoughts

    Your homestead doesn’t have to be perfect to be worth it. It doesn’t have to be Pinterest-worthy to be valuable. It just has to be yours—messy, doable, workable, and real.

    So, the next time you find yourself saying, “I can’t do it all,” remind yourself: you don’t have to. You only have to do it your way.

  • How to Keep Your Kids Busy on The Homestead

    How to Keep Your Kids Busy on The Homestead

    Homesteading is like the ultimate family adventure—there’s always something to do, something to grow, and something to fix. But if you’ve ever tried to get your kids involved in all these homesteading tasks, you know it can be more of a circus act than a harmonious family project. Between the chickens that refuse to be herded, the garden that somehow becomes a jungle overnight, and your kids who have no idea what a rake is, it’s easy to feel like your homesteading dreams are on the brink of chaos.

    But here’s the secret: keeping your kids busy on the homestead doesn’t have to drive you to the brink of insanity (though you may feel like it on some days). With a little creativity, some patience, and maybe a healthy dose of humor, you can get your little helpers involved in tasks that not only help you out but also teach them valuable skills. Bonus: You can even do it without breaking a sweat—or your patience. Let’s dive in!

    Let Them “Help” with the Animals (and Watch Them Learn Responsibility)

    One of the best ways to get your kids involved in homesteading is by giving them the responsibility of helping with the animals. Whether it’s feeding the chickens, collecting eggs, or making sure the goats don’t eat the neighbor’s garden (again), there’s always something to do in the animal department.

    But here’s the catch: you have to keep it simple. You’re not asking them to wrangle a herd of cows or build a barn from scratch. Give them age-appropriate tasks like filling the chicken feeder, collecting eggs (with a bit of guidance), or making sure the rabbits have enough hay. These are small, manageable jobs that will make them feel like they’re part of the action, without leaving you with a mountain of extra work.

    Pro Tip: Start a “chore chart” that lists the animals they’re responsible for. Make it colorful and fun—kids love checklists! Plus, the satisfaction of checking off a chore will do wonders for their sense of accomplishment.

    And if they try to sneak off after five minutes of work, just remind them how proud they’ll be when they see those chickens happily clucking away. Plus, you can always offer a fun reward—like letting them name a new pet goat or chicken. Who wouldn’t want to be known as “Penny the Chicken’s Best Friend”?

    Turn Gardening into a Scavenger Hunt (Because Who Doesn’t Love a Challenge?)

    Let’s face it—gardening can be hard work, and it’s not always the most exciting activity for kids. However, turning it into a game is a surefire way to get them interested without having to force them to “weed the flower beds” for the hundredth time.

    Try a gardening scavenger hunt! Give your kids a list of things to find in the garden: “Find one ripe tomato,” “Pick a handful of basil leaves,” or “Find a ladybug.” You can even get creative and turn it into a race—whoever finds all the items on their list first wins a small prize or gets to choose what’s for dinner (within reason, of course).

    This not only keeps them engaged but also teaches them about different plants, bugs, and the process of growing food. Plus, they’ll feel like little explorers hunting for treasure, which is a lot more fun than simply pulling weeds. And if they find a cool rock or an interesting bug along the way? Even better!

    Pro Tip: For younger kids, a “sensory garden” can be a fun way to engage them. Let them touch and smell the plants and flowers, and encourage them to describe what they experience. Trust us, your kids will find a whole new appreciation for the magic of dirt.

    Create a “Junior Homesteader” Club (Complete with Membership Cards)

    Sometimes, the best way to get kids excited about homesteading is by giving them their own “role” on the farm. Enter the Junior Homesteader Club. This could be as simple as creating a fun membership card (you can make these yourself or print them out online) and assigning your kids specific jobs that make them feel like important team members.

    This works especially well if you’ve got multiple kids, as they can all have different responsibilities. One might be in charge of feeding the animals, while another might be tasked with watering the plants. You can even add some extra tasks like “Chief Egg Collector” or “Master Weeder”—titles that will give them a sense of pride.

    Pro Tip: Have a “Junior Homesteader Meeting” once a week to discuss what needs to be done on the homestead, and let your kids help plan the week’s tasks. They’ll feel more invested and have a better idea of how everything works, from the animals to the garden. It’s like the best 4-H meeting ever!

    Turn DIY Projects into Craft Time (With a Side of Power Tools)

    Kids are crafty by nature. So, why not combine their love for arts and crafts with a little DIY homesteading magic? Sure, you may not trust them with a chainsaw just yet (or ever), but there are plenty of homesteading projects that are totally safe and fun for kids.

    For example, building birdhouses, creating garden markers, or assembling simple compost bins can be great projects for little hands. These tasks give kids a sense of accomplishment and teach them valuable skills like measuring, sawing (with supervision, of course), and even hammering. Plus, they’ll get to see their work come to life on the homestead.

    To make it even more fun, you can turn DIY projects into a full-blown craft day. Gather up some materials—wood, paint, brushes—and let the kids get creative. You’ll be amazed at how much pride they’ll take in making something that contributes to the farm (even if it’s just a lopsided birdhouse).

    Pro Tip: If your kids are into gardening, consider making personalized garden markers out of popsicle sticks or old spoons. Not only will they keep track of what they’ve planted, but they’ll also feel like real homesteading pros.

    Use “Farm Tours” as Entertainment (Because Everyone Loves a Good Show)

    Here’s the thing: Kids love showing off what they’ve been working on. Why not take advantage of that and turn it into an educational activity for both them and any visitors? You can host your very own Farm Tour where your kids can proudly show off their contributions to the homestead. Whether it’s introducing the chickens or showing off the latest vegetable harvest, they’ll love being the stars of the show.

    Pro Tip: If you have guests, let your kids be the “tour guides” and teach the guests about the animals, garden, and how everything works. You’ll be amazed at how much they know once you put them in the spotlight. Plus, it keeps them busy for hours. Who knew your children would be the next great tour guides?

    Final Thoughts: Keeping Your Sanity Intact (Mostly)

    At the end of the day, getting your kids involved in homesteading tasks is all about making it fun, educational, and—let’s be honest—keeping them busy so you can get some actual work done. With a little creativity, humor, and a lot of patience, you can turn everyday homesteading chores into entertaining (and sometimes even productive) activities for your little ones.

    Remember, there will be days when they’d rather be inside playing video games or making a mess in the living room, but by creating engaging, hands-on experiences, you’ll help them develop a lifelong appreciation for hard work, the great outdoors, and, of course, the joys of homesteading. And who knows? You might even get a few moments of peace while they’re busy collecting eggs or making mud pies in the garden.

    Happy homesteading, and may your kids always love playing in the dirt!

  • Homestead Budget 101: 5 Things You Don’t Need to Buy as a Beginner

    Homestead Budget 101: 5 Things You Don’t Need to Buy as a Beginner

    Starting your homestead is exciting, but it can also feel overwhelming—especially when every new tool, animal, or gadget seems essential. Beginners often make the mistake of overspending early, leaving them strapped for cash when the things that really matter come along. Managing your homestead budget wisely is key to building a sustainable and successful homestead. Here are 5 common areas where homesteaders overspend and smarter alternatives to save money while still getting results.

    1. Fancy Livestock Before You’re Ready

    It’s tempting to splurge on heritage chickens, rare goats, or miniature cows, but buying animals before you understand your homestead’s layout, workload, and local climate can backfire.

    Instead: Start with low-maintenance, beginner-friendly animals. For example:

    • Chickens: Start with a few hardy, easy-to-raise breeds like Rhode Island Reds or Buff Orpingtons.
    • Ducks: Start with a small flock of hardy, beginner-friendly breeds like Pekin or Khaki Campbell to learn their care without feeling overwhelmed.
    • Goats: While goats are not on my beginner friendly list. If you must, begin with a pair of standard dairy or meat goats to learn their care without feeling overwhelmed. Dwarf varieties are also available in certain breeds which is what I personally choose to raise.

    By starting small, you’ll protect your homestead budget while mastering animal care.

    2. Expensive Tools You Don’t Really Need

    High-end tractors, electric fencing systems, or specialty gardening tools might look impressive, but they’re not essential for your first year.

    Instead: Invest in multipurpose, durable, and affordable tools:

    • A good shovel, hoe, and rake can handle most garden and small farm tasks.
    • Hand tools and repurposed materials can often replace pricey gadgets for your initial setup.

    Focusing on what you’ll actually use daily helps you stick to your homestead budget and avoid unnecessary expenses.

    3. Large Garden Infrastructure

    Building huge raised beds, a greenhouse, or a complex irrigation system right away can drain your budget. Beginners often underestimate the costs and maintenance of large setups.

    Instead: Start small. Try:

    • Container gardening or a few modest raised beds.
    • DIY trellises and simple row covers to protect crops.
    • Expand gradually as you understand your garden’s needs and your local climate.

    Starting with a manageable garden keeps your homestead budget in check and ensures you can maintain it long-term.

    4. Pre-Packaged Feed or Supplements

    Many beginners overspend on premium feeds, vitamins, or supplements for their livestock. While some are necessary, much of the “extra” is marketing.

    Instead: Learn what your animals truly need and what you can produce at home. For example:

    • Supplement chickens with kitchen scraps and garden greens.
    • Mix homemade minerals for your goats or cows, adjusting for what your pasture may be lacking.
    • Rotate pastures and grow fodder to reduce feed costs.

    Keeping an eye on your feed and supplement spending protects your homestead budget while still providing healthy nutrition for your animals.

    5. “Trendy” Homestead Products

    There’s a world of shiny homesteading tools, décor, and kits that promise to make life easier—but beginners often buy them on impulse. Think artisanal soap-making kits, specialty fermenting crocks, or boutique chicken coops.

    Instead: DIY, upcycle, or borrow.

    • Repurpose containers for fermenting.
    • Build your own small chicken coop from scrap wood.
    • Start simple with soap or candle recipes before investing in fancy equipment.

    Learning to be resourceful will help you stick to your homestead budget while gaining valuable skills.

    Final Thoughts: Spend Smart, Grow Gradually

    Starting a homestead doesn’t require a huge budget—it requires planning, patience, and prioritization. By avoiding these overspending traps and focusing on essentials, you’ll save money, reduce stress, and set yourself up for long-term success.

    Remember: your homestead will grow with you, not the other way around. Start small, learn as you go, and spend where it truly matters to protect your homestead budget.

  • What to Do When Your DIY Projects Don’t Go as Planned (Hint: Embrace the Chaos)

    What to Do When Your DIY Projects Don’t Go as Planned (Hint: Embrace the Chaos)

    Let’s face it: DIY projects on the homestead are not always the Pinterest-worthy, smooth-sailing, “look how perfect this turned out!” moments we envision. Sometimes, things go hilariously wrong. You might find yourself standing in a puddle of sawdust, holding a power tool, wondering how exactly you managed to turn a simple garden shed project into a full-blown disaster. Or maybe that chicken coop you thought you’d whip up in a weekend has turned into a leaning tower of wonky wood, with more gaps than a spaghetti strainer.

    But here’s the truth: when you’re homesteading, chaos is inevitable. And while it’s easy to throw in the towel when things go awry, the real beauty of homesteading comes in embracing those failures, learning from them, and—most importantly—having a good laugh. If you’re feeling like your DIY homesteading projects are taking an unexpected turn, take a deep breath, grab a cup of coffee (or a beer, I won’t judge), and read on for some encouragement and practical advice on how to roll with the punches.

    First Things First: Take a Step Back (and Maybe a Deep Breath

    It’s easy to get frustrated when your latest homesteading project isn’t going according to plan. Whether you’re trying to build a chicken coop, start a garden bed, or install a new fence, things rarely go off without a hitch. If your DIY project is starting to look more like a horror show than a success story, step back.

    Take a breather. Get away from the project for a bit and give yourself a moment to clear your mind. Sometimes, a fresh perspective (and a little bit of space) is all it takes to see the solution. I once spent two days trying to build my brooder shed (don’t ask), only to realize I had the walls upside down.

    Pro Tip: If you’re working on something more intense like fencing or building structures, take breaks and pace yourself. That way, you’ll avoid burnout and the temptation to “rush through it” (which, as we all know, leads to more chaos).

    Learn to Laugh at Your Mistakes (They Make the Best Stories)

    Okay, maybe you’ve spent days building a coop, only to realize the door is on backwards. Or perhaps you tried to fix a leaky faucet and somehow flooded the entire kitchen instead. It happens to the best of us. So, instead of letting it get you down, embrace the comedy of the situation. After all, you’re likely to look back on the disaster and laugh.

    Case in point: I once tried to build a garden trellis using a combination of left over gazebo poles and wire. I meant to create a sturdy framework for my pickling cucumbers, but ended up with a lopsided, wobbly structure that looked more like a half-hearted attempt at modern art. I had to embrace the fact that it wasn’t going to win any design awards, but hey—it worked! My cucumbers climbed the structure just fine. Sometimes, the beauty of DIY is that it’s uniquely imperfect, and that’s okay.

    Pro Tip: When things go wrong, share the experience! Posting funny stories or photos of your homesteading fails online will not only make you feel better, but you might just inspire someone else who’s dealing with a similar disaster. Trust me, you’re not the only one who’s ever had a “what was I thinking?” moment!

    DIY Fail? It’s Actually a Learning Opportunity (Really!)

    While it’s tempting to call it quits when a project doesn’t go as planned, remember that every mistake is a learning opportunity. No one gets everything perfect the first time (or the second or third, let’s be real). The key is to learn from the experience and adjust for next time.

    I had an epic fail while building a raised garden bed one summer. The boards I used were too short, which led to uneven sides and, well, a very weirdly shaped bed. After much frustration and some choice words, I realized that this was an opportunity to learn how to make better measurements. (I also learned to triple-check my math next time, but that’s another story.) In the end, I fixed the raised bed with a bit of extra wood and a lot of patience.

    Pro Tip: Keep a notebook (or digital file) of lessons learned from your DIY projects. This way, you can refer to it next time you’re tackling something similar. Write down measurements, materials, and tips to avoid repeating the same mistakes.

    Ask for Help (Yes, Even If You’re a “DIY Master”)

    Sometimes, our pride gets in the way. “I can handle this on my own,” we think, even when things are clearly falling apart around us. But here’s the thing: you don’t have to do it alone. Whether you need an extra set of hands, some advice from an expert, or a quick tutorial, asking for help doesn’t make you less of a homesteader—it makes you a smarter one.

    If something is outside of your skill set, don’t hesitate to call in an expert or ask a fellow homesteader for help. It’s a lot less stressful and will save you time and frustration.

    Pro Tip: Find homesteading communities online or locally. People love to share advice and offer support, and you’d be surprised how willing others are to help when you’re stuck. Plus, those communities often have a good sense of humor about DIY disasters!

    Embrace the Chaos (Because Perfection is Overrated)

    Here’s a truth bomb: homesteading is messy. Whether it’s a haphazard pile of firewood or a crooked fence that you somehow can’t bring yourself to fix, things rarely go according to plan—and that’s okay. Perfection is overrated anyway. It’s the imperfect, quirky nature of DIY that makes homesteading so rewarding.

    I’ve had more than one garden project that didn’t go according to plan. One time, I planted my tomato plants a little too close together (oops), and instead of the neat row of plants I envisioned, I ended up with a tangle of vines. But you know what? It didn’t matter. The tomatoes grew just fine, and the viney chaos made it all the more charming. Plus, the kids loved trying to navigate the jungle to pick the ripe ones!

    Pro Tip: Instead of chasing perfection, focus on functionality and enjoyment. Is your chicken coop a bit crooked? Is your garden bed a little lopsided? If it works and your animals are happy, that’s all that matters. Let go of the need for everything to be “picture perfect.”

    Fix It, Learn From It, and Keep Going

    It’s normal to feel like quitting when things don’t go right, but remember, it’s all part of the process. Some of your best projects will come from fixing what went wrong the first time. Take the opportunity to roll up your sleeves, adjust your plans, and keep going. One of the greatest aspects of homesteading is problem-solving—and let’s face it, sometimes the most creative solutions come from those “uh-oh” moments.

    Final Thoughts: DIY Projects Are About the Journey, Not the Destination

    So, the next time your DIY project goes completely off the rails, remember to embrace the chaos. Laugh at your mistakes, learn from them, and keep moving forward. After all, homesteading is all about adapting to whatever life throws your way—whether it’s a wonky shed or an overly enthusiastic goat chewing through your garden plans.

    At the end of the day, these imperfect projects are what make the experience memorable and fun. And you never know—your “failed” DIY project might turn into your proudest accomplishment, even if it’s a little wobbly around the edges.

  • Why Every Homesteader Needs an Emergency Fund (and How to Build One)

    Why Every Homesteader Needs an Emergency Fund (and How to Build One)

    Homesteading can be rewarding, fulfilling, and deeply satisfying—but it’s also unpredictable. One day you’re harvesting a bumper crop of tomatoes, and the next you’re calling the vet for a goat who suddenly won’t eat. From equipment breakdowns to extreme weather, unexpected expenses are simply part of homestead life.

    That’s why every frugal homestead needs an emergency fund—a financial safety net designed to handle those “oh no” moments without derailing your budget or forcing you into debt.

    Why an Emergency Fund is Critical for Homesteaders

    An emergency fund isn’t just about peace of mind—it’s a tool that can keep your homestead running when life throws you a curveball. Unlike a general savings account or your regular budget, this money is set aside for true emergencies only.

    Here are a few situations where having one could save you from financial stress:

    • Unexpected Repairs – Tractor breaks down during planting season? Well pump fails in the middle of summer? These repairs aren’t optional—you’ll need them fixed immediately.
    • Vet Bills – Even with healthy, well-cared-for livestock, accidents and illnesses happen. A sudden $300–$800 bill for emergency care isn’t unusual.
    • Crop Loss – Storms, pests, and disease can wipe out weeks or months of work. Having a financial cushion allows you to replant, buy supplemental feed, or pivot your income plan.

    Without an emergency fund, these moments can force you to pull money from other important areas, delay essential work, or go into debt.

    Why Your Emergency Fund Should Be Separate from Your Project/Livestock Fund

    I always recommend keeping your emergency fund completely separate from your project or livestock fund.

    • Project/Livestock Fund – This is for planned expenses like building a new chicken coop, adding fencing, buying breeding stock, or expanding your garden.
    • Emergency Fund – This is for urgent, unexpected situations only—things that threaten your current operations or animal welfare.

    If you mix the two, it’s all too easy to “borrow” from your emergency savings for a project you’re excited about… and then find yourself unprepared when a true emergency happens.

    How Much Should You Save?

    A good starting point is to save at least $500–$1,000 for emergencies. Over time, aim for 3–6 months’ worth of your essential homestead expenses—things like animal feed, utilities, equipment maintenance, and basic living costs.

    Remember: it’s not about building it overnight. Small, consistent deposits add up faster than you think.

    Saving Strategies for Homestead Emergencies

    Building an emergency fund on a homestead budget takes creativity and discipline. Here are some frugal, homesteader-approved ways to grow your savings

    1. Sell Excess Produce or Eggs

    Set aside the income from your extra eggs, veggies, or baked goods specifically for your emergency fund. Even $20 a week adds up to over $1,000 a year.

    2. Barter for Needs, Save the Cash

    If you can trade produce, skills, or labor for goods and services, you can keep more money in your pocket to funnel into savings.

    3. Designate “Bonus Money”

    Tax refunds, side-hustle income, or unexpected windfalls can be earmarked for your emergency fund instead of day-to-day spending.

    4. Cut One Monthly Expense

    Cancel a subscription you barely use or reduce a non-essential cost for a few months, putting the savings directly into your emergency account.

    5. Use a Separate Account or Cash Envelope

    Keeping the fund in a different account—or even a secure cash box—helps reduce the temptation to spend it.

    When to Use Your Emergency Fund (and When Not To)

    Use it for:

    • Urgent livestock medical care
    • Essential equipment repair
    • Critical home or barn maintenance
    • Emergency feed or hay purchase due to a crop failure

    Don’t use it for:

    • Planned projects
    • New livestock purchases
    • Upgrades or “nice to haves”

    The goal is to keep it intact until you truly need it.

    Final Thoughts

    Homesteading is full of challenges, and while you can’t prevent every setback, you can prepare for them. A dedicated homestead emergency fund helps you handle life’s unexpected expenses without going into debt or putting your animals and crops at risk.

    Start small, stay consistent, and remember—this fund is your lifeline, not your project budget. Treat it with the same care you give to your most valuable tools, and it will serve you for years to come.

  • How I Grow with the Homesteading Seasons: A Year on My Pacific Northwest Homestead

    How I Grow with the Homesteading Seasons: A Year on My Pacific Northwest Homestead

    Homesteading isn’t just a lifestyle—it’s a rhythm that flows with the natural seasons. On my small homestead nestled in the Pacific Northwest, every season brings a new set of responsibilities, challenges, and joys. Understanding the homesteading seasons is key to building a sustainable and fulfilling life close to the land.

    Whether you’re just starting out or deep into your homesteading journey, knowing what to expect from each season can help you plan ahead, reduce burnout, and enjoy the process more fully. Here’s what life looks like on my homestead, season by season.

    Winter: Rest, Reset, and Indoor Growing

    Winter is the slowest season on our homestead—and we embrace it. While snow and frost blanket the garden beds, this season gives us a chance to rest and reflect. Our animals require basic care: feeding, water checks (especially in freezing temps), and shelter maintenance. But compared to summer, their needs are minimal.

    It’s also the perfect time for planning. I spend my evenings with seed catalogs, budgeting for the year ahead, and experimenting with indoor growing methods like microgreens and herbs under grow lights. Understanding the homesteading seasons means appreciating this necessary lull—winter is for hibernation, both for nature and the homesteader.

    Spring: New Life and New Beginnings

    Spring is when everything bursts into action. The garden begins to wake up, and so do the projects. Depending on your setup, you might be incubating eggs, bringing home new chicks or ducklings, or watching for signs of labor in pregnant goats or sheep from the previous year’s breeding.

    Spring is also a busy time for planting. Soil preparation, composting, and succession sowing keep us busy as we try to get ahead before the summer heat hits. On my homestead, this homesteading season becomes very real in spring—it’s a time of energy and motion, and the farm feels alive again.

    Summer: Full Tilt Homesteading

    Summer is the heart of the homestead hustle. The garden is in full swing, animals need extra attention (especially in the heat), and the harvests start rolling in. If you raise meat animals, this is also a time when harvesting may begin for broilers, rabbits, or even ducks.

    Preservation kicks into high gear—canning, fermenting, dehydrating, freezing. It’s not unusual to be up late boiling jars or checking the dehydrator while making dinner. On my homestead, we lean into the long days and try to keep pace with nature’s abundance.

    Understanding the homesteading seasons helps keep burnout at bay. Summer is busy, yes—but it’s also deeply rewarding.

    Fall: The Big Shift

    Fall is the season of transition and preparation. The weather begins to cool, and if you’ve planted a fall garden, it’s a good time to enjoy cool-weather crops like kale, carrots, and broccoli.

    For us, fall is also butchering season. Our meat birds are processed, and we begin preparations for butchering our hogs as we near the colder months. It’s bittersweet but necessary, and part of honoring the cycle of life on the homestead.

    Fall is also a time to clean up the garden, mend fences, and prepare animal shelters for the cold months ahead. For those who follow the homesteading seasons, fall is when we start to wind down, stock up and prepare to hunker down for winter.

    End of Fall into Winter: The Final Push

    The end of fall into early winter is hog butchering season on our homestead. We wait until the temperatures drop to help keep the meat safe during processing. Freezers are filled, lard is rendered, and smoked meats are prepped for the pantry.

    This time of year wraps up our homesteading seasons and reminds us of the importance of planning, pacing, and working with the natural cycles. We slow down once again and welcome the restful rhythm of winter.

    Final Thoughts

    Every homesteader’s year will look a little different depending on your climate, goals, and setup. But understanding and honoring the homesteading seasons can help you build a more peaceful, productive, and balanced life on your land. Whether it’s seed-starting in March, harvesting in August, or butchering in November—each season has a purpose.

    On my homestead, I’ve learned to grow with the seasons, not against them—and that mindset has made all the difference.

  • How To Get Past The Hard Days On Your Homesteading Journey

    How To Get Past The Hard Days On Your Homesteading Journey

    Homesteading is beautiful, fulfilling, and deeply rewarding—but it’s not always easy. There are days you wake up and feel completely alone. Days when you look around at the world and realize you don’t really fit in anymore. While others are rushing through the McDonald’s drive-thru, you’re tending goats, planting crops, or working on preserving food. It can make you feel like an outcast—like you’ve chosen a life few people understand.

    But here’s the truth: those hard days don’t mean you’re failing. They’re part of the process of choosing a life that’s counter-cultural. And when you learn how to navigate them, you’ll come out stronger, more grounded, and even more committed to your “why.”

    Remember Your Why

    On the hard days, the most powerful thing you can do is pause and say out loud why you chose this life in the first place.

    • Maybe you wanted to raise your kids with wholesome food.
    • Maybe you were tired of being dependent on a fragile system.
    • Maybe you wanted to reconnect with the land and live more intentionally.

    Say it. Repeat it until it sinks back into your bones.

    Your “why” is what separates you from the masses—and what will carry you through the loneliness, setbacks, and overwhelming moments.

    It’s Okay to Be an Outcast

    Being different doesn’t mean you’re wrong. In fact, sometimes it’s proof you’re on the right path. Choosing a life of sufficiency and connection to the land naturally sets you apart. You’re not supposed to fit into a system that thrives on fast food, consumerism, and convenience at all costs.

    And the truth is—you don’t want to. You don’t want to live in a diseased community, relying on a broken food system, just to fit in. That’s not freedom. That’s not the life you dreamed of.

    So embrace your “outcast” identity. Wear it like a badge of honor. It means you had the courage to choose differently.

    Do Something You Enjoy

    Hard days feel heavier when all you do is push through. Sometimes the best antidote is to step back and do something that fills your soul.

    • Take a walk in nature.
    • Watch the sunset.
    • Sit in silence with your animals.
    • Pick a flower and put it on your kitchen table.

    These small moments are reminders of the beauty you’re building—a rhythm, a life, a legacy.

    Let the Land Hold You

    One of the most healing parts of homesteading is that the land has a way of holding you up when you feel empty. The soil doesn’t care about your mood. The animals don’t care about your doubts. They just keep showing up, day after day.

    And sometimes, that’s the reminder you need—you don’t have to do it all perfectly. You just have to keep showing up too.

    Final Thoughts

    Hard days will come. Days when you question yourself, when you feel isolated, when you wonder if this life is too much. But those are the days when your “why” matters most.

    Remember:

    • You chose this life for a reason.
    • It’s okay—healthy, even—to be different.
    • Finding joy in small moments can lift the weight.
    • The land is always there to ground you.

    So on the days you feel like giving up, pause. Breathe. Remind yourself: I chose this life because it matters. Because it’s real. Because it’s worth it.

    And then take one small step forward. That’s how you keep going.

  • How to Decide What Animals Are Right for Your Small Farm

    How to Decide What Animals Are Right for Your Small Farm

    Starting a small farm is an exciting journey, and one of the biggest decisions you’ll make is choosing which animals to raise. From chickens to goats to pigs, each animal offers unique benefits and comes with its own set of needs. But how do you decide which animals are the best fit for your farm?  

    Whether you’re looking for eggs, milk, meat, or simply a more sustainable lifestyle, this guide will help you evaluate your goals, resources, and capabilities to choose the perfect animals for your small farm.  

    Start with Your Farm’s Goals

    Before you choose any animals, consider what you want to achieve with your small farm.  

    Eggs or Dairy: If your goal is a steady supply of eggs or milk, chickens or dairy goats may be a good place to start.  

    Meat Production: If you’re looking to raise your own meat, animals like pigs, rabbits, or sheep might be ideal.  

    Land Management: For clearing brush or improving pastures, goats or grazing animals like sheep or cows can be invaluable.  

    Companionship and Hobby Farming: If your primary goal is to enjoy the experience of caring for animals, chickens or ducks are fun and beginner-friendly.  

    Understanding your goals will narrow down your options and help you choose animals that align with your vision.  

    Assess Your Land and Space  

    The size and quality of your land will play a major role in determining which animals you can raise.  

    Small Spaces: If you only have a small backyard or limited acreage, chickens, rabbits, or ducks are great options since they don’t require much space.  

    Moderate Space: With a few acres, you can consider goats, pigs, or sheep. These animals need more room to roam and graze.  

    Larger Acreage: If you have 10+ acres, you can think about larger livestock like cows or horses. These animals require significant space and grazing land to thrive.  

    Also, consider the quality of your land. Goats, for example, are excellent for hilly or rocky terrain, while sheep prefer lush pastures.  

    Factor in Time and Labor 

    Different animals require different levels of care and time commitment.  

    Low Maintenance: Chickens, ducks, and rabbits are relatively low-maintenance animals. They need daily feeding, water, and a clean coop, but their care is manageable for beginners or busy schedules.  

    Moderate Maintenance: Goats and sheep require more attention, including proper fencing, health checks, and occasional hoof trimming.  

    High Maintenance: Larger animals like cows and horses need significant time for feeding, grooming, and pasture management.  

    Be realistic about how much time and energy you can dedicate to your animals each day.  

    Consider Your Budget  

    The cost of raising animals can vary widely depending on the species and your setup.  

    Initial Costs: Consider the price of purchasing the animals, building housing, and setting up fencing or infrastructure. For example, a chicken coop is much cheaper than a barn for cows.  

    Ongoing Costs: Factor in feed, bedding, veterinary care, and supplies. Larger animals like cows and pigs will eat much more than chickens or rabbits, leading to higher feed costs.  

    Unexpected Expenses: Be prepared for emergencies, like vet visits or equipment repairs, that can add to your overall costs.  

    Choose animals that fit within your budget, especially if you’re just starting out.  

    Research Local Regulations

    Before you bring animals to your farm, check local zoning laws and regulations.  

    – Some areas have restrictions on livestock, especially in suburban or urban locations.  

    – You may need permits for certain animals or be required to follow specific guidelines for housing and fencing.  

    – Keep in mind that roosters, for example, can be noisy and may not be allowed in some neighborhoods.  

    Understanding the rules in your area will save you from potential fines or the heartbreak of having to rehome your animals.  

    Evaluate Your Climate  

    Not all animals thrive in every climate, so it’s essential to consider your local weather conditions.  

    Cold Climates: Animals like sheep, cows, and certain chicken breeds are hardy and can handle cold winters with proper shelter.  

    Hot Climates: Goats, pigs, and heat-tolerant chickens like Leghorns do well in warmer regions.  

    Extreme Weather: If you live in an area with extreme heat, cold, or storms, invest in sturdy shelters and infrastructure to protect your animals.  

    Choose animals that are well-suited to your climate to ensure their health and well-being.  

    Start Small 

    If you’re new to farming, it’s best to start with one or two types of animals and expand as you gain experience.  

    Chickens: A small flock of hens is a great way to begin. They’re easy to care for, provide fresh eggs, and can help control pests in your garden.  

    Rabbits: These quiet, low-maintenance animals are excellent for small spaces and can provide meat or fertilizer for your garden.  

    Goats: Dairy goats are a good next step if you’re ready to tackle milking and want a steady supply of milk for your family.  

    Starting small allows you to learn the ropes without becoming overwhelmed.  

    Learn About Each Animal’s Needs

    Do your homework before bringing any animals to your farm.  

    Housing: What kind of shelter do they need? Chickens require a secure coop, while goats need a barn or covered pen.  

    Fencing: Some animals, like goats, are escape artists and require strong, well-designed fencing.  

    Diet: Learn about each animal’s nutritional requirements and plan for feed and supplements.  

    Understanding the specific needs of your chosen animals will set you up for success and keep your animals happy and healthy.  

    Think About Your Future Plans 

    As you choose animals, consider how they fit into your long-term vision for your farm.  

    – Do you want to expand your operation in the future?  

    – Are you raising animals for personal use or planning to sell products like eggs, milk, or meat?  

    – Will your current infrastructure support additional animals as your farm grows?  

    Planning ahead will help you make choices that align with your goals and prevent unnecessary expenses down the line.  

    Trust Your Passion 

    Finally, let your passion guide your decision. Farming is hard work, and it’s much more enjoyable when you’re caring for animals you truly love.  

    – Do you dream of fresh eggs every morning? Start with chickens.  

    – Are you fascinated by the idea of making your own cheese? Consider dairy goats or cows.  

    – Do you love watching animals graze in your fields? Sheep or cattle might be the perfect choice.  

    The animals you choose should bring you joy and fulfillment, not just practicality.  

    Final Thoughts

    Choosing the right animals for your small farm is a deeply personal decision that depends on your goals, resources, and lifestyle. By starting with clear priorities, assessing your land and budget, and doing thorough research, you can build a farm that meets your needs and brings you lasting satisfaction.  

    Remember, there’s no “perfect” farm setup—what works for one family may not work for another. Start small, stay flexible, and enjoy the journey of learning and growing alongside your animals.  

    What animals do you have on your small farm? Or what are you planning to raise? Share your thoughts and experiences in the comments below—I’d love to hear from you!