Tag: recipes

  • Soft Homemade French Bread Loaves + Hoagie Roll Option

    Soft Homemade French Bread Loaves + Hoagie Roll Option

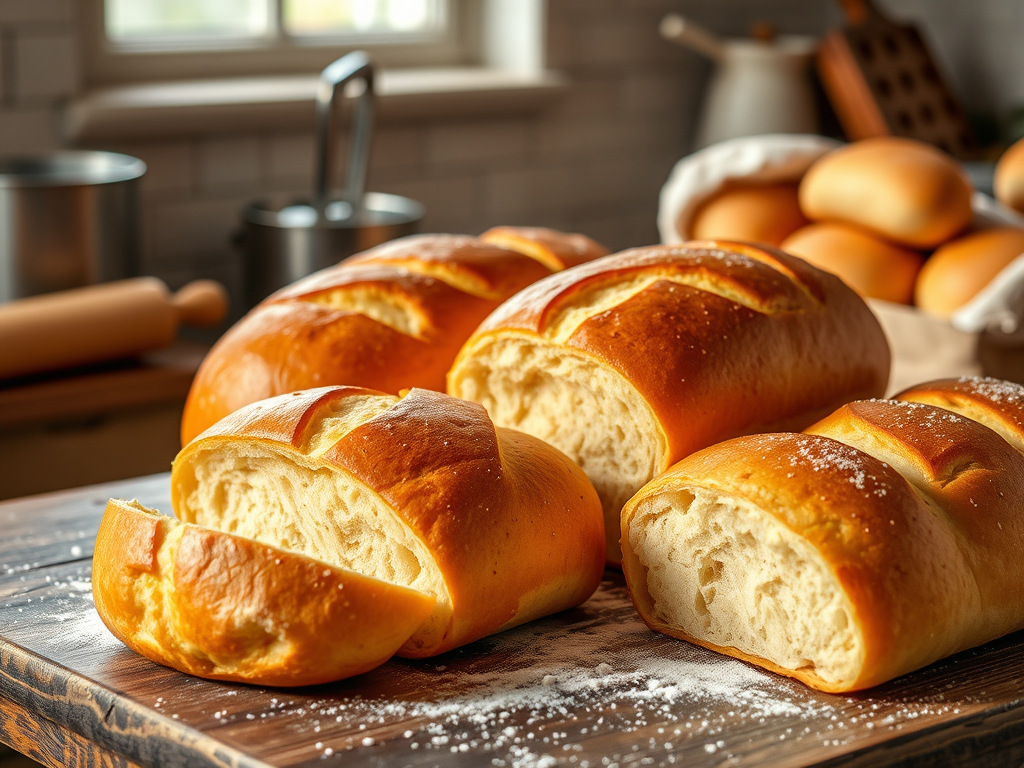
    There is nothing—nothing—like the smell of fresh homemade bread baking in your kitchen. It instantly makes your home feel warmer, cozier, and just… happier. And this recipe? It’s one of my absolute favorites because it’s simple, reliable, and incredibly versatile.

    This homemade French bread comes out soft, squishy, lightly golden, and perfect for serving with dinner, slicing for sandwiches, or turning into hoagie rolls. It uses everyday ingredients, requires no fancy tools, and makes two full loaves — or one loaf and a batch of hoagie rolls like I did!

    If you’ve been looking for a beginner-friendly bread recipe that works every time, this is the one.


    Ingredients

    • 5–6 cups flour
    • 2 ¼ cups warm water
    • 2 tablespoons sugar
    • 1 tablespoon yeast
    • ¾ teaspoon salt
    • 2 tablespoons oil

    🥖 How to Make Becky’s Homemade French Bread

    1. Activate your yeast

    Pour the warm water and sugar into a large mixing bowl.
    Sprinkle the yeast on top and gently stir.
    Let it sit for a few minutes until it starts to bubble and foam — this means the yeast is alive and ready to work its magic.

    2. Add oil, salt & flour

    Stir in the oil and salt.
    Slowly add 5 cups of flour, mixing until everything is well combined.

    3. Knead the dough

    Turn your dough out onto a lightly floured surface.
    Use the remaining 1 cup of flour during kneading as needed.
    Knead for 4–5 minutes, adding flour only until the dough is soft, smooth, and just a little tacky — not sticky.

    4. Shape your loaves

    This recipe makes 2 full French bread loaves.
    Shape them however you like:

    • 2 large French loaves
    • 8 hoagie rolls
    • or 16 small bun-sized rolls

    5. Let rise

    Place your shaped loaves or rolls on a greased baking sheet.
    Cover with a towel and let rise for 1 hour, or until visibly puffy.

    Score the tops if desired — this helps the bread expand beautifully while baking.


    🔥 6. Bake

    Bake at 375°F for 20–25 minutes.

    For an extra golden brown, soft top:
    Brush with melted butter during the last 10 minutes of baking.

    The smell when these come out of the oven… heavenly.
    The texture is soft, warm, and perfectly squishy.


    🍽️ How to Use This Dough

    This dough is incredibly versatile. Try using it for:

    • French bread
    • Hoagie rolls
    • Sub sandwiches
    • Garlic bread
    • Bread bowls
    • Dinner rolls
    • Picnic sandwiches

    Once you make it, you’ll realize how many meals it fits into.


    💛 Final Thoughts

    This homemade French bread is one of those recipes that instantly becomes a family staple. It’s easy, forgiving, and makes your whole home smell amazing. Whether you’re making classic French loaves or hoagie rolls for the week, this bread is soft, warm, and absolutely delicious.

    If you make this recipe, I’d love to hear how it turned out for you!

  • The Nikki Special: Big-Batch Kielbasa Rice Dinner (Dump-and-Go)

    The Nikki Special: Big-Batch Kielbasa Rice Dinner (Dump-and-Go)

    Some recipes come from cookbooks… some come from Grandma… and some come from a coworker named Nikki who casually hands you a recipe one day and changes your entire dinnertime routine forever.

    This dish—which we lovingly call The Nikki Special—has gone through many tweaks and adjustments over the years. At this point, it’s very much my version… but the name sticks because it makes me smile every time.

    And fair warning: this makes a BIG batch.
    Like, “feed the whole family for dinner AND have lunches for the rest of the week” big.
    It’s hearty, flavorful, comforting, and ridiculously easy to customize.

    Let’s dive in!


    Ingredients

    • 2 boxes Rice-A-Roni or 2 cups uncooked white rice
    • 1 whole onion, chopped
    • 3 bell peppers, chopped
    • 2 pint jars of homemade chicken broth
      (About 4 cups — you can do half broth, half water if needed)
    • 1 kielbasa sausage, sliced into bite-sized pieces
    • 1 can corn, drained
    • A handful of cheese, your choice (cheddar, Colby Jack, etc.)

    Optional add-ins:

    • Garlic (fresh or powdered)
    • Green onions
    • Peas
    • Mushrooms
    • Anything you’d throw in a stir fry

    🍳 How to Make the Nikki Special

    1. Cook your rice

    If you’re using Rice-A-Roni, follow the instructions on the box—just swap the water for broth for extra flavor.

    If you’re using white rice, you’ll want to season it yourself since it doesn’t come with a flavor packet. Add:

    • Salt
    • Pepper
    • Garlic powder
    • Onion powder
    • Or your favorite all-purpose seasoning blend

    This step ensures the rice is flavorful and not bland once everything comes together.

    2. Add your veggies while the rice cooks

    Throw the chopped onion and bell peppers right into the pot while the rice cooks.
    No extra pan, no extra dishes—my kind of cooking.
    They soften perfectly and add tons of flavor.

    3. Add the kielbasa

    Once the rice is done, stir in the sliced kielbasa.
    It warms through quickly and gives the dish a hearty, smoky bite.

    4. Add the corn + cheese

    Stir in:

    • 1 can of corn
    • A handful of shredded cheese

    Mix until the cheese melts and everything is combined.

    5. Taste & tweak

    Now channel your inner Ratatouille.
    Smell it. Stir it. Taste it. Adjust seasonings.
    Add more cheese, garlic, veggies—whatever makes your heart happy.

    And viola! Dinner is served.


    🍽️ Why My Family Loves This Recipe

    • Makes a HUGE batch
    • Reheats beautifully
    • Has everything in one pot (rice, veggies, protein, cheese!)
    • Easy to customize
    • Comfort food at its finest

    It’s one of those meals that somehow turns out great every single time—even when you wing it( which is essentially every meal in my household). Let me know if you try this one, and what you thought!

  • Creamy Buffalo Chicken Crack Dip with Canned Chicken

    Creamy Buffalo Chicken Crack Dip with Canned Chicken

    If you’re looking for the perfect dip to take to a party, potluck, family gathering—or honestly just to enjoy on the couch while watching a movie—this Homemade Chicken Crack Dip is it.

    It’s creamy, spicy (but not too spicy), cheesy, and unbelievably easy to whip together. This is one of those dips that disappears FAST. Like… blink and it’s gone.

    I’ve been making this for years using my own canned chicken, but store-bought canned chicken works perfectly too. The real magic is in the creamy base and the buffalo sauce that brings everything to life.


    Why I Love This Chicken Crack Dip

    • Dump-and-go style
    • Perfect for using your home-canned chicken
    • Easy to adjust spice level
    • Always a crowd-pleaser
    • Amazing with chips, crackers, veggies, or bell peppers (my favorite!)
    • No fancy skill required—just mix, bake, and enjoy

    🥣 Ingredients

    • 1 pint jar of home-canned chicken
      or 2 standard cans of store-bought chicken (drained)
    • 16 oz cream cheese, softened
    • 16 oz sour cream
    • 1 large handful shredded cheese (cheddar, Colby Jack, or your favorite)
    • Frank’s Buffalo Hot Sauce
      About ¼ cup for mild/medium,
      ½ cup or more for spicy!
      (Or, as I do: “measure with your heart” depending on the occasion.)

    Optional toppings:

    • Extra shredded cheese
    • Sliced green onions
    • Bacon Bits

    🧡 How to Soften Your Cream Cheese

    Cream cheese MUST be softened or it won’t blend smoothly.

    • Leave it on the counter for 1–2 hours OR
    • Microwave for 10–15 seconds at a time until soft (not melted)

    🍗 How to Make Chicken Crack Dip

    1. Mix the base

    Add softened cream cheese and sour cream to your mixer bowl.
    I use my KitchenAid for this because my arms get tired, and cream cheese sometimes fights back. 😂
    Blend until completely smooth—no clumps.

    2. Add the chicken, cheese & hot sauce

    Mix in:

    • Your canned chicken
    • A handful of shredded cheese
    • Frank’s Buffalo Hot Sauce

    Start with ¼ cup of hot sauce if you’re unsure. You can always add more!
    At home I add way more because that’s how my daughter likes it.

    Mix again until everything is fully combined. Mixy mixy!

    3. Bake

    Spread your dip into a casserole dish.
    Bake at 400°F for 15 minutes or until it’s hot and bubbly around the edges.

    (Yes, 400° for 15 minutes is perfect!)


    🥨 How to Serve

    This dip is amazing with:

    • Tortilla chips
    • Crackers
    • Pita chips
    • Celery sticks
    • Bell pepper slices (my personal favorite!)

    Honestly… it’s one of those dips that tastes good with anything


    If you try this recipe, let me know what you think!
    I can almost guarantee there won’t be leftovers.

  • No-Bake Lemon Fudge (3 Ingredients & Ridiculously Easy!)

    No-Bake Lemon Fudge (3 Ingredients & Ridiculously Easy!)

    If you’re looking for a dessert that’s sweet, creamy, refreshing, AND doesn’t require you to turn on your oven… you just found it!
    This No-Bake Lemon Fudge is one of the easiest desserts you’ll ever make—and with only three simple ingredients, your friends and family will absolutely beg you for the recipe.

    It’s bright, zesty, silky, and dangerously addicting. Also? Foolproof. Like truly “dump, melt, mix, chill” foolproof.

    Let’s get into it!


    Why You’ll Love This Lemon Fudge

    • No baking involved (hallelujah)
    • Only 3 ingredients
    • Ready to chill in minutes
    • Perfect for holidays, BBQs, potlucks, teacher gifts… or just because
    • Kid-friendly and super customizable

    This recipe is basically sunshine in fudge form.


    🍋 Ingredients

    • 24 oz white almond bark or white chocolate chips
    • 1 (14 oz) can sweetened condensed milk
    • 1 package lemon instant pudding mix (the whole thing!)

    🔥 How to Make No-Bake Lemon Fudge

    1. Melt the chocolate

    If you have a double boiler, this is its moment to shine.
    If not? A microwave works perfectly.

    Using almond bark:
    Cut or shave it into smaller chunks so it melts faster and more evenly.

    Microwave method:
    Place the chocolate in a microwave-safe bowl and heat in 30-second intervals, stirring each time.
    Don’t skip the stirring—if you heat it too long without mixing, you’ll end up with burned chocolate in some spots and unmelted hunks in others. Trust me, 30 seconds + stir is your new best friend.

    Double boiler method:
    Heat on low and stir continuously until smooth and melty.


    2. Add the magic

    Once your chocolate is melted, stir in:

    • the full can of sweetened condensed milk, and
    • the entire package of lemon pudding mix

    Don’t skimp on the pudding mix—it helps the fudge set and gives it that delicious lemony flavor.
    Mix until everything is smooth and combined. Mixy mixy! 😄


    3. Pour & chill

    Line an 8×8 pan with parchment paper and pour the mixture in.
    Smooth the top and pop it in the fridge for 2 hours (or until firm).

    Once set, lift the fudge out by the parchment, slice into squares, and enjoy!


    🍋 Time to Taste!

    This fudge is creamy, bright, and SO refreshing. The lemon flavor makes it perfect for spring and summer, but honestly… I’d make this any day of the year.

    I’m already thinking about experimenting with other pudding flavors—maybe butterscotch? Chocolate? Banana cream?
    I’ll test them out on my coworkers first before sharing the official verdict with you. 😉

    If you try this recipe, let me know what you think! Have a wonderful day, everyone!

  • The Best Cauliflower Salad for Holidays – Easy Dump-and-Go Recipe

    The Best Cauliflower Salad for Holidays – Easy Dump-and-Go Recipe

    If you’ve been around here long enough, you know I love a good dump-and-go recipe—especially the kind that makes people think you spent way more time in the kitchen than you actually did. And friends… this cauliflower salad? It’s exactly that.

    I’m normally not one for raw cauliflower. I usually prefer it cooked and softened because it’s just easier to eat. But this salad? This salad converted me. It’s creamy, crunchy, flavorful, and so ridiculously easy to throw together that you’ll find yourself making it over and over again.

    And with the holidays right around the corner, this recipe deserves a spot on your table. Trust me—bring this to a gathering and watch it disappear.


    Why This Salad Is Always a Crowd Favorite

    It’s the perfect blend of crunchy veggies, salty bacon, nutty sunflower seeds, and a creamy dressing that ties everything together. Every bite has a little bit of everything, and the flavors get even better the longer it sits.

    This is one of those dishes that tastes like something your aunt spent three hours making… except it takes about 15 minutes and almost zero effort.


    Ingredients

    • 12 slices of bacon, cooked and crumbled
    • 1 head cauliflower, cut into bite-sized pieces
    • 1 head broccoli, cut into bite-sized pieces
    • ¾ cup sunflower seeds (salted or unsalted—your call!)
    • ½ red onion, diced
    • 1 cup creamy ranch dressing
    • 1 ½ Tbsp white wine vinegar
    • ¼ cup sugar

    Directions

    1. Prep your veggies

    Cut the cauliflower and broccoli into bite-sized pieces—nothing too tiny and nothing the size of a small tree. Just nice, fork-friendly bites. And feel free to adjust the ratio while you’re at it! More cauliflower, less broccoli, or vice versa… remember, it’s your kitchen and your rules.

    Think of a good salad: you want to get a little bit of everything in one bite. That’s the goal here.

    2. Dump everything in a big bowl

    Here’s a cleaned-up, fun, and on-brand rewrite:

    Grab a big bowl—trust me, this recipe makes a generous batch.

    Add in your cauliflower, broccoli, bacon, sunflower seeds, and diced red onion.
    You can whisk the ranch dressing, white wine vinegar, and sugar together in a separate bowl…

    Or, let’s be real: just dump it straight into the big bowl and mixy-mixy. Your kitchen, your rules, soo your choice.

    Give everything a good stir until all the pieces are coated in that creamy, delicious dressing.

    3. Refrigerate

    Let the salad chill for at least 4 hours before serving.
    But if you really want the flavors to shine, make it 24 hours ahead. Everything melds together and it tastes even better the next day.


    4. Serve & Enjoy!

    Serve cold and enjoy the crunchy, creamy goodness. This is always a hit at potlucks, holidays, cookouts, and honestly… random Tuesdays.

    If you try this recipe, drop a comment and let me know what you think!
    Writing this out actually made me want to run to the store for ingredients—so don’t be surprised if I’m making a batch tonight too. 😆

  • My Favorite Blueberry Muffin Recipe (The Easiest Dump-and-Go Ever!)

    My Favorite Blueberry Muffin Recipe (The Easiest Dump-and-Go Ever!)

    If you’ve been around my kitchen for more than two minutes, you know I’m a huge fan of easy recipes—like the kind you can whip together on a busy morning before chores or after a long day when you just want something sweet. This blueberry muffin recipe is hands-down one of my all-time favorites.

    I honestly don’t even remember where it came from originally. Maybe a family cookbook? Maybe Pinterest from 10 years ago? Who knows. What I do know is that it has slowly changed over time and turned into the perfect “dump and go” recipe that I make all year long.

    And when I say dump-and-go, I mean it.
    No creaming the butter and sugar. No sifting. No separating bowls. None of that. Just toss it all together, mix, bake, and enjoy.

    Because at the end of the day—it’s your kitchen, and YOU’RE the boss.


    Why I Love This Recipe So Much

    Every summer I go to a local U-pick blueberry farm and load up like I’m preparing for a blueberry shortage. I freeze them in 1-cup increments, specifically for this recipe. That’s how much I love it—my freezer is literally prepped around these muffins.

    These muffins come out soft, sweet, perfectly moist, and studded with juicy berries. And don’t even get me started on the streusel topping… it’s the perfect crunchy-sweet finish.


    Ingredients

    For the Muffins

    Makes 12

    • 1 ½ cups all-purpose flour
    • ¾ cup sugar
    • 2 tsp baking powder
    • ½ tsp salt
    • ⅓ cup oil
    • 1 egg
    • ⅓ cup milk
    • 1 cup blueberries (I use frozen!)

    For the Streusel Topping

    • ½ cup sugar
    • ⅓ cup flour
    • ¼ cup cold butter, diced
    • 2 tsp cinnamon

    Directions

    1. Preheat the oven

    Preheat your oven to 400°F and grease your muffin or cupcake pan.

    2. Mix the batter (the lazy, glorious way)

    Most recipes tell you to cream the egg and sugar together first…
    But this isn’t most recipes.

    Just add everything (except the blueberries) into a mixing bowl and stir until combined. That’s it. No fancy techniques, no special equipment.

    Fold in the blueberries last. If you’re using frozen ones, don’t thaw them—just toss them in frozen. It keeps the batter from turning totally purple.

    3. Fill the muffin tins

    Scoop the batter into your muffin pan, filling each cup about ¾ full, just like any standard muffin recipe.


    4. Make the Streusel Topping

    This is where things get a little messy, but in a fun way.

    Add your sugar, flour, cinnamon, and cold butter pieces to a bowl.
    Most recipes will tell you to use a fork or pastry blender… but honestly?

    Wash your hands and get right in there.

    Squish, pinch, and crumble the mixture together until the butter breaks down and you have a sandy, crumbly topping. It might clump up at first, but keep going. It’s all part of the process.


    5. Bake

    Bake the muffins for 25 minutes.

    You can add the streusel topping before baking, but I’ve found it sometimes gets a little too brown before the muffins are fully done. So I prefer to add the topping during the last 15 minutes of baking.

    But again—your kitchen, your rules.


    6. Enjoy!

    Let them cool a bit (if you can resist), then dig in. These muffins are amazing warm, and they freeze beautifully too.

    If you try this recipe, please let me know! I’d love to hear if your family loves them as much as mine does.

  • Grandma’s Peanut Butter Pie Recipe: A Sweet Slice of Nostalgia

    Grandma’s Peanut Butter Pie Recipe: A Sweet Slice of Nostalgia

    Some recipes are more than just instructions for food—they’re family history written in sugar, butter, and love. My grandma left behind boxes full of recipes. Some handwritten on scraps of paper, some typed up, and some printed from her old dial-up computer (I can still hear the screech of it connecting when she checked her emails).

    As I went through them, I couldn’t help but notice a theme: desserts. Page after page of cakes, pies, cookies, and candies. Clearly, I inherited my sweet tooth!

    One recipe that stood out recently was her peanut butter pie.

    At my workplace (I work at a hospital), the cafeteria makes an incredible peanut butter pie. It’s so popular that when they make a batch, it disappears in no time, and then you don’t see it again for months. After what felt like forever without a slice, I decided it was time to dig through Grandma’s recipes to see if she had her own version.

    Sure enough—there it was, tucked away in her collection. And let me tell you: it’s every bit as delicious as I hoped. Simple, creamy, and downright nostalgic.

    The Recipe

    This pie is wonderfully easy to put together, and it only requires a few ingredients.

    Ingredients

    • 1 (8 oz) package cream cheese, softened
    • 1 cup sugar
    • 1 cup peanut butter (creamy works best)
    • 2 Tablespoons butter
    • 1 Tablespoon vanilla
    • 1 (8 oz) container whipped topping (like Cool Whip)
    • 1 prepared graham cracker crust (store-bought or use your favorite recipe)

    Instructions

    1. In a large mixing bowl, beat the cream cheese and sugar until smooth.
    2. Add peanut butter and vanilla; mix until creamy and well blended.
    3. Spoon mixture into the graham cracker crust, smoothing out the top.
    4. Chill in the refrigerator for at least 2–3 hours.
    5. Add whipped cream when serving.

    Optional: Top with crushed peanuts, or chocolate.

    A Slice of Family Tradition

    This pie isn’t just sweet—it’s sentimental. Every time I make it, I’m reminded of my grandma’s kitchen, her recipe boxes, and the way she loved to collect desserts. Food has a way of connecting us back to the people we love, and for me, this peanut butter pie is one of those connections.

    So, the next time you’re craving something creamy, peanut buttery, and comforting, skip the store-bought version and give this family recipe a try. It’s easy, delicious, and a little slice of my grandma’s love.