Category: Pasture Pals

  • Beginner Homestead Animals: Common Mistakes You Can Avoid

    Beginner Homestead Animals: Common Mistakes You Can Avoid

    One of the first questions new homesteaders ask is, “What animals should I start with?”

    And the truth is — every homesteader’s version of a “beginner animal” is different.

    Your space, climate, budget, time, personality, and goals all play a role. What feels easy for one person might feel completely overwhelming for someone else. That’s why instead of giving you a one-size-fits-all answer, I want to walk through some common “starter” animals and the beginner mistakes you can avoid before you bring them home.

    I’ll also sprinkle in a few honest homestead thoughts I wish more people talked about.


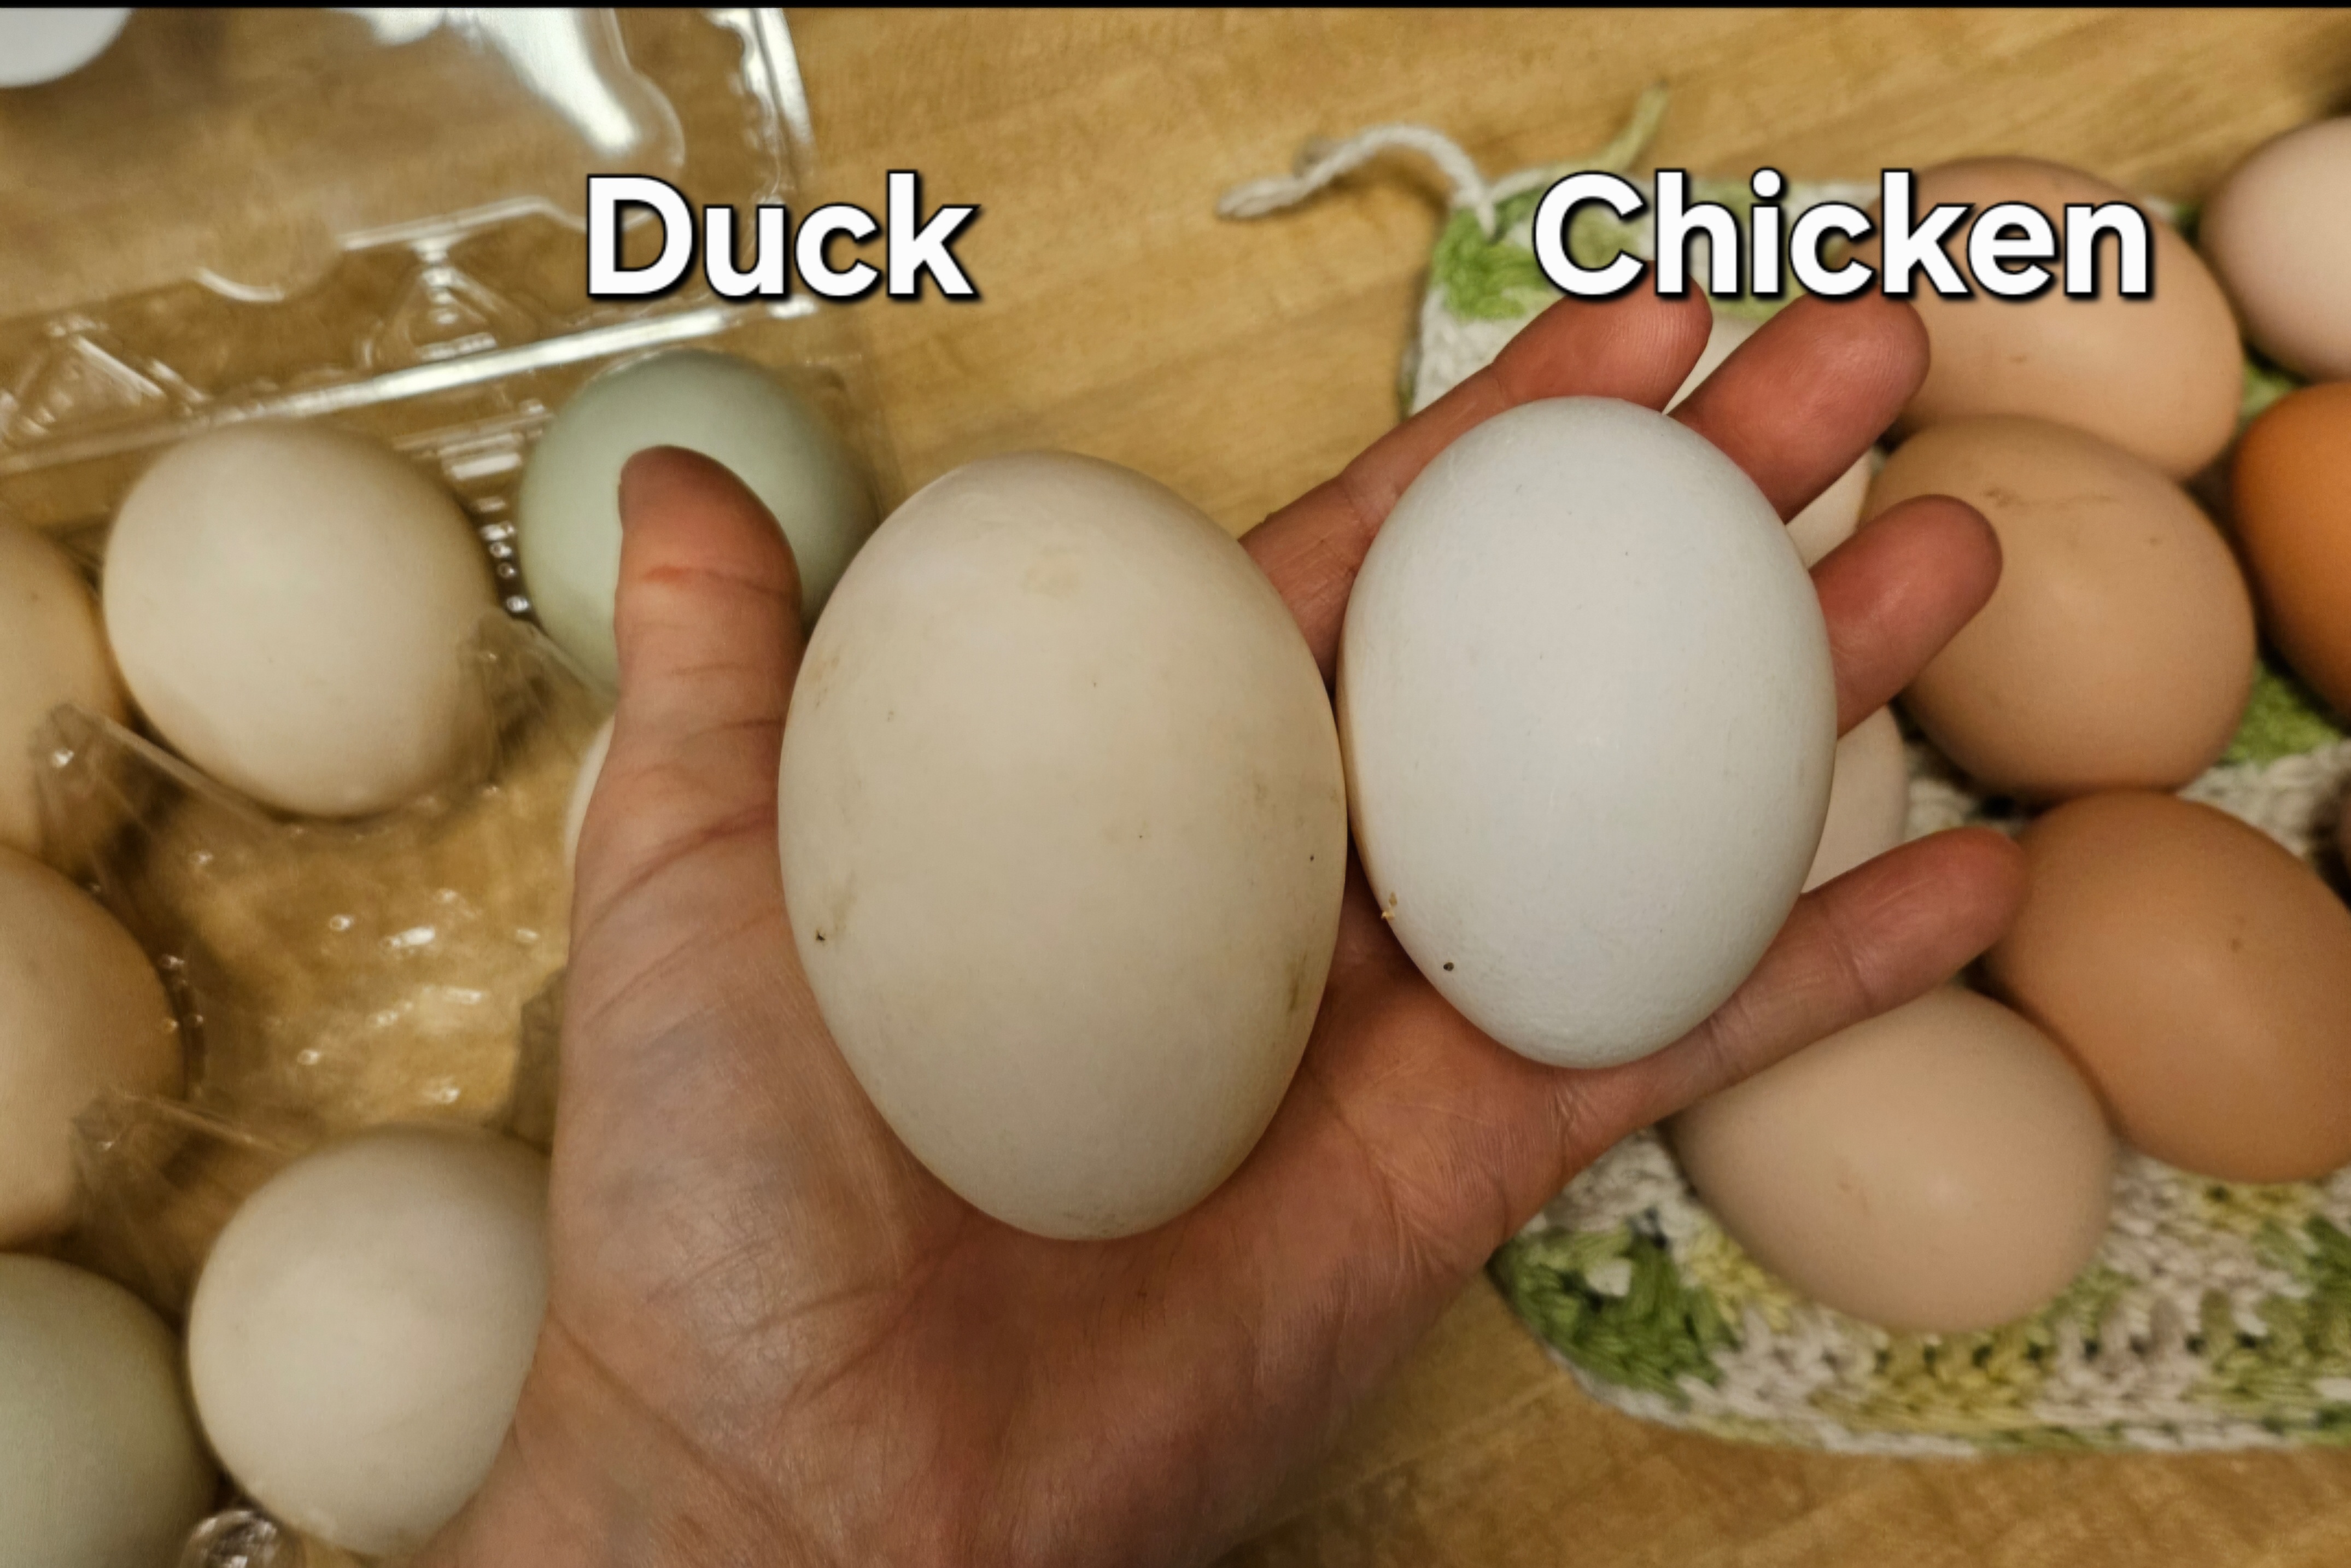
    Chickens: Easy… Until They’re Not

    In my opinion, chickens are often the easiest beginner livestock — depending on the breed and your expectations.

    One of the biggest mistakes I see is people choosing chickens based solely on looks. Fancy feathers are great, but they don’t help much if the bird can’t handle your climate.

    Things to consider before buying chicks:

    • Heat tolerance vs. cold tolerance
    • Egg production vs. dual purpose
    • Temperament (some breeds are much friendlier than others)

    👉 Beginner mistake to avoid: Buying whatever chicks are available without researching whether they’ll thrive where you live.

    My homestead thought: Chickens will teach you routine, responsibility, and patience. They’re forgiving enough to learn with, but they still require daily care. If chores already feel overwhelming, start small — less birds taken care of beats a full coop of neglected ones.


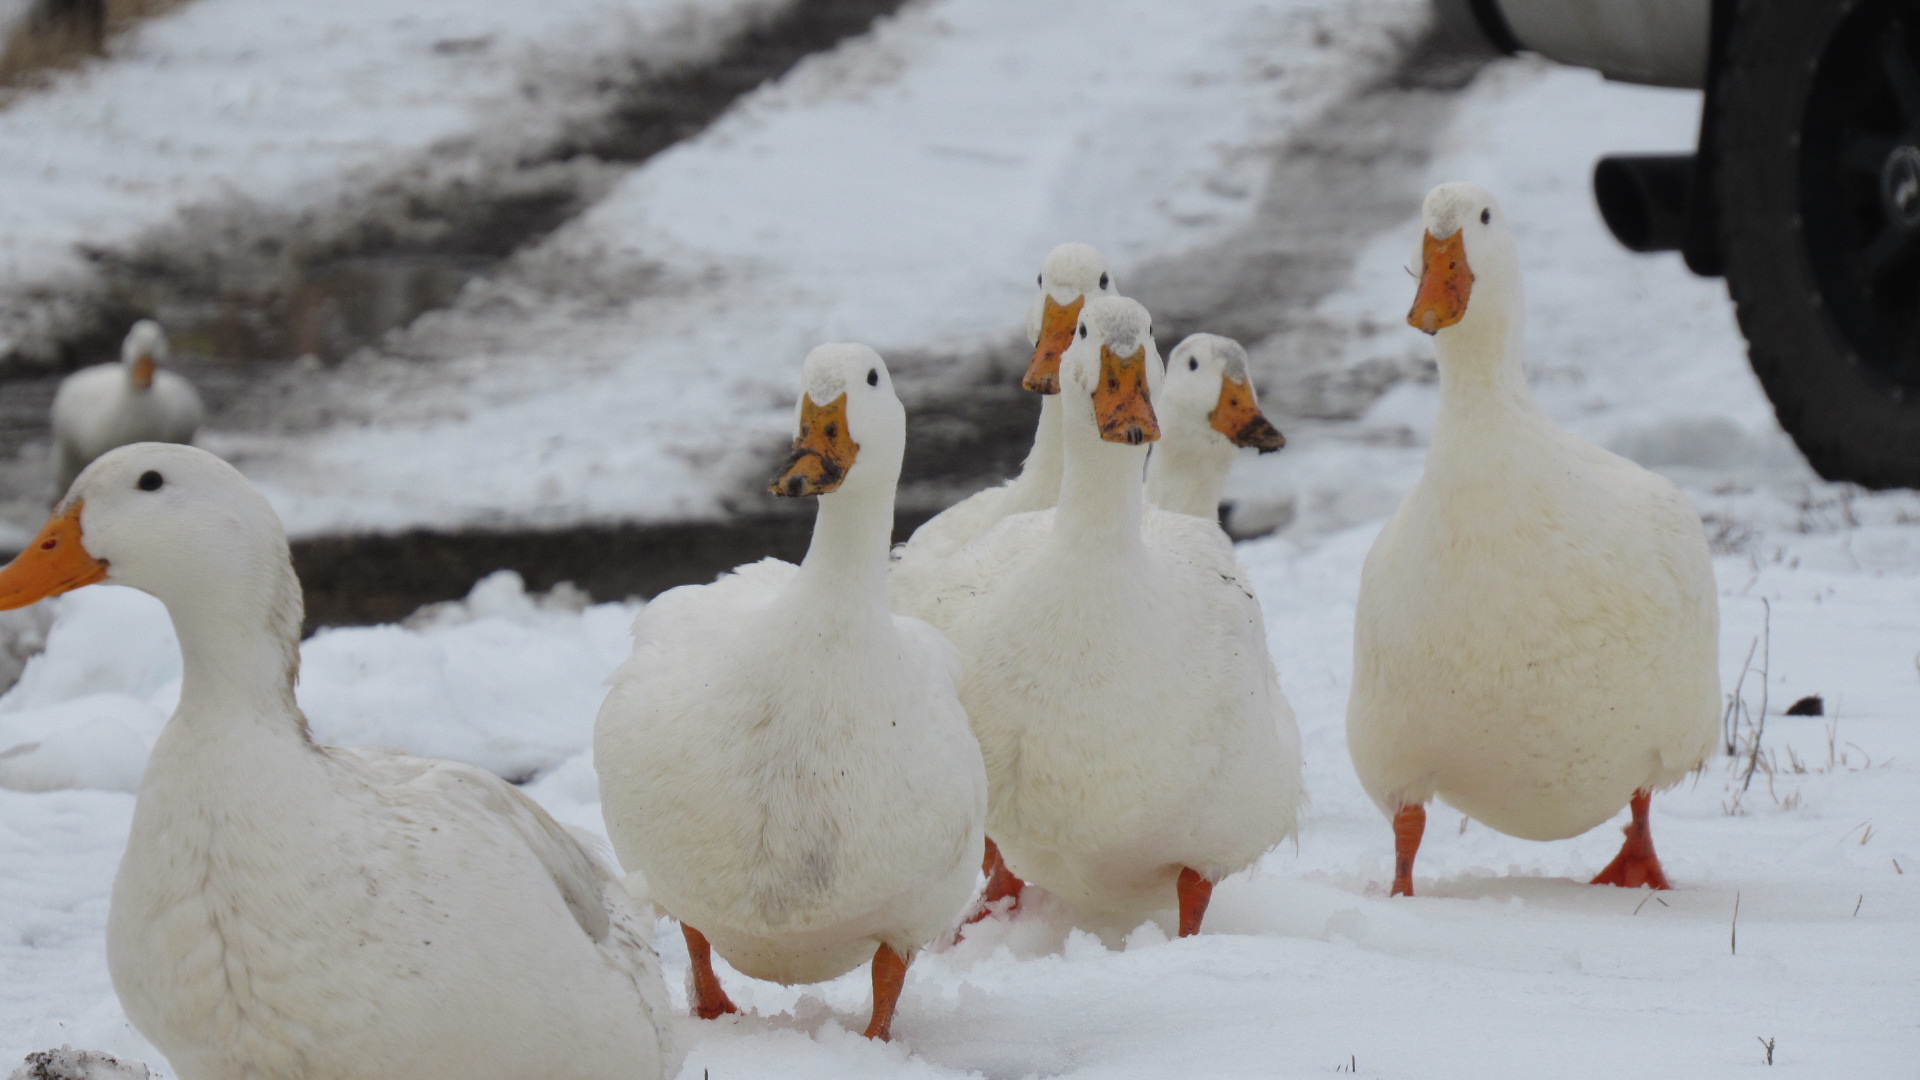
    Ducks: Adorable, Entertaining… and Very Wet

    Ducks are often labeled as beginner friendly, but they come with quirks that surprise a lot of new homesteaders.

    Ducks must have access to water deep enough to dunk their heads and clear their nares (nostrils). This is non-negotiable for their health.

    Other common duck mistakes:

    • Underestimating how messy they are
    • Brooding them indoors without proper ventilation
    • Assuming ducklings are waterproof

    Ducklings don’t develop their down coats or oil glands until about 6–8 weeks old. That means:

    • They love water
    • But they are not waterproof
    • They can chill quickly and get sick if they can’t dry off properly

    👉 Beginner mistake to avoid: Letting ducklings play in water without immediate access to warmth and a dry area.

    My homestead thought: Ducks are joy-filled chaos. If you love watching animals and don’t mind extra cleaning, they’re wonderful. If mess stresses you out, ducks might test your patience more than chickens ever will.


    Turkeys: Sensitive Babies, Hardy Adults

    Turkeys get a bad reputation, but honestly? Turkeys are just… big chickens.

    The challenge is the beginning.

    For the first 4–6 weeks, turkey poults are:

    • More temperature sensitive
    • Less forgiving of mistakes
    • More fragile than chicks

    Once they pass that stage, many homesteaders find them surprisingly straightforward.

    👉 Beginner mistake to avoid: Treating turkey poults exactly like chicks without adjusting brooder temperatures and care.

    My homestead thought: Turkeys teach you attentiveness. They’ll force you to slow down, observe, and respond quickly. If you enjoy learning through close observation, they can be incredibly rewarding.


    Quail: Small Birds With Big Learning Curves

    Quail are often suggested for small spaces, but they require careful setup.

    One of the most common (and heartbreaking) beginner mistakes is this:
    👉 Quail can drown in water dishes.

    To prevent this:

    • Use shallow waterers designed for quail
    • Add marbles, rocks, or pebbles to water dishes

    They’re fast, fragile, and don’t tolerate mistakes well.

    👉 Beginner mistake to avoid: Using standard poultry equipment without modifications.

    My homestead thought: Quail are not “set it and forget it” birds. They’re great for people who like precision and structure, but they’re not as forgiving as chickens or ducks.


    Goats: Let’s Stop Calling Them Beginner Animals

    I’m going to be honest here.

    If you start your homestead with goats… you’re either very confident or a little wild.

    Goats require:

    • Excellent fencing (and then better fencing)
    • Consistent parasite management
    • Nutrition knowledge
    • Daily observation

    They’re intelligent, curious, and always testing limits — both physical and mental.

    👉 Beginner mistake to avoid: Getting goats because they’re cute or popular on social media.

    My homestead thought: Goats are not difficult because they’re bad animals — they’re difficult because they’re smart. They require leadership, consistency, and patience. They will make you a better animal keeper, but they’ll humble you first.


    Cows: Simple Animals With Big Needs

    Cows can actually be fairly easy animals to manage — if you’re prepared.

    They need:

    • Adequate pasture
    • Strong, reliable fencing
    • Space to move and graze
    • Long-term planning

    They’re not forgiving of shortcuts, especially when it comes to space and infrastructure.

    👉 Beginner mistake to avoid: Underestimating how much room and planning cows require.

    My homestead thought: Cows teach respect. Their size alone demands calm, intentional handling. If you’re someone who likes structure and routine, cows can be incredibly grounding animals.


    Pigs: Breed Choice Changes Everything

    Not all pigs are created equal.

    Breeds like:

    • Kunekune
    • Guinea hogs

    are often considered more beginner friendly because they’re:

    • Smaller
    • More docile
    • Easier to manage

    That said, they’re also much fattier breeds, which isn’t everyone’s preference for meat.

    Many people raise them for butcher, but that’s a personal decision.

    I’ll be honest — I have a pig who’s basically a pet. She’s chill, eats anything and everything, and genuinely enjoys long walks. 😂

    👉 Beginner mistake to avoid: Choosing pig breeds without understanding size, temperament, and end goals.

    My homestead thought: Pigs are smarter than people expect. If you treat them with respect and consistency, they’re some of the most enjoyable animals to raise.

    wrote it in the same voice and depth as the rest of the article.


    Rabbits: Quiet, Efficient… and Not as Low-Maintenance as People Think

    Rabbits are often suggested as one of the best beginner homestead animals — and in some ways, they are.

    They’re quiet, don’t require a lot of space, and can be incredibly efficient producers. But there are a few common beginner mistakes that catch people off guard.

    Common rabbit mistakes:

    • Keeping them in direct heat without airflow
    • Assuming wire cages don’t need resting mats
    • Not protecting them from predators
    • Underestimating how sensitive they are to stress

    Rabbits do not handle heat well. Temperatures above the mid-80s can quickly become dangerous without shade, airflow, and frozen water bottles or cooling methods.

    They also have delicate feet. Wire cages without resting boards can lead to sore hocks, which are painful and avoidable with proper setup.

    👉 Beginner mistake to avoid: Assuming rabbits are “easy” because they’re quiet and small.

    My homestead thought: Rabbits are calm animals that require intentional care. If you’re someone who likes quiet, routine, and efficient systems, rabbits can be a great fit. But they’re not hands-off animals — they reward consistency, not neglect.


    Final Thoughts: Start Where You Are

    There is no universal beginner animal.

    The best animals to start with are the ones that:

    • Fit your space
    • Match your climate
    • Align with your goals
    • Work with your daily routine

    Every homesteader learns by doing. Mistakes happen — what matters is planning thoughtfully and being willing to adjust as you grow.

  • What I Wish I Knew Before Buying My First Homestead Animals

    What I Wish I Knew Before Buying My First Homestead Animals


    Starting a homestead often comes with dreams of fresh eggs, goat milk, or maybe even raising your own meat. But here’s the truth—buying animals too soon (or without the right preparation) can turn that dream into stress fast.
    When I bought my first animals, I thought I was ready. What I didn’t realize was how much work, money, and planning it really takes. So today, I want to share the biggest lessons I wish I knew before buying my first animals—so you can avoid the mistakes I made.

    Animals Cost More Than You Think

    It’s so easy to get swept up in the excitement of bringing home new animals — a $5 chick, a “free” goat from a neighbor, or a couple of ducks from the feed store. But here’s the truth: the purchase price is just the beginning of what you’ll spend.

    Feed & supplements:
    Even small animals eat more than you’d expect. A laying hen, for example, goes through roughly ¼ pound of feed per day. Multiply that by a dozen hens, and suddenly you’re buying 50-pound bags. Add in grit, oyster shell, minerals, and the occasional treat or supplement, and those “cheap chickens” start to add up fast.

    Housing & bedding:
    Animals need safe, weatherproof shelter — and that means coops, barns, or hutches that are not only built but also maintained. Repairs, predator-proofing, and fresh bedding like straw or shavings are ongoing expenses. Even the best-built coop needs regular upkeep to stay clean and dry.

    Health care:
    Whether you handle it yourself or call in a vet, animal health care isn’t optional. Vaccines, dewormers, hoof trims, and the occasional emergency visit can hit your wallet when you least expect it. And trust me — it’s never at a convenient time.

    💡 Tip: Before bringing any new animal home, set aside 3–6 months of feed, bedding, and health care costs in your budget. That cushion gives you peace of mind and keeps your homestead running smoothly when unexpected expenses pop up — because they will.

    Homestead Animals Are a Full-Time Commitment

    Animals don’t take days off — and once they’re part of your homestead, neither do you (at least not completely). They don’t care if you’re tired, working late, or dreaming of a weekend getaway. They depend on you for food, water, safety, and care every single day — rain, shine, or snow.

    Daily care:
    Feeding, watering, and cleaning pens or coops quickly become part of your daily rhythm. Chickens still need food and unfrozen water in the snow. Goats still expect breakfast and a secure fence after a windstorm. Cows still need milking — even on holidays or when you’d rather sleep in.

    No “pause” button:
    It’s one of the biggest adjustments for new homesteaders. You can’t simply skip a morning or leave town without a plan. Animals notice when routines are broken — and their health and safety depend on consistency.

    💡 Tip:
    Before bringing animals home, line up a reliable backup plan for the days you can’t be there. Neighbors, friends, or local farm sitters can be absolute lifesavers. It’s worth building those relationships early — because even the most dedicated homesteader needs a break sometimes.

    Build First, Buy Later

    One of the biggest lessons I learned the hard way was this: don’t bring animals home before you’re fully ready for them. I know how tempting it is — you see those adorable baby goats or chicks at the feed store and think, “I’ll finish the pen this weekend.” But animals don’t wait patiently while you finish your to-do list.

    Proper housing matters:
    Chickens need secure, predator-proof coops that lock up tight at night. A single weak spot is an open invitation to raccoons or foxes.

    Goats are escape artists:
    Whatever fencing you think will work — double it. Goats love to climb, lean, and test boundaries (literally). Even a small gap can turn into an impromptu jailbreak.

    Rabbits need protection too:
    Their hutches should have shade in summer, shelter from wind and rain, and wire bottoms sturdy enough to keep out predators.

    💡 Tip:
    Finish the fencing, build the coop, and test everything before you bring your animals home. It might take more time upfront, but it’ll save you endless stress, late-night chases, and potential injuries later. Your animals deserve a safe start — and you deserve peace of mind.

    Not All Breeds Are Created Equal

    It’s easy to fall in love with cute animals online — those floppy-eared goats on Instagram or the fluffy chickens at the feed store. But not every breed is right for every homestead. The animals that fit your goals, climate, and lifestyle will serve you much better than the ones that just look adorable.

    Chickens:
    Before buying, ask yourself — are you after eggs, meat, or both? Laying breeds like Leghorns or Australorps are great for daily eggs, while Cornish Cross are raised for meat. Dual-purpose breeds like Orpingtons or Plymouth Rocks can give you a bit of both but require more feed and patience.

    Goats:
    Goats come with very different skill sets. Dairy breeds like Nubians or Alpines give rich milk for cheese and soap making. Meat breeds like Boers are bulkier and better for freezer camp. There are even smaller breeds like Nigerian Dwarfs(that’s what I have) that make great family milk goats for small spaces.

    Cows:
    A Jersey cow might be perfect for a small homestead if you want rich, creamy milk — but an Angus steer is bred for beef, not daily milking. Each type has different space, feed, and care requirements.

    💡 Tip:
    Choose animals that match your homestead goals, not just your heart. The right breed will make your life easier, your projects more successful, and your animals happier in the long run. Take time to research before buying — your future self (and your feed bill) will thank you.

    Start Small & Grow Slowly

    One of the quickest ways to burn out on the homestead is by diving in too deep, too fast. When you’re just starting out, everything sounds exciting — chickens, goats, cows, rabbits, ducks! But each new species adds a layer of chores, learning, and expenses.

    Start simple:
    Begin with one type of animal and learn their needs inside and out. Master chickens before adding goats. Get comfortable with goats before moving up to cows. Each step builds your confidence and teaches valuable lessons about feed, fencing, and daily routines.

    Grow at your own pace:
    Homesteading isn’t a race — it’s a lifestyle. Expanding slowly allows you to enjoy the process instead of constantly playing catch-up. When you build solid systems first, adding new animals later feels natural instead of chaotic.

    💡 Tip:
    Think of your homestead like a garden — plant a few things, see what thrives, then add more next season. With patience and planning, you’ll grow something that truly lasts.

    Final Thoughts

    Bringing home your first animals is thrilling — there’s nothing quite like hearing that first morning cluck or watching a goat hop through the pasture. But it’s also a big commitment. If I could go back, I’d slow down, prepare more, and start smaller.

    Homesteading is about creating a life that’s sustainable, not stressful. The slower you go, the stronger your foundation will be. Take your time, do your research, and give yourself grace to learn as you grow.

    🐓 Your turn:
    What’s the first animal you dream of bringing to your homestead — and why? Share in the comments below! I love hearing everyone’s stories and seeing how each homestead journey begins.

  • How to Decide What Animals Are Right for Your Small Farm

    How to Decide What Animals Are Right for Your Small Farm

    Starting a small farm is an exciting journey, and one of the biggest decisions you’ll make is choosing which animals to raise. From chickens to goats to pigs, each animal offers unique benefits and comes with its own set of needs. But how do you decide which animals are the best fit for your farm?  

    Whether you’re looking for eggs, milk, meat, or simply a more sustainable lifestyle, this guide will help you evaluate your goals, resources, and capabilities to choose the perfect animals for your small farm.  

    Start with Your Farm’s Goals

    Before you choose any animals, consider what you want to achieve with your small farm.  

    Eggs or Dairy: If your goal is a steady supply of eggs or milk, chickens or dairy goats may be a good place to start.  

    Meat Production: If you’re looking to raise your own meat, animals like pigs, rabbits, or sheep might be ideal.  

    Land Management: For clearing brush or improving pastures, goats or grazing animals like sheep or cows can be invaluable.  

    Companionship and Hobby Farming: If your primary goal is to enjoy the experience of caring for animals, chickens or ducks are fun and beginner-friendly.  

    Understanding your goals will narrow down your options and help you choose animals that align with your vision.  

    Assess Your Land and Space  

    The size and quality of your land will play a major role in determining which animals you can raise.  

    Small Spaces: If you only have a small backyard or limited acreage, chickens, rabbits, or ducks are great options since they don’t require much space.  

    Moderate Space: With a few acres, you can consider goats, pigs, or sheep. These animals need more room to roam and graze.  

    Larger Acreage: If you have 10+ acres, you can think about larger livestock like cows or horses. These animals require significant space and grazing land to thrive.  

    Also, consider the quality of your land. Goats, for example, are excellent for hilly or rocky terrain, while sheep prefer lush pastures.  

    Factor in Time and Labor 

    Different animals require different levels of care and time commitment.  

    Low Maintenance: Chickens, ducks, and rabbits are relatively low-maintenance animals. They need daily feeding, water, and a clean coop, but their care is manageable for beginners or busy schedules.  

    Moderate Maintenance: Goats and sheep require more attention, including proper fencing, health checks, and occasional hoof trimming.  

    High Maintenance: Larger animals like cows and horses need significant time for feeding, grooming, and pasture management.  

    Be realistic about how much time and energy you can dedicate to your animals each day.  

    Consider Your Budget  

    The cost of raising animals can vary widely depending on the species and your setup.  

    Initial Costs: Consider the price of purchasing the animals, building housing, and setting up fencing or infrastructure. For example, a chicken coop is much cheaper than a barn for cows.  

    Ongoing Costs: Factor in feed, bedding, veterinary care, and supplies. Larger animals like cows and pigs will eat much more than chickens or rabbits, leading to higher feed costs.  

    Unexpected Expenses: Be prepared for emergencies, like vet visits or equipment repairs, that can add to your overall costs.  

    Choose animals that fit within your budget, especially if you’re just starting out.  

    Research Local Regulations

    Before you bring animals to your farm, check local zoning laws and regulations.  

    – Some areas have restrictions on livestock, especially in suburban or urban locations.  

    – You may need permits for certain animals or be required to follow specific guidelines for housing and fencing.  

    – Keep in mind that roosters, for example, can be noisy and may not be allowed in some neighborhoods.  

    Understanding the rules in your area will save you from potential fines or the heartbreak of having to rehome your animals.  

    Evaluate Your Climate  

    Not all animals thrive in every climate, so it’s essential to consider your local weather conditions.  

    Cold Climates: Animals like sheep, cows, and certain chicken breeds are hardy and can handle cold winters with proper shelter.  

    Hot Climates: Goats, pigs, and heat-tolerant chickens like Leghorns do well in warmer regions.  

    Extreme Weather: If you live in an area with extreme heat, cold, or storms, invest in sturdy shelters and infrastructure to protect your animals.  

    Choose animals that are well-suited to your climate to ensure their health and well-being.  

    Start Small 

    If you’re new to farming, it’s best to start with one or two types of animals and expand as you gain experience.  

    Chickens: A small flock of hens is a great way to begin. They’re easy to care for, provide fresh eggs, and can help control pests in your garden.  

    Rabbits: These quiet, low-maintenance animals are excellent for small spaces and can provide meat or fertilizer for your garden.  

    Goats: Dairy goats are a good next step if you’re ready to tackle milking and want a steady supply of milk for your family.  

    Starting small allows you to learn the ropes without becoming overwhelmed.  

    Learn About Each Animal’s Needs

    Do your homework before bringing any animals to your farm.  

    Housing: What kind of shelter do they need? Chickens require a secure coop, while goats need a barn or covered pen.  

    Fencing: Some animals, like goats, are escape artists and require strong, well-designed fencing.  

    Diet: Learn about each animal’s nutritional requirements and plan for feed and supplements.  

    Understanding the specific needs of your chosen animals will set you up for success and keep your animals happy and healthy.  

    Think About Your Future Plans 

    As you choose animals, consider how they fit into your long-term vision for your farm.  

    – Do you want to expand your operation in the future?  

    – Are you raising animals for personal use or planning to sell products like eggs, milk, or meat?  

    – Will your current infrastructure support additional animals as your farm grows?  

    Planning ahead will help you make choices that align with your goals and prevent unnecessary expenses down the line.  

    Trust Your Passion 

    Finally, let your passion guide your decision. Farming is hard work, and it’s much more enjoyable when you’re caring for animals you truly love.  

    – Do you dream of fresh eggs every morning? Start with chickens.  

    – Are you fascinated by the idea of making your own cheese? Consider dairy goats or cows.  

    – Do you love watching animals graze in your fields? Sheep or cattle might be the perfect choice.  

    The animals you choose should bring you joy and fulfillment, not just practicality.  

    Final Thoughts

    Choosing the right animals for your small farm is a deeply personal decision that depends on your goals, resources, and lifestyle. By starting with clear priorities, assessing your land and budget, and doing thorough research, you can build a farm that meets your needs and brings you lasting satisfaction.  

    Remember, there’s no “perfect” farm setup—what works for one family may not work for another. Start small, stay flexible, and enjoy the journey of learning and growing alongside your animals.  

    What animals do you have on your small farm? Or what are you planning to raise? Share your thoughts and experiences in the comments below—I’d love to hear from you!

  • The True Cost of Raising Backyard Meat Birds (And How to Save Money)

    The True Cost of Raising Backyard Meat Birds (And How to Save Money)

    Thinking about raising your own meat birds? You’re not alone—more and more homesteaders are choosing to raise chickens, ducks, or other poultry for meat. It’s a great way to provide clean, healthy food for your family—but how much does it actually cost? And can it be done affordably?

    Let’s break down the true costs of raising backyard meat birds—and share smart ways to save money without sacrificing quality.

    What Are “Meat Birds”?

    Meat birds are poultry breeds specifically raised for fast growth and efficient meat production. The most common are:

    • Cornish Cross: Ready to process in 6–8 weeks.
    • Freedom Rangers: Slower-growing, more active, processed in 9–12 weeks.
    • Pekin Ducks: Great for meat, typically ready in 7–9 weeks.

    Turkeys: Often raised for holidays, broad-breasted varieties take 16–24 weeks.

    Basic Costs of Raising Meat Birds

    Here’s a rough breakdown for raising 10 Cornish Cross chickens (your numbers may vary by location):

    ItemEstimated Cost
    Chicks (10)$30–$50 (including shipping)
    Brooder setup$20–$50 (can reuse each year)
    Feed (50–100 lbs)$25–$45
    Bedding$10–$15
    Processing (DIY or pro)$0–$60+
    Total$85–$220

    That means $8.50–$22 per bird, depending on how many costs you can reduce. Also keep in mind that the more birds you buy the cheaper they will be for bulk discounts. If you learn to process yourself, you only have to purchase the equipment once and can eliminate that cost next year. Here is my personalized break down for my Cornish Cross this year(2025).

    ItemEstimated Cost
    Chicks (20)$95
    Brooder setup$0 I have a built one I reuse
    Feed (50–100 lbs)$100(These brids seriously eat so much)
    Bedding$10? I used pine shavings in a tote for the first 2 day after recieving them in the mail. Then they went out the the brooder that has a mesh bottom-no bedding needed.
    Processing (DIY or pro)$0 I have all my own equipent. 
    Total$205

    Ways to Save Money on Meat Birds

     Buy Chicks in Bulk or Split an Order

    Hatcheries offer discounts on larger quantities, so team up with a friend or neighbor and split an order. The more you buy, the less you pay per chick (and on shipping).

    Supplement Feed With Garden Scraps and Foraging

    While meat birds are feed-hungry, you can still offset costs:

    • Let them forage in a movable tractor or pen.
    • Feed kitchen scraps.
    • Grow extra greens, squash, or sunflowers as supplements.

    Every bit helps cut that feed bill!

    Use a DIY Brooder and Tractor

    Skip the fancy gear! A simple tote or wooden box with a heat source makes a great brooder. A DIY chicken tractor built from scrap wood and wire can house your birds on pasture and reduce feed needs.

    Here is my current brooder set up. https://youtu.be/aCZucUI-ytA

      Process the Birds Yourself

    If you’re comfortable doing your own butchering, you’ll save a huge chunk. Processing can cost $5–$10 per bird at a facility. With a few tools and tutorials, you can learn to do it at home (bonus: it’s a great skill to have!).

    Compost the Waste

    Manure and leftover feathers don’t go to waste! Compost them to enrich your garden soil. You’ll save money on fertilizer and close the homestead loop.

    Is It Worth It Financially?

    You won’t always beat grocery store prices—but you can beat quality. Your birds will be:

    • Humanely raised
    • Fed a diet you control
    • Free from questionable additives
    • Raised outdoors with love and care

    And you’ll get roughly 4–6 lbs of meat per bird, depending on the breed and how long you raise them. That’s a lot of meals for the price!

    Bonus: Tips to Stretch Your Meat

    • Save bones for broth
    • Freeze or can meat in meal-size portions
    • Render fat for cooking
    • Don’t forget giblets—they’re nutrient-dense!

    Final Thoughts

    Raising your own meat birds is an incredible way to take control of your food and connect with your homestead in a new way. Yes, it may cost more than the store at first—but with smart planning, you can make it affordable and high-quality.

    Whether you’re raising 5 birds or 50, every batch teaches you something new—and helps you feed your family with confidence.

    If you liked this read check out this one next:

  • How to Raise Chickens on a Budget: A Beginner’s Guide

    How to Raise Chickens on a Budget: A Beginner’s Guide

    Raising chickens is one of the most rewarding things you can do on a homestead—fresh eggs, natural pest control, and endless entertainment! But if you’ve been holding off because you’re worried about the cost, we’ve got good news: you can absolutely raise chickens without breaking the bank.

    With a little creativity and planning, it’s possible to start and maintain a healthy flock on a tight budget. Here’s how to do it:

    Start Small and Smart

    You don’t need a massive flock to get started. Begin with 3–6 hens—enough to give you regular eggs but not so many that feed and housing costs get overwhelming. Many beginners also choose to skip the rooster if they’re not planning to hatch eggs (and want to avoid noise complaints!).

    Build Your Own Coop (or Upcycle One)

    Coops can get expensive fast—some premade ones cost hundreds of dollars. But chickens don’t care about fancy. Use scrap wood, pallets, or even an old shed to build your own coop. Check local classifieds or Facebook Marketplace for free or cheap materials—or even an unused dog house you can convert!Just make sure it’s predator-proof, dry, and well-ventilated.

    Buy Chicks from Local Sources

    Hatcheries are great, but you might find better prices buying chicks locally—especially from farm swaps, feed stores, or other homesteaders. Some people even give away extra chicks for free or cheap in spring.

    Bonus tip: Don’t go overboard with rare or fancy breeds if you’re on a budget. Stick with hardy, reliable layers like Rhode Island Reds, Australorps, or Buff Orpingtons.

    Feed Them Smarter

    Feed can be one of the biggest ongoing costs—but there are ways to slash that bill:

    • Ferment your feed (it stretches farther and improves digestion).
    • Give kitchen and garden scraps (they love veggie peels, bread ends, and more).
    • Let them free-range when safe to supplement their diet with bugs and greens.
    • Grow your own feed, like sunflowers, pumpkins, and greens.

     Use DIY Waterers and Feeders

    You don’t need expensive feeders or waterers. A 5-gallon bucket and a few nipples or PVC pipe can make a perfect gravity-fed waterer. Same goes for feeders—there are tons of easy, low-cost DIY tutorials out there.

    Skip the Heat Lamp (If You Can)

    If you’re raising chicks in spring or summer and can brood them inside, you might not need a heat lamp running 24/7. A well-insulated brooder with a heating pad or a safe radiant heater can cost less to run and be safer overall.

    Keep It Clean to Avoid Medical Expenses

    Healthy chickens = fewer expenses. Keep their coop clean, dry, and well-ventilated to avoid disease. Give them grit, oyster shell, and fresh water. A little prevention goes a long way toward saving money down the road.

    Barter with Other Homesteaders

    Need a rooster? Extra feed? Materials for a coop? Try trading! Many homesteaders love to barter, and you might be able to swap eggs, labor, or produce for what you need. Check local homesteading or farming groups online.

    Reuse What You Have

    Before you buy anything, look around your property. Can you turn an old dog crate into a brooder? Repurpose old fence posts for a chicken run? Use leftover wire for a predator screen? Homesteading on a budget is all about creativity.

    Let Your Chickens Work for You

    Chickens don’t just give you eggs—they’re also great composters, pest controllers, and tillers. Let them help in the garden, turn compost, and reduce your need for pesticides or fertilizers. That’s money saved across your whole homestead!

    Final Thoughts

    You don’t need a lot of money to raise happy, productive chickens. With a few frugal hacks and a little elbow grease, you can build a thriving flock that earns its keep and brings joy to your homestead.

    Start simple, stay resourceful, and enjoy every quirky, egg-laying minute of it!

  • A Beginner’s Guide to Incubating Duck Eggs: From Setting Up the Incubator to Duckling Care

    A Beginner’s Guide to Incubating Duck Eggs: From Setting Up the Incubator to Duckling Care

    Incubating duck eggs can be a rewarding and exciting experience for anyone interested in raising ducks. Whether you’re a first-time incubator or looking to perfect your skills, this guide will cover everything you need to know—from why you should incubate duck eggs, to how ducks mate, how fertilized eggs are formed, and what to expect throughout the incubation process. Let’s get started!

    Why Incubate Ducks?

    Incubating ducks can be an enriching way to grow your flock, whether you’re interested in adding new members to your backyard, raising ducks for eggs or meat, or simply enjoying the process of watching tiny ducklings hatch and grow. Incubation gives you full control over the hatching process, which can help improve hatch rates compared to natural brooding.

    Additionally, it’s a great opportunity to observe the early stages of life and learn about the development of ducklings in a more hands-on way. Incubating also allows for the potential to hatch rare or special breeds that might not be readily available in your area.

    How Ducks Mate

    Before diving into the incubation process, it’s important to understand how ducks mate. Ducks typically mate in the spring and fall. During the mating season, the male (drake) will court a female (hen) through displays of affection, including vocalizations and movements(like head bobbing). Once a female is receptive, the male will mate with her. 

    After successful mating, the eggs produced by the female may be fertilized. It’s important to note that only fertilized eggs have the potential to hatch into ducklings.

    How Ducks Fertilize Eggs

    Ducks, like other birds, lay eggs with the potential to be fertilized internally after mating. The drake’s sperm fertilizes the eggs inside the female’s body before they are laid. Once the eggs are laid, they can be collected and incubated. A key point to remember is that not all eggs will be fertilized, so it’s important to check the eggs for signs of fertilization, such as veins or a developing embryo.

    Prepping the Eggs for Incubation

    Before placing your duck eggs in the incubator, it’s important to handle them with care to preserve the natural protective coating, known as the bloom. The bloom is a thin layer of protective film on the eggshell that helps prevent bacteria from entering the egg and keeps the contents fresh. When collecting eggs, avoid washing them, as this can strip away the bloom and reduce the eggs’ ability to fend off contaminants. If the eggs are dirty, gently wipe them with a dry, soft cloth or brush to remove any debris without damaging the bloom. Additionally, store the eggs at a cool, stable temperature (around 55°F or 13°C) with the large end up until you’re ready to incubate them. This ensures the eggs remain viable and the embryo develops properly once incubated. Handling the eggs gently and minimizing contact with the shell will help increase the chances of a successful hatch.

    Setting Up Your Incubator

    To successfully incubate duck eggs, it’s crucial to have the right setup. Here’s how to set up an incubator:

    Choose the Right Incubator: Select an incubator designed to hold and rotate your duck eggs. There are both manual and automatic incubators, and automatic models that turn the eggs for you are often preferred for beginners. Most models have the options to handle different sizes of eggs. Read the instructions to make sure yours is set up right.

    Temperature: The ideal temperature for incubating duck eggs is between 99.5°F and 100.5°F (37.5°C-38°C). Too high or too low of a temperature can result in poor hatch rates.

    Humidity: Humidity is equally as important as temperature. For the first 25 days, maintain humidity around 55-60%. During the final days of incubation (the last 3 days), raise the humidity to around 70% to help soften the eggshells, allowing the ducklings to hatch.

    Turning the Eggs: Ducks need their eggs turned regularly to prevent the embryo from sticking to the shell. If using a manual incubator, turn the eggs 3-5 times a day. If using an automatic incubator, the machine will handle this for you.

    Egg Position: Eggs should be placed on their sides in the incubator/pointed end down. The large end of the egg should face upward to allow for proper air sac development.

    Incubation Timeline: Week by Week

    The incubation of duck eggs typically lasts about 28 days. Here’s what you can expect each week:

    Week 1:

    – Development Begins: By the end of week 1, you’ll begin to notice small blood vessels starting to form. The eggs will appear a bit darker when candled.

    -Turning: Continue turning the eggs at least 3-5 times per day.

    Week 2:

    – Embryo Growth: The embryos continue to grow, and you may notice more developed blood vessels. The embryos are beginning to look like tiny ducklings inside their eggs.

    – Candling:Candling helps you see the development progress and ensures the eggs are still viable.

    Week 3:

    – Lung Development: By now, the ducklings have grown significantly. Their organs are starting to develop, and you may notice more prominent veins. The eggs will feel heavier due to the growing embryos.

    – Humidity Adjustment: Check the humidity and make sure it’s consistent to prevent dehydration.

    Week 4:

    – Final Week: The ducklings are almost fully developed by day 25. At this point, you’ll need to raise the humidity to 70% to help the ducklings hatch.

    – Lock down: Don’t turn the eggs anymore. Keep the temperature and humidity stable.

    What to Expect on Hatch Day

    Hatch day is one of the most exciting moments! Ducklings can take anywhere from 12 to 48 hours to fully hatch. Here’s what will happen:

    Pipping: The first sign of a hatch is when the duckling begins to pip, or break through the shell. This can take several hours as they rest in between.

    Hatching: Once the duckling has pipped and started to break the shell, they will continue to work their way out. This is a slow process, but it’s a sign that everything is going well.

    Duckling Behavior: Ducklings are covered in a soft layer of down and will be wet and tired. They will rest and begin drying off shortly after hatching.

    Caring for Your Ducklings

    Once the ducklings have hatched, it’s time for care:

    Heat Source: Provide a warm brooder to keep the ducklings warm, ideally between 85°F and 90°F (29-32°C). Gradually lower the temperature over the next few weeks.

    Water and Food: Ducklings need access to clean water and a high-quality duckling starter feed. Make sure they can easily access their food and water, but avoid deep water containers to prevent drowning.

    Space: Ducklings grow quickly, so ensure they have enough room to move around. A spacious brooder helps prevent stress.

    Socialization: Ducklings are social animals, so consider keeping multiple ducklings together for companionship.

    Special Notes

    While ducklings are naturally drawn to water and may enjoy playing in it, it’s important to remember that they don’t develop their waterproof down feathers until around six weeks of age. Until then, they can get chilled easily if left wet, which can lead to illness. If you allow them to play in water, always supervise them closely to ensure they don’t get too cold. After they have been in water, you should manually dry them off with a towel and return them to their warm brooder under the heat source to prevent hypothermia.

    Additionally, ducklings need access to clean water deep enough to allow them to clear their nares (nostrils). This is crucial for their health, as blocked nares can lead to respiratory issues. Keep water containers low enough to allow easy access but ensure the water is shallow enough to prevent accidental drowning.

    Conclusion

    Incubating duck eggs is a fulfilling experience that allows you to witness the entire life cycle of ducks. By understanding how ducks mate, how fertilized eggs develop, and the steps to ensure a successful hatch, you’ll be well on your way to raising healthy ducklings. Whether you’re hatching for fun or expanding your flock, the joy of watching ducklings grow is unmatched.

    Good luck with your incubating journey, and don’t forget to capture those precious moments on camera!

    Below you’ll see I linked my Free Printable Incubation Checklist, it applies to all poultry, just make sure you do your research as incubation days will be different.

  • The Ultimate Goat Feeder Bag Review: Is It Worth It?

    The Ultimate Goat Feeder Bag Review: Is It Worth It?

    If you’re a goat owner, you know how important it is to keep your herd happy, healthy, and well-fed. A goat feeder bag is a practical tool designed to make feeding more efficient while reducing waste. But is it really worth the investment? In this review, we’ll take a closer look at a popular goat feeder bag, its benefits, drawbacks, and whether it’s the right choice for your farm.  

    What Is a Goat Feeder Bag?  

    A goat feeder bag is a portable, durable bag designed to hold hay, alfalfa, or other feed for your goats. These bags typically feature small feeding holes to encourage goats to eat without pulling out excessive amounts of hay, minimizing waste. They are usually made from heavy-duty materials like nylon or canvas to withstand chewing, pulling, and rough use by curious goats.  

    Features of the Feeder Bag  

    The feeder bag I’m reviewing is made from ‘premium 600 D oxford cloth'(no, I don’t know what that means but its feels like canvas) it’s supposed to ensure strength and durability. It comes with the following features:  

    Adjustable straps and hooks: The straps make it ideal to accomadate different animals or locations. High strength zinc alloy hooks. You can easily attach the bag to trees, fences, stalls, or gates.    

    Feeding holes: Strategically placed to allow goats easy access without creating excessive mess.  

    https://www.amazon.com/dp/B0CMX4L95Q?ref_=ppx_hzsearch_conn_dt_b_fed_asin_title_1&th=1

    Benefits of Using a Goat Feeder Bag  

    Reduces Feed Waste: One of the biggest advantages of a feeder bag is its ability to minimize feed waste. Goats are notorious for pulling hay out of traditional feeders, trampling it, and leaving it uneaten. The small feeding holes in the bag make it harder for them to scatter hay, saving you money on feed in the long run.  

    Portable and Easy to Use: The adjustable straps and lightweight design make the feeder bag easy to hang anywhere on your property. Whether you’re feeding your goats in the barn, in the pasture, or during transport, the feeder bag offers flexibility.  

    Promotes Clean Feeding: The mesh bottom prevents hay from sitting in moisture or dirt, ensuring that your goats always have access to clean, dry feed. This can help reduce the risk of illness caused by moldy or contaminated hay.  

    Durable and Long-Lasting: The heavy-duty construction holds up well against chewing and rough handling, which is essential for goats who love to nibble and play with anything within reach.  

    Easy on the go option when your transporting animals.

    Drawbacks to Consider  

    Limited Capacity for Large Herds: If you have a large herd, you may need to invest in multiple feeder bags, as one bag may not hold enough feed to sustain several goats at once.  

    Initial Cost: While a feeder bag is a cost-effective solution in the long term, the upfront investment can be higher compared to traditional feeders.  

    Potential for Damage:Although the material is durable, persistent chewers or highly aggressive goats may still manage to damage the bag over time. Regular inspections and occasional repairs may be needed.  Or go with a different method of feeding.

    Tips for Using a Goat Feeder Bag  

    Place at the Right Height: Hang the bag at a comfortable height for your goats to prevent neck strain.  

    Monitor Wear and Tear: Check the bag regularly for signs of damage, such as frayed straps or holes, to ensure it remains safe for your animals.  

    Rotate Locations: Move the bag around your property to prevent overuse in one area and encourage natural grazing behavior.  

    Use with Complementary Feeders: If you have a large herd, consider using the bag alongside traditional feeders to ensure all goats get equal access to food.  

    Is a Goat Feeder Bag Worth It?  

    Overall, the goat feeder bag offers a practical and efficient solution for feeding your goats while minimizing waste. It’s especially beneficial for small to medium-sized herds or for goat owners looking for a portable feeding option. If you’re tired of watching your goats waste expensive hay or struggle with traditional feeders, a goat feeder bag could be a game-changer. With proper care and use, it’s a tool that can simplify your feeding routine and keep your herd healthy and satisfied.  

    Do you use a goat feeder bag on your farm? Share your experiences and tips in the comments below!  

  • Chicken Coop Building 101

    Chicken Coop Building 101

    Whether you’re a new homesteader or a seasoned pro, providing your chickens with a safe and comfortable home is crucial for their health and productivity. A well-designed chicken coop not only keeps your flock secure from predators but also offers them a comfortable environment to lay eggs and thrive. If you’re building or upgrading your chicken coop, there are several essentials to consider, from ventilation and nesting boxes to predator-proofing. Plus, with a little creativity, you can reuse and recycle materials to keep your budget in check.

    If you are new to owning chickens or they are in your forseeable future you should check out this Beginner article! I give you a run down of all the basics to give you a head start.

    Ventilation: A Must-Have for Healthy Chickens

    Good airflow is one of the most important aspects of a chicken coop. Chickens produce moisture, heat, and waste that can quickly make the air stuffy and unhealthy if not properly ventilated. Inadequate ventilation can lead to respiratory problems and poor egg production. 

    Tips for Proper Ventilation

    Windows and Vents: Install adjustable windows or vents at different heights around the coop. Higher vents allow warm air to escape, while lower vents let fresh air in.

    Cross-Ventilation: Make sure air can flow across the coop from one side to the other. This can be achieved by placing vents or windows on opposite walls.

    Natural Ventilation:Position the coop in a shaded area to help keep temperatures down during the summer months.

    If you’re working with a tight budget, consider using old window frames, mesh, or even plastic vent covers from a local salvage yard to create effective ventilation.

    Bedding: Creating a Clean Environment

    Choosing the right bedding for your chicken coop is essential for their health, comfort and cleanliness. Here are some of the best bedding types for your coop.

    Wood Shavings: Pine or cedar both work well. They’re highly absobent, helping to manage moisture and control odors in your coop.

    Straw/Hay: Provides a soft, cushioned bedding thats great for nesting boxes. Its cheap, easily replaced, biodegradable and helps provide extra warmth in the winter.

    Construction Sand: Easy to clean, drains well so it’s great for managing moisture and odors. It also provides a natural surface for chickens to take their dust baths in.

    Compost- AKA The Deep Litter Method: This method involves using straw, hay or other organice materials like leaves that naturally compost over time. Instead of changing out the bedding your just add to it. This promotes a natural decomposition, creating a self-cleaning system that requires less changing but keeps chickens in a warm and dry environment.

    Nesting Boxes: Comfort and Privacy for Egg-Laying

    Nesting boxes are a must-have for any chicken coop. They provide a private, secure space for hens to lay eggs and encourage them to lay in the right spot instead of on the floor. Proper nesting boxes can help prevent egg breakage and keep your eggs clean.

    Nesting Box Tips

    Size: Each box should be around 12 inches by 12 inches, and you can add a few extra boxes to accommodate your flock size. Typically, one box per 3-4 hens is sufficient.

    Height: Place the boxes about 18 inches off the ground, so hens feel safe but can easily access them.

    Bedding: Use straw, hay, or wood shavings for bedding inside the boxes. Not only does this provide comfort, but it also helps absorb moisture.

    For a budget-friendly option, repurpose wooden crates, old cabinets, or even milk cartons to make your nesting boxes. You can often find these items at thrift stores, yard sales, or even for free from neighbors.

    Predator-Proofing: Keeping Your Flock Safe

    One of the biggest threats to your chickens is predators. Raccoons, foxes, weasels, and even neighborhood dogs can cause serious harm to your flock if your coop isn’t secure. A well-built, predator-proof chicken coop will give you peace of mind and keep your chickens safe.

    Predator-Proofing Tips

    Strong Construction: Use sturdy materials for the coop frame, such as treated lumber or recycled pallets. Make sure all doors and windows close securely.

    Wire Mesh: Use 1-inch hardware cloth for windows and doors. Avoid chicken wire, as predators can easily tear through it. If you want to secure the floor of the coop, bury the wire 6 inches into the ground to prevent digging predators.

    Secure Latches: Install heavy-duty locks or latches on doors and nesting boxes to prevent raccoons from opening them.

    Roof Protection: A solid roof, either metal or sturdy plywood, is essential. Ensure it is secure to prevent predators from sneaking in from above.

    If you’re on a budget, you can recycle old fencing, wire, or scrap lumber from construction projects. This is a great way to save money and still keep your flock safe.

    Also please keep in mind that many people choose to free range their flock and that is perfectly fine. Depending on where you live that may be a feasible option for you. I have personally done both and choose to have mine cooped up most of the year. After garden season is over, I like to let them out but I do notice a higher rate of death when I let mine free range. Whether its due to illness or predators.

    Insulation and Comfort: Keeping Your Flock Happy Year-Round

    Chickens need protection from both the cold and heat, so it’s important to think about insulation in your coop. This will help maintain a comfortable temperature for your chickens in every season.

    Comfort Tips

    Winter Insulation: If you live in a cold climate, you’ll need to insulate your coop to keep your chickens warm in the winter. Use recycled foam panels, cardboard, or even old insulation materials to line the walls.

    Summer Cooling: In hot weather, ensure your coop has plenty of shade and airflow. You can make a simple shade structure from recycled tarps or old roofing materials to create a cooler environment.

    Depending on your climate and the breed of chickens you keep, winter insulation may not be necessary. Chickens can tolerate cold temperatures, and it’s best to keep them as natural as possible. I don’t insulate my coop during the winter months but I do use the deep litter method to help maintain a warmer temperature in their coop. I also have chickens who still prefer to roost outside even with snow on the ground. However, if you live in a climate where the temperature drops below zero, insulation for your coop may be needed to keep your flock healthy.

    Herbs: Lavender, Mint, Oregano, Thyme, Rosemary, Dandelion and even Chamomile can be beneficial additions to your chicken coop. I like to just sprinkle some around the coop on top of whatever bedding you prefer to reap the benefits.

    Lavender: Is widely known for it’s calming properties, so yes it can help keep your chickens in a relaxed state. It also repels flies and mosquitos.

    Mint: Also has a strong distinct sent that will deter rodents and insects.

    Oregano: Natural micorbial properties that can help prevent bacterial infections. It can also boost their immune systems! (Can also be added to their feed.)

    Thyme: Also has microbial benefits and can help with respiratory issues. (Can also be added to their feed.)

    Rosemary: Has antifunal and antibacterial propertties and can help reduce the presence of bacteria in your coop. Also helps digestion if comsumed.

    Chamomile and Dandelion can also help support digestion.

    Reuse, Recycle, and Save Money: Building a Budget-Friendly Chicken Coop

    You don’t have to spend a fortune to create a comfortable, functional chicken coop. With a little creativity and a focus on reusing and recycling materials, you can build or upgrade your coop on a budget.

    Budget-Friendly Ideas

    Pallets: Wooden pallets are a fantastic building material. They can be disassembled and repurposed for walls, floors, and even roosting bars. Many businesses give away pallets for free or at a low cost.

    Old Furniture: Repurpose old wooden furniture, such as cabinets or dressers, for nesting boxes, roosting bars, or even coop walls.

    Scrap Metal or Wood: Check with local construction sites or salvage yards for leftover materials. Many contractors are happy to give away scrap materials that are perfect for building or upgrading your coop.

    By repurposing materials, you not only save money but also reduce waste, contributing to a more sustainable lifestyle.

    Final Thoughts

    A chicken coop is more than just a shelter; it’s the heart of your flock’s well-being. By focusing on ventilation, bedding, nesting boxes, predator-proofing, and insulation, you can ensure your chickens live in a safe and comfortable environment. And remember, building a budget-friendly coop doesn’t mean sacrificing quality. With a bit of creativity and a focus on reusing and recycling materials, you can create a chicken coop that works for you and your flock without breaking the bank. Happy homesteading!

    Here is a low budget coop my husband and I put together with repurposed materials if you want to check it out below.

  • Feeding Your Chickens for a Healthy Flock: A Guide to Quality Eggs and Meat

    Feeding Your Chickens for a Healthy Flock: A Guide to Quality Eggs and Meat

    Raising chickens is not just about providing a safe environment and clean shelter; their diet plays a significant role in their overall health, productivity, and the quality of eggs and meat they produce. Whether you’re raising chickens for eggs, meat, or both, understanding what to feed your flock is essential for ensuring they thrive. In this guide, we’ll explore the importance of a balanced diet, provide tips on feeding your chickens for optimal health, and highlight some nutritious herbs that can benefit your flock.

    The Basics of a Balanced Chicken Diet

    A healthy, balanced diet is the foundation of a thriving chicken flock. The right nutrition will ensure that your chickens are healthy, produce high-quality eggs, and grow into strong, healthy meat birds

    Key Components of a Chicken’s Diet

    Layer Feed (For Egg-Laying Hens): The primary food for egg-laying hens is a specially formulated layer feed. This feed is designed to provide the right balance of protein, calcium, and other essential nutrients. A typical layer feed contains around 16-18% protein, which supports healthy growth and egg production. The added calcium in layer feed is vital for strong eggshells.

    Starter Feed (For Chicks): Chicks require a higher protein content to support their rapid growth. Starter feed is formulated with 18-20% protein and includes all the nutrients necessary for healthy development. Once chicks are a few weeks old, you can switch to a grower feed.

    Grower Feed (For Meat Birds): If you’re raising chickens for meat, grower feed is the best choice. This feed is typically lower in calcium but provides higher levels of protein (around 18-20%) to support muscle development. It’s formulated to ensure healthy growth and optimal meat production.

    Grain and Scratch: Grains such as corn, wheat, oats, and barley can be offered to chickens in moderation. While they are not complete feeds, they provide energy and variety. Scratch is usually offered as a treat but should be limited to prevent imbalanced nutrition.

    Greens and Vegetables: Fresh greens, such as lettuce, kale, spinach, and herbs, are excellent additions to your chickens’ diet. These provide vitamins, minerals, and fiber. Chickens love pecking at fresh vegetables, and offering a variety can help keep them engaged.

    Clean Water: Water is just as important as food in a chicken’s diet. Ensure your flock has constant access to clean, fresh water, as dehydration can lead to poor health, reduced egg production, and weight loss.

    Incorporating Healthy Herbs Into Your Chicken’s Diet

    Herbs can not only spice up your chickens’ diet but also provide numerous health benefits. Many herbs are rich in vitamins, minerals, and antioxidants, supporting your chickens’ immune systems and overall well-being. Here are a few herbs to consider:


    Parsley: High in vitamin K, vitamin C, and folic acid, parsley is excellent for supporting bone health and overall immune function. It can also help with digestion.

    Oregano: Known for its antibacterial properties, oregano is a great herb for supporting respiratory health. It can help fight off infections and boost the immune system.

    Thyme: Thyme is another herb with powerful antimicrobial and antioxidant properties. It can promote respiratory health and aid in digestion.

    Mint: Fresh mint is known for its digestive benefits, helping with bloating and upset stomachs. It also has a refreshing scent that can help deter pests in the coop.

    Dandelion: Dandelion is full of vitamins A, C, and K and has anti-inflammatory properties. It can aid digestion and promote overall vitality.

    Basil: Basil contains essential oils that have anti-inflammatory and antioxidant properties. It’s great for promoting healthy digestion and boosting the immune system.

    Garlic: While not technically an herb, garlic is a natural antibiotic and can help fight off infections. It also helps boost immunity and can deter internal parasites. However, garlic should be used in moderation.

    How to Feed Herbs to Your Chickens

    You can offer fresh or dried herbs to your chickens. Simply hang bundles of herbs in the coop or scatter them in their outdoor run. Chickens will naturally peck at the herbs, gaining the benefits as they eat. You can also mix chopped herbs into their regular feed or sprinkle them on top of greens or vegetables.

    Providing Treats and Supplementing Their Diet

    While a balanced base feed should make up the majority of your chickens’ diet, occasional treats can offer enrichment and variety. However, treats should never exceed more than 10% of their total diet to avoid nutritional imbalances.

    Healthy Chicken Treats

    Fruits and Berries: Chickens enjoy fruits like berries, apples, and bananas. These are rich in vitamins and antioxidants. However, make sure to remove any seeds or pits, as they may be harmful.

    Vegetables: Chickens love leafy greens, carrots, cucumbers, and squash. These vegetables provide fiber and essential nutrients.

    Mealworms and Grubs: These high-protein treats are ideal for chickens that need extra protein, especially during molting season.

    Sunflower Seeds: A healthy snack that is high in fats and protein, sunflower seeds can be offered in moderation.

    Supplements

    To ensure your chickens are getting all the nutrients they need, you may need to supplement their diet occasionally

     Calcium Supplements: For laying hens, you can provide crushed oyster shell or limestone to ensure they get the necessary calcium for strong eggshells.

    Grit: Chickens need grit to help them digest food properly. Grit aids in grinding down food in their gizzards, especially if they eat grains and seeds. You can offer commercial grit or even small stones from your yard.

    Signs of an Imbalanced Diet

    While chickens generally have hearty appetites, you should be aware of the signs of an unbalanced diet, which can affect their health and productivity.

    Decreased Egg Production: If your hens suddenly stop laying or produce soft-shelled eggs, it may indicate a lack of calcium or an imbalance in their diet.

    Pale Comb and Wattles: If a chicken’s comb or wattles appear pale, it could signal nutritional deficiencies, anemia, or illness.

    Lethargy or Weight Loss: If chickens become weak, lethargic, or lose weight despite eating regularly, they may be lacking essential nutrients.

    Feather Loss or Poor Plumage: Feather loss, or the development of dull, brittle feathers, can indicate inadequate protein or vitamins.

    Conclusion: The Key to Healthy Chickens and Quality Eggs and Meat

    Feeding your chickens the right diet is crucial for their health, egg production, and meat quality. By providing a balanced diet that includes layer or grower feed, plenty of fresh water, and healthy herbs, you can ensure that your flock thrives. Including a variety of fruits, vegetables, and occasional treats can also support their overall well-being and keep them happy and engaged. Keep an eye on your chickens’ condition, and always look for signs of dietary imbalance. A well-fed flock will reward you with vibrant health, high-quality eggs, and delicious meat.

    Happy chicken keeping!

  • Duck Eggs vs Chicken Eggs: Key Differences Explained

    Duck Eggs vs Chicken Eggs: Key Differences Explained

    Duck egg and Chicken egg side by side

    When it comes to choosing between duck and chicken eggs, both options might catch your eye during your next trip to the local market or while tending to your poultry on the homestead. These eggs may appear quite similar at first glance, but they offer distinct nutritional benefits, flavors, and culinary uses that set them apart. Duck eggs, for instance, are often richer and creamier than chicken eggs, making them a favorite among bakers and gourmet cooks alike. As you weigh the pros and cons of each type, it’s important to consider how these differences might align with your cooking needs and taste preferences. Understanding the unique qualities of duck eggs can help you make the best choice for your kitchen and lifestyle.

    Nutritional Content

    Higher Protein Content: Duck eggs contain more protein than chicken eggs, making them an excellent choice for those looking to increase their protein intake.  

    More Omega-3s: Duck eggs are rich in omega-3 fatty acids, which support brain health and reduce inflammation.  

    Higher Vitamin and Mineral Levels: Duck eggs have more vitamins (A, D, B12) and minerals like iron and selenium compared to chicken eggs.  

    Calories and Fat: Duck eggs are larger and have a higher fat content, which provides more energy but might not be suitable for those on low-fat diets.  

    Flavor and Taste

    Duck eggs have a richer, creamier flavor compared to chicken eggs.  

    – The yolks are larger and have a more vibrant orange color, often described as “buttery.”  

    – Many bakers prefer duck eggs for their richer taste and ability to enhance baked goods’ texture and flavor. 

    Baking Benefits

    Duck eggs are a favorite among bakers and chefs.  

    Better Structure: The higher protein content helps create fluffier cakes, stronger meringues, and denser, more moist baked goods.  

    Richer Texture: Duck eggs contribute to a creamier texture in custards, quiches, and other recipes. 

    A dozen duck eggs

    Longer Shelf Life

    Duck eggs have thicker shells than chicken eggs, which:  

    – Makes them more durable and less likely to crack.  

    – Helps them stay fresher for longer, especially when stored properly

    Allergen Alternative

    Some people with chicken egg allergies find that they can tolerate duck eggs. While they’re not suitable for everyone, this can be a great alternative for those who miss eating eggs.

    More Sustainable for Small Homesteads

    Ducks are hardy, low-maintenance animals that:  

    – Lay eggs consistently, even in colder weather.  

    – Thrive in a variety of environments, including wetlands or small homesteads.  

    – Are great pest controllers, eating slugs, snails, and insects.  

    Their eggs can provide a reliable source of nutrition year-round.  

    Richer in Healthy Fats

    Duck eggs contain more healthy fats, including monounsaturated and polyunsaturated fats. These fats are important for heart health and maintaining healthy skin and hair. 

    Larger Size

    Duck eggs are larger than chicken eggs, which means:  

    – You get more egg per shell.  

    – Fewer eggs are needed for recipes or meals, making them more efficient in the kitchen.  

    Downsides to Consider

    While duck eggs offer many benefits, they may not be for everyone:  

    Cost: Duck eggs tend to be more expensive than chicken eggs due to lower supply.  

    Taste: The richer flavor might not appeal to everyone, especially if you prefer the lighter taste of chicken eggs.  

    Fat and Cholesterol: The higher fat and cholesterol levels may not suit individuals with specific dietary restrictions.

    Smell: The aroma of duck eggs can resemble that of cooked fish, depending on the cooking method. This scent is attributed to their rich omega-3 fatty acid content, which is similar to that found in fish.

    Which Should You Choose?

    Choosing between duck eggs and chicken eggs is a matter of personal taste, nutritional needs, and usage. For those in search of superior flavor, richer nutrition, or exceptional baking outcomes, duck eggs are an excellent option. Conversely, if a gentler flavor profile or specific dietary considerations are your priorities, chicken eggs remain a wonderful selection. For homesteaders, the decision to raise both ducks and chickens can yield a multifaceted experience—offering delicious eggs, natural pest control, and an array of dietary choices!


    Both duck and chicken eggs present an abundance of nutritional benefits and culinary versatility. Including a mix of these eggs in your dishes can bring an exciting variety of flavors and textures into your kitchen and home. Embracing the distinct characteristics of each type enriches your meals and broadens your cooking skills, enhancing the joy and diversity at your dining table. Whether you savor the robust taste of duck eggs or the subtler flavor of chicken eggs, having both available unlocks endless culinary adventures. Personally, I find duck eggs to be delightful! Have you had a chance to try duck eggs? I’d love to hear your thoughts in the comments!